Quantcast
Channel: Gear Archives - CYCLINGABOUT.com
Viewing all 154 articles
Browse latest View live

9 Reasons Why We Should Drop The Drop Bars On Touring Bikes

$
0
0

For those who follow my bike trips around the world, you’ll know that over the last couple of years I’ve made the switch away from drop bars. This all started because I wanted to test some of the new handlebar shapes on the market and let you know whether they’re awesome or not. It turns out they really are…

Let’s discuss!

9 Reasons To Drop The Drop Bars

Descending is a pleasure with a wide handlebar and good access to your brake levers.

1. Better Bike Handling
The handlebar grips are two-out-of-five attachment points between your body and the bike, and arguably, they’re also the two most important. It’s these points which largely determine how well you can balance and manoeuvre your bike. Working against your bike manoeuvrability and balance is any style of front luggage (panniers, bikepacking bags, handlebar bag, cargo cages) which increases the amount of ‘steering effort’ required to change your bike’s direction.

The best possible way to combat heavier steering is by fitting a wider handlebar to your bike. Wide bars increase the steering leverage up front, which allows you to maintain a light steering feel, even with a front load. As a result, you can expect better bike control at high speeds (thanks to the quicker steering inputs) and low speeds (thanks to the micro adjustments you can make to help with your balance). This is most noticeable when you’re climbing slowly up a hill, or when you need to quickly avoid something on the road while travelling at speed. By dropping the narrow drop bars, not only will you have more control over your bike, but you’ll also find you can ride even more confidently on any road or trail.

2. The Brake Levers Are Just Better
Firstly, it’s easier to replace and maintain your cables because you can do so without having to remove any bar tape. This is a godsend if you’re maintaining cable-operated brakes, as you can pop out your stainless steel inner cables in seconds and give them a good lube. Secondly, the ergonomics of a flat bar allow you to wrap your thumb and three fingers around your grip for a better hold (it’s often a thumb and two fingers on a drop bar). Try braking into a rough corner with a flat bar and drop bar and you’ll immediately notice which brake levers you have the most control over…

3. It’s Often Cheaper
By and large, MTB-style shifters are way cheaper to manufacturer than a set of road shifters. A set of Shimano Ultegra road shifters work out at 3x the cost of the equivalent quality MTB shifters (I know, you get brake levers too – but still). All handlebar styles can be both cheap and expensive, but consider that two of the most popular alt bars are just $60 (Crazy Bars) and $79 (Jones Loop).

Want to compare handlebars? You want WhatBars.com. Click to create visual overlays of the most popular alt handlebar shapes.

4. There Are Dozens of Alternative Handlebar Shapes For Touring
Don’t like a typical flat/riser handlebar because of the lack of hand positions? Not to worry. There are literally dozens of new bar styles that offer a unique geometry to change it up. You can view most of your options at WhatBars.com.

5. More Bikepacking Handlebar Pack Options
Handlebar packs are often interrupted by drop bar levers unless you succumb to quite a low volume bag. The Ortlieb Handlebar Pack S fits nicely between a set of drop bar levers, but its volume works out at 9L compared to the 15L you can accommodate on a flatbar. In addition, you have the option to run unique handlebar packs like the Revelate Sweetroll which mount to a Jones Loop bar at four locations, rather than the standard two, for a more secure fit.

6. Bar Tape Kinda Sucks
Granted a good-quality wrap can last years provided it has the right amount of stretch and grip, bar tape is still quite susceptible to tearing, moving or unwrapping itself. On a long bike trip, this just means more bike maintenance. You don’t want more bike maintenance.

custom touring bike

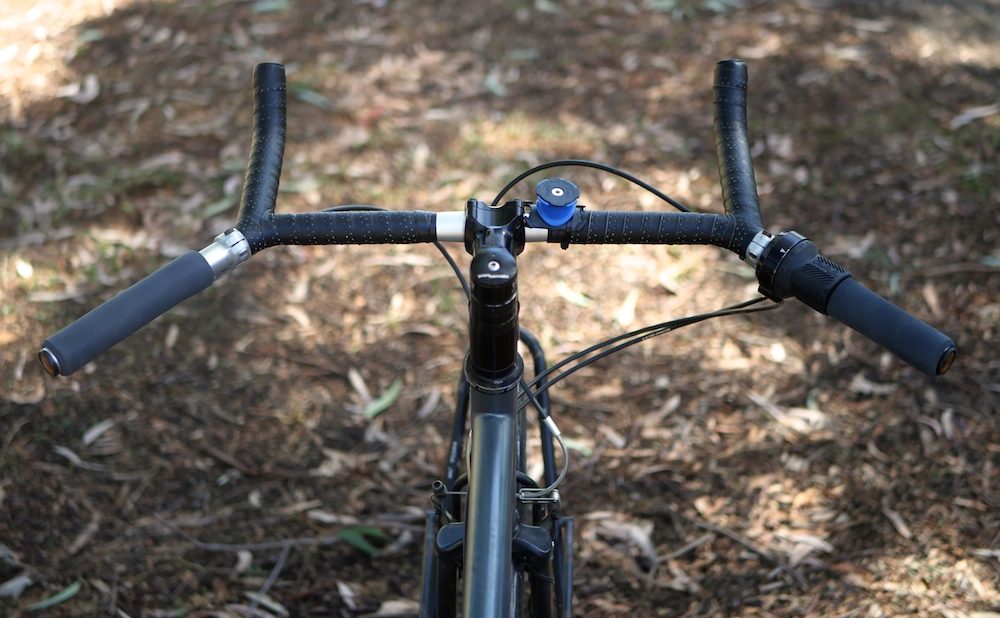
The Velo Orange Crazy Bar is a great alternative to a drop bar. You’ll be able to keep your aerodynamic position by using the bullhorn section, you’ll get extra steering leverage and there’s even a location for a handlebar bag mount!

7. Ergonomic Grips Rock
Never used Ergon grips? What about ESI chunky silicone grips? No? Well, you’re missing out. The unique shape of these grips offers a more comfortable hand fit than any bar tape I’ve ever come across.

8. MTB Shifters And Derailleurs Work Flawlessly Together (Obvs 🙄)
I’ve written countless resources about how to mate road shifters with MTB derailleurs (they’re mostly incompatible). The aim of this pursuit is to get low climbing gears on a bike with road shifters. But you know what? If you skip on the drop bars, this becomes a non-issue as component manufacturers have designed MTB shifters to work flawlessly with… err, MTB derailleurs and wide range cassettes.

9. Rohloff/Pinion Shifter Compatibility
There are heaps of workarounds for getting a Rohloff/Pinion twist shifter onto a drop bar. But what if you could just use the stock twist shifter on a flat handlebar like it was intended? 👌🏻

DW… There Are Reasons To Keep Ya Drop Bars Too

1. To Reduce Your Frontal Area
There’s an aero advantage to fitting drop bars to your bike. In the hoods or drops you can tuck your elbows in and reduce your body’s frontal area. Given you don’t move that fast on a touring bike, this feature is most useful for whenever you’re riding into headwinds. That said, an alt bar like the Crazy Bar actually provides the best of both worlds – a narrow bullhorn section and a wide, sweptback grip location.

2. They Look Rad
I’ll admit it. Drop bars are cooler. There’s something about those classic lines…

3. Dude, Ultra-Wide Drops Exist!
Is the ultimate solution for you a set of wide drop bars? You’re in luck. The Crust Towel Rack bars are ~700mm wide at the ends which is the equivalent of most flat bars. The Salsa Woodchipper and Soma Gator are also pretty wide; but note that when your fingers are on the brake levers, the equivalent width works out closer to 600mm.

4. When You Don’t Have Any Weight Up Front
If you don’t have more than 2-3 kilos up front, you’ll find a standard drop bar offers more than enough leverage to steer confidently.

The Salsa Woodchipper handlebars will give you some extra steering leverage thanks to their relatively wide width.

Summary

My experience with alt handlebars has, errr… altered my perception of touring handlebars entirely.

I used to prefer drops on touring bikes because:
– I wasn’t a huge fan of butterfly bars (they lacked the width I desired)
– I wasn’t a huge fan of flat bars (they offered fewer hand positions than my drop bars)

The latest generation of handlebar designs has given me lots of width, lots of hand positions and a nice aero location so I can tuck in my elbows for headwinds. I’ve found my Crazy Bars work better at both high and low speed, better on dirt roads and better on the steep climbs. I honestly can’t find any downsides for the majority of the bike travel I do.

I’m not planning on going back to drops unless my bike is set up to be light, fast and intended for smoother surfaces. Think ultralight carbon touring bike with bikepacking bag ensemble. Otherwise, wide alt bars all the way! Yewww! 🤘🏼

The post 9 Reasons Why We Should Drop The Drop Bars On Touring Bikes appeared first on CyclingAbout.com.


Bikepacking Tires: Which Brands And Models Are The Most Durable?

$
0
0

Mountain bike tires are often optimised for grip by employing soft rubber compounds in their construction. This is great for trails, but not necessarily your highest priority if you’re on an epic bike journey. Luckily for the adventurers out there, there are a handful of bikepacking tires that are optimised for durability, intentionally or not – which I’ll be covering in this resource.

I asked the highest-mileage riders I know (ultra racers and round-the-world adventurers) which bikepacking tyres they reliably use for months at a time. The same few tires were recommended over and over, suggesting that there is somewhat of a consensus here. The tires I will be recommending have been known to last upwards of 8000km/5000mi, and as much as 25000km/15000mi.

Maxxis undoubtedly has the best reputation for making the most-durable, high mileage tires, in particular, their models with the EXO casing. The tires by Continental that feature their ‘ProTection’ label are also exceptional. Schwalbe off-road tires commonly prioritise grip rather than durability, but a few of their touring models work out well for dirt roads. Vittoria makes a few super fast-rolling models that folks are getting great mileage out of, and they come in the new 29 x 2.60″ size too.

But first, let’s start with some general tire info.

bikepacking tires

Sarah Hammond is the 3x Race to the Rock winner and has NEVER had a puncture on her Maxxis Ikon tires mounted to Curve carbon rims. Not even when out training for her ultra races!

Rolling Resistance And Bikepacking Tires

If speed is your aim, stop thinking about how to shave a kilogram off your kit and start looking at fast tires. Rolling resistance plays a big role in your cycling speed because no matter what speed you ride, it’s a consistent force that you need to overcome (unlike air resistance which increases with speed). The speed difference between slow and fast rolling tires is very significant – a slow rolling set of tires will tax you 90 watts, while a fast set will take as little 46 watts. If you’re putting 150 watts into the pedals, 40-something watts is a large percentage of your effort to have disappearing into your tire contact patch.

There is a ‘but’, however.

This assumes a relatively smooth riding surface. The rougher a trail gets, the wider your tires need to be to optimise your speed. Tires in a 3.00″ width can absolutely be the fastest rolling tire option under the right conditions. I think it makes the most sense to optimise rolling resistance for the surfaces that you will be riding most.

I have provided the rolling resistance data where I can (thanks to BicycleRollingResistance.com), but I’ve also estimated the resistance for other tires too. This information isn’t 100% accurate, but I have factored in many data points (width, casing, similar tires etc) to arrive at these approximate numbers.

Head HERE for an in-depth look at the rolling resistance lab testing for touring tires.

This tire size comparison chart by Jamis Bikes is the best I’ve seen.

Bikepacking Tire Sizes And Widths

29 Inch
The fastest option is a 29-inch mountain bike wheelset for most off-road terrain. With a broad range of widths (2.00 to 2.60″), you should be able to find a tire that’s both quick on dirt roads and also very capable the trails. Narrower tires tend to have the advantage on smoother surfaces while wider tires will offer additional grip and comfort (nice on a rigid bike).

29+
For rough trails, this is the option that will roll over objects with the smallest ‘angle of attack’. 29+ works out to be fastest over rocks, and with the increased tire footprint and volume, you’ll find them to be supremely grippy too.

27.5 Inch
Not too many MTB bikepacking bikes are built around this wheel size, however, a growing number of drop bar gravel bikes can accommodate tires in the 27.5 x 2.00-2.40″ range. Bikes that fit these tires can often also be interchangeably used with 700 x 35-45C wheelsets too. The All City Gorilla Monsoon or Bombtrack Hook EXT-C are two bikes that come to mind.

27.5+
This is the most popular plus-sized option as the wheel+tire diameter works out to be the equivalent of a 29″ wheel. As a result, you can have one bike that will fit two different wheelsets, allowing you to perfectly optimise your tires for your intended terrain.

26 Inch
A decade ago, the standard size for bike travel was 26 inch. There are still a few 26″ touring bikes getting about, but they’re becoming less common by the year (the 2019 Touring Bicycle Buyer’s Guide has very few). But 26 ain’t dead – 26″ is still the most common rim diameter for fat bikes and can still be found on many XS and small bikepacking bikes.

The bike pictured is Jesse Carlsson’s Curve GMX. Most ultra racers prefer the 29 x 2.20″ size because it’s fast but capable.

Factors Affecting Durability

There are a few factors affecting tire durability which need to be considered because, well, results will vary.

Rockiness of the Terrain
If you’re spending more time riding on rocks, you’re simply not going to get the same mileage as on a smooth dirt road. Based on anecdotal evidence, rocky terrain can increase tyre wear by as much as 75% (eg. 2000km instead of 8000km wear life).

Rider+Gear Weight
One reason why ultra racers often get such good mileage out of their tires is that they pack light. The heavier the load on the tire, the faster the tire wears. This isn’t the best news for heavier riders, sorry!

Riding Style
You will experience less tire wear by simply taking it easy on rough and rocky descents. Make sure to avoid locking up your rear tire whenever you can.

Air Pressure
I’ve found that by running a higher pressure than ideal (make sure not to exceed the maximum) allows for better mileage as the tire will deform less. Please note that both your speed and grip will be reduced by employing this strategy.

Tire Switching
An age-old way to get more life out of your tires is to switch the front to the rear at about 50% wear. As the rear wears faster than the front, this avoids having one very worn tire and another with thousands of kilometres of life left.

Tire Fit

Ideally, all tires would fit all rims with the same amount of ease. But this isn’t always the case; in the worst case scenarios, a tire can literally be an impossible fit. Equally, you don’t want a tire to be too loose, as this results in the tire bead being able to pop off the rim while riding.

Make sure you can get your tire off the rim with the tire levers you bring on your adventures. This is particularly important if you’re racing, as your hands will often be fatigued. You can pre-stretch your tires on another rim if they seem to be too tight, or alternatively, you can fit and remove your tires a few times to stretch a couple of extra millimetres out.

As for tubes or tubeless, the answer is undoubtedly… TUBELESS! Yes, it’s worth the hassle. A little extra sealant than recommended is worth its weight in gold too – you never know how many thorns you’ll meet on a long outing.

Bad Tire Batches

The recommended tires below don’t all have a perfect manufacturing track record, but they are pretty damn good – I think you can be confident with them. That said, it’s worth putting some mileage on a tire before taking it into the wilderness. Sometimes you’ll find the rubber layers can deform, or the bead can separate from the sidewall.

The good news is that these problems normally show themselves very early on, and any bad batch tires will be replaced under the manufacturer warranty.

Eurobike 2018

The Otso Voyek is a 27.5+ or 29+ trail bike that can also accommodate up to 26 x 4.6” tires!

DURABLE 29″ BIKEPACKING TIRES

*If you want to buy any of these tires, doing it via the Amazon links give CyclingAbout a small commission which goes into creating more great resources for the bike travel community.


Continental RaceKing Protection

The RaceKing ProTection is one of the most well-known bikepacking tire options. Sets of these have been known to conquer the Tour Divide bikepacking race not once, but twice (8800km+). Amazingly, some dirt tourers have even exceeded 12,000km with zero punctures (although a couple of plugs were required). You’re also looking at the fastest rolling tire on the list.


Maxxis Ikon 3C/EXO/TR MaxxSpeed

  • 2.00, 2.20, 2.35 inches
  • 605, 640, 740 grams
  • 31.5 watts
  • Buy for $58

The Maxxis Ikon is currently a very popular option for bikepacking racing. These are known to be super-durable and easy to fit. The rolling resistance numbers may be a little bit disappointing, but given how many love the way these tires hook up on trails, they’re still a winner.


bikepacking tires

Vittoria Mezcal TNT G+

  • 2.10, 2.25, 2.35, 2.60 inches
  • 680, 725, 745, 870 grams
  • 24.6 watts
  • Buy for $57

Another super popular bikepacking tire for events like the Tour Divide is the Vittoria Mezcal. These super fast-rolling tires use a graphene compound which seems to allow them to roll particularly quick, but at the same time, last the distance. These are also one of the only durable tire options in the new 29 x 2.60″ width.


Schwalbe Marathon Mondial DD V-Guard

While more of a touring tire, the wear-life of the Mondial is simply out-of-this-world – I clocked 25,000km on a set between Europe and Australia. There are two main downsides to the tire though. The grip is very poor on trails, and the tire is only available in a 2.00″ width. Still a great option for dirt road riding, and one of the only models that are decent with tubes.


Schwalbe Marathon Plus MTB

  • 2.10, 2.25 inches
  • 1275, 1350 grams
  • ~35 watts
  • Buy for $57

These boat anchors are the most puncture resistant bikepacking tires money can buy thanks to their thick protective layer. A continuous tread along the centre of the tire allows them to roll relatively quick on harder surfaces. I’d be confident in suggesting you can travel 10,000km+ on a set of these with zero punctures (even with tubes).

DURABLE 29+ BIKEPACKING TIRES


bikepacking tires

Maxxis Chronicle EXO TR

The 29+ bikepacking tire of choice for most long-haul travellers is the Chronicle. It’s built super sturdy with Maxxis’ EXO protection and rolls ok thanks to its low profile knobs. It’s not the lightest, but who cares when you can beat them up for 10,000km.


Maxxis Ikon Plus 3C/EXO/TR MaxxSpeed

  • 3.00 inches
  • 770 grams
  • ~35-40 watts

A touch narrower and a decent amount lighter than the Chronicle, the Ikon has recently been produced in a larger volume. While I don’t know anyone who has put high mileage on them, they’re expected to perform very well considering the outstanding track record of the regular width Ikons.


Surly Knard

  • 3.00 inches
  • 1240 grams
  • ~35-40 watts

The Knard was introduced along with the Surly ECR in 2014, making it the oldest 29+ tire (I think). Quite a few ECR owners have managed to clock over 8000km with these tires, making them a great option for long-distance bikepacking trips. The wire bead version is known to be the most durable.

DURABLE 27.5″ BIKEPACKING TIRES


Maxxis Ikon 3C/EXO/TR MaxxSpeed

  • 2.20, 2.35 inches
  • 600, 705 grams
  • ~31.5 watts
  • Buy for $58

The Maxxis Ikon is currently a very popular option for bikepacking racing. These are known to be super-durable and easy to fit. The rolling resistance numbers may be a little bit disappointing, but given how many love the way these tires hook up on trails, they’re still a winner.


Schwalbe Marathon Mondial DD V-Guard

  • 2.00 inches
  • 780 grams
  • ~25-30 watts

While more of a touring tire, the wear-life of the Mondial is simply out-of-this-world – I clocked 25,000km on a set between Europe and Australia. There are two main downsides to the tire though. The grip is very poor on trails, and the tire is only available in a 2.00″ width. Still a great option for dirt road riding, and one of the only models that are decent with tubes.


Schwalbe Marathon Plus MTB

These boat anchors are the most puncture resistant bikepacking tires money can buy thanks to their thick protective layer. A continuous tread along the centre of the tire allows them to roll relatively quick on harder surfaces. I’d be confident in suggesting you can travel 10,000km+ on a set of these with zero punctures (even with tubes).


bikepacking tires

Schwalbe Super Moto X

This wide slick was originally designed for eBike use but they’ve also been used on many 10,000km+ trips now. You’ll find this fast-rolling rubber to be very puncture resistant thanks to the DD and GreenGuard protection layers. Unfortunately, the wire bead makes them a little heavier than most tire options, but the low rolling resistance more than makes up for it.


bikepacking tires

Vittoria Mezcal TNT G+

  • 2.10, 2.25, 2.35, 2.60 inches
  • 660, 670, 680, 830 grams
  • ~25 watts
  • Buy for $67

Another super popular bikepacking tire for events like the Tour Divide is the Vittoria Mezcal. These super fast-rolling tires use a graphene compound which seems to allow them to roll particularly quick, but at the same time, last the distance. These are also one of the only durable tire options in the new 2.60″ width.

DURABLE 27.5+ BIKEPACKING TIRES


bikepacking tires

Maxxis Chronicle EXO TR

The 27+ bikepacking tire of choice for most long-haul travellers is the Chronicle. It’s built super sturdy with Maxxis’ EXO protection and rolls ok thanks to its low profile knobs. It’s not the lightest, but who cares when you can beat them up for 10,000km.


Maxxis Ikon Plus 3C/EXO/TR MaxxSpeed

A touch narrower and a decent amount lighter than the Chronicle, the Ikon has recently been produced in a larger volume. While I don’t know anyone who has put high mileage on them, they’re expected to perform very well considering the outstanding track record of the regular width Ikons.


bikepacking tires

Schwalbe Super Moto X

This wide slick was originally designed for eBike use but they’ve also been used on many 10,000km+ trips now. You’ll find this fast-rolling rubber to be very puncture resistant thanks to the DD and GreenGuard protection layers. Unfortunately, the wire bead makes them a little heavier than most tire options, but the low rolling resistance more than makes up for it.

DURABLE 26″ FAT BIKE TIRES


bikepacking tires

Maxxis Minion FBF (or FBR) EXO/TR

  • 4.00, 4.80 inches
  • 1295/1365, 1645/1620 grams
  • ~55-60 watts
  • Buy for $110

The Maxxis Minion fat bike tires have the best reputation for durability. There are front (FBF) and rear (FBR) specific models to fit up, but these tires are certainly not quick rolling (not that you buy fat bike tyres for speed). If you’re doing lots of dirt roads, a Schwalbe Jumbo Jim tire is around 20 watts faster though… per tire!

Can You Recommend Any Other Long-Wearing Bikepacking Tires (8000km/5000mi+)?

The post Bikepacking Tires: Which Brands And Models Are The Most Durable? appeared first on CyclingAbout.com.

My 14 Favourite Touring and Bikepacking Gear Innovations For 2018

$
0
0

It’s a great time to be a bike tourer or bikepacker because travelling on a bike has never been more popular. With this wave of popularity comes more brands, more products, more competition and more money for designing cool things. I’m lucky enough to get all the new products shoved in my face, so I thought I’d round up my favourite bikepacking gear innovations from this year. Let’s go!

This list is in alphabetical order.

The Best Gear Innovations For 2018

1. Apidura Magnetic Top Tube Pack
This new top tube pack uses magnets to hold it in place. Not only does it look super neat, but you can keep your phone/wallet inside and remove it all while you run into a shop. How cool is that?!

2. Apidura Racing Handlebar Pack
The Apidura Racing Handlebar Pack caught my eye for two reasons. Firstly, it mounts directly to aero bars, keeping the bag stable and reducing the strain on your cables. It also has integrated feed bags on either end to quickly stow more bidons or snacks.

3. Jones SG 2.5 Loop Bar
This is a really elegant solution to achieving a bit more height out of your front end. Plus you get all the benefits of a wide touring bar with heaps of space for accessories!

4. kLite Bikepacker ULTRA Dynamo Light
Bikepackers are loving this new dynamo light by kLite. Compared to other lights, it has an exceptionally wide beam, more brightness (1350 lumens!), reduced flicker at lower speeds and a longer stand-light. It’s available in two beam patterns for on-road or off-road riding.

best dynamo hubs best dynamo hub

5. KT Dynamo Hub
KT is a new dynamo hub brand offering a model with interchangeable end caps that allow you to fit QR, 12mm or 15mm axles. The hub internals are KTs own design, but it shares the same hub shell with SP Dynamo. Given it has just been released, it’s not proven yet, but it’s looking very promising.

stabilized bikepacking

6. PDW Bundle Roll
In the last 12 months, we’ve seen dozens of stabilized bikepacking bags hit the market. The Bundle Roll is just one example, using a handlebar mount to keep everything still. This design will keep the drybag stable, will prevent paint rub, will give your cables room to breath and will make sure the drybag can’t rub on your front tyre.

7. Problem Solvers Bow Tie Strap Anchors
This is a really neat solution for mounting bottles of all sizes. These Bow Tie Anchors bolt on to your existing bidon mounts and provide the loopholes you need for some Voile straps to secure a water bottle, fuel bottle or drybag!

Eurobike 2018

8. Restrap Accessory Bag
The Restrap handlebar harness now has this neat quick release accessory bag – simply slide it up and across to remove it. Like the Apidura Magnetic Top Tube Bag, this is another great place to stash your valuables.

9. Sawyer Micro Squeeze Water Filter
I’ve been using Sawyer Squeeze filters for almost as long as I’ve been travelling around the world. They’re super cheap and pretty much bombproof. Sawyer released a ‘Micro’ model this year which makes packing a filter even easier than before. The filter spec is 0.1 microns and it’s rated for 100,000 gallons!

10. SRAM NX Eagle Drivetrain
The SRAM NX drivetrain has made bikepacking bikes better thanks to its wide gear range and low cost. While stock bikes previously had 11-42t cassettes, the Eagle climbing gear is now boosted up to 50-tooth. This gives you more range, but more importantly, you can achieve an 18-inch climbing gear on a plus-bike without any trouble.

The Best Travel Bikes For 2018

All City Gorilla Monsoon

11. All City Gorilla Monsoon
I really like what All City have done with the Gorilla Monsoon. This is a bike that can accommodate 27.5 x 2.4″ rubber, or alternatively 650B x 47C slicks with full fenders. The size range is great and it’s available as a frameset too. It has a super cool twin-plate fork crown and mounts for Surly-8 and 24-Pack rando-ish racks. The 1x drivetrain may be fine for some, but for lower gears, you could change the front chainring, or alternatively, fit a front derailleur. The wider-than-usual 73mm threaded bottom bracket shell makes fitting MTB front derailleurs and MTB cranksets (eg. 48/36/26t or 42/28t) very easy.

2019 Cannondale Topstone

12. Cannondale Topstone Sora
When you factor in price, the 2019 Cannondale Topstone undoubtedly comes out on top in the light touring category. The aluminium frame features a threaded bottom bracket shell (big tick), rear rack mounts, internal cable routing in the downtube, routing for a dropper seatpost, 3x bidon cage mounts, a cargo cage mount and top tube bag mount. The frame is able to accommodate 700 x 42C and probably 650B x 47C too. The fork is FULL carbon (unheard of at this price) and thanks to the sub-compact crankset and wide range cassette, the climbing gear ratio is 24 gear inches. Achieving even lower gears is a very easy mod – simply swap the rear derailleur and cassette. Oh, did I mention a Topstone Sora is just a thousand bucks??

13. Salsa Warbird v4
The 2019 Salsa Warbird has once again paved the way for other carbon bikepacking bikes. It’s lighter and smaller than previously (good for 142cm/4ft8 riders). It fits 700c x 45c or 27.5″ x 2.1″ tyres. There’s provision for 2-3 bidon cages in the front triangle, one under the downtube and one on either side of the fork. There’s a top tube bag mount for those who like the idea of reducing strap wear. And it fits front/rear racks! The weight of the bike is between 8.4-10kg and the prices start from US $2399.

2018 Surly Bridge Club

14. Surly Bridge Club
The Surly Bridge Club is my favourite flat bar tourer for 2018. It’s US $1200, it has a 17 gear inch climbing gear and it can fit 27.5 x 2.8″, 26 x 3.0″ or 700 x 47C tyres. It has also got all the braze-ons you need for touring, including mounts for the Surly-8 and 24-Pack rando-ish racks. Fit some fat slicks (Schwalbe Super Moto X) and fenders and you can take this bike on a long road tour too.

What Have Been Your Favourite Bike Travel Innovations For 2018?

The post My 14 Favourite Touring and Bikepacking Gear Innovations For 2018 appeared first on CyclingAbout.com.

Bikepacking Aerobars: Increase Your Comfort And Speed On Your Bike Adventures

$
0
0

While still quite unconventional, aerobars are gaining in popularity for bike trips thanks to the rise of ultra racing events like the Tour Divide. But what you may not realise is that for these events, and many other bike trips – bikepacking aerobars aren’t really about speed. Most aerobar users will agree the biggest advantage is actually the extra comfort they offer.

Let’s get aero!

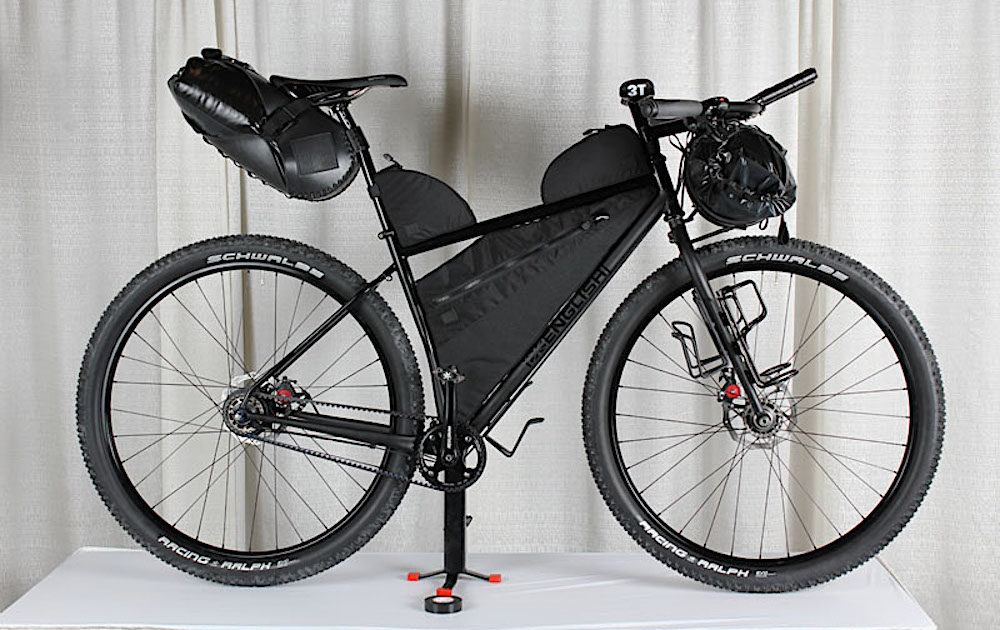
Rob English makes custom bikepacking aerobars for his customers, this one is built around a Jones Loop bar.

Why Bikepacking Aerobars Are Awesome

Enjoy A Different Riding Position
Aerobars offer an entirely new riding position that’s most beneficial on long days where your body sits statically. With your elbows and humerus (arm bone) supporting the majority of your upper body weight, you’ll reduce strain on your arms, wrists and hands. In addition, aerobars will allow you to stretch out and use different back muscles.

Reduce Your Frontal Area
One of the biggest forces working against you is wind resistance. Aerobars will help to reduce your frontal area, resulting in higher riding speeds for the same amount of effort. This is particularly nice if you’re riding into headwinds but will also appeal to those attempting to cover longer daily distances.

More Mounting Options
If you’ve ever used then removed a set of aerobars after an event, you’ll know how much you miss that extra bar real estate. For bikepacking setups, aerobars are a great place to mount bike computers, lights, phones and feed bags. Check out the Profile Design UCM ($11 on Amazon) to create more horizontal space.

Lewis Ciddor making the most of his bikepacking aerobars in New Mexico to take the 2018 Tour Divide win. Image: Tom Briggs

Frame Design And Aerobars

There are two frame geometries for bike travel:
– Frames that are designed for flat handlebars (with longer top tubes)
– Frames that are designed for drop handlebars (with shorter top tubes)

Given that riding in an aero position requires you to stretch further forward than normal, drop bar bikes with their shorter top tubes tend to be the best candidates for an aerobar setup. That said, there are a few products that will help you to achieve a comfortable riding position on flat bar bikes too, which I will be focusing on below.

Super Adjustable Aerobars

The majority of aerobars are designed to increase your speed on a road racing bike, more specifically in the triathlon discipline. The thing is that sizing between almost all road bikes of similar sizes is within millimetres, so aerobars don’t actually have to be very adjustable for the most part.

However, given that there is so much more variation between touring and bikepacking frames, plus the fact we’re looking to prioritise comfort over speed – you’ll want some aerobars with the most adjustability possible.

Here are the adjustments that are most useful for bike travel:

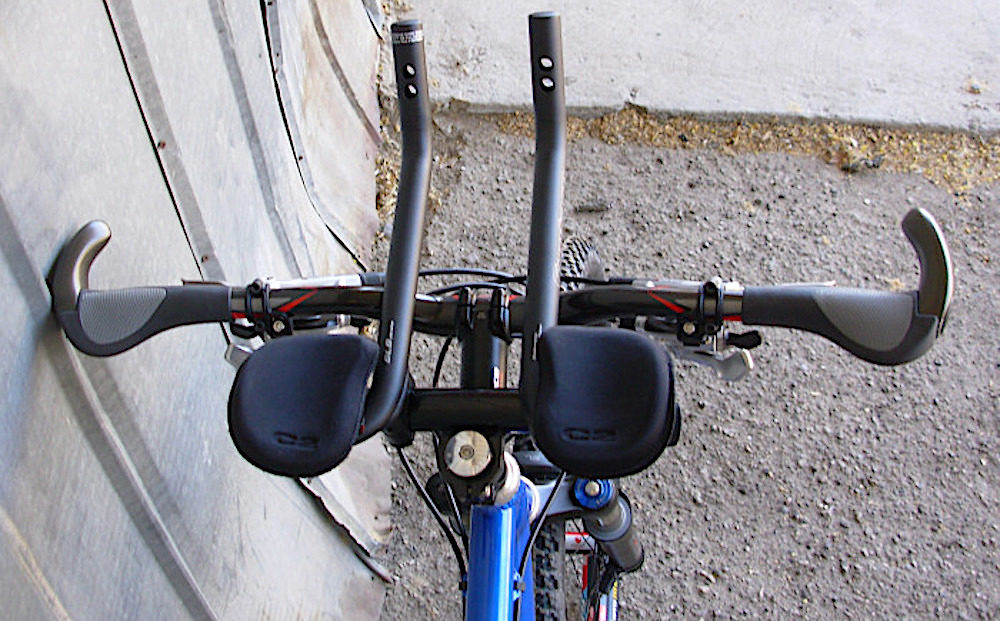
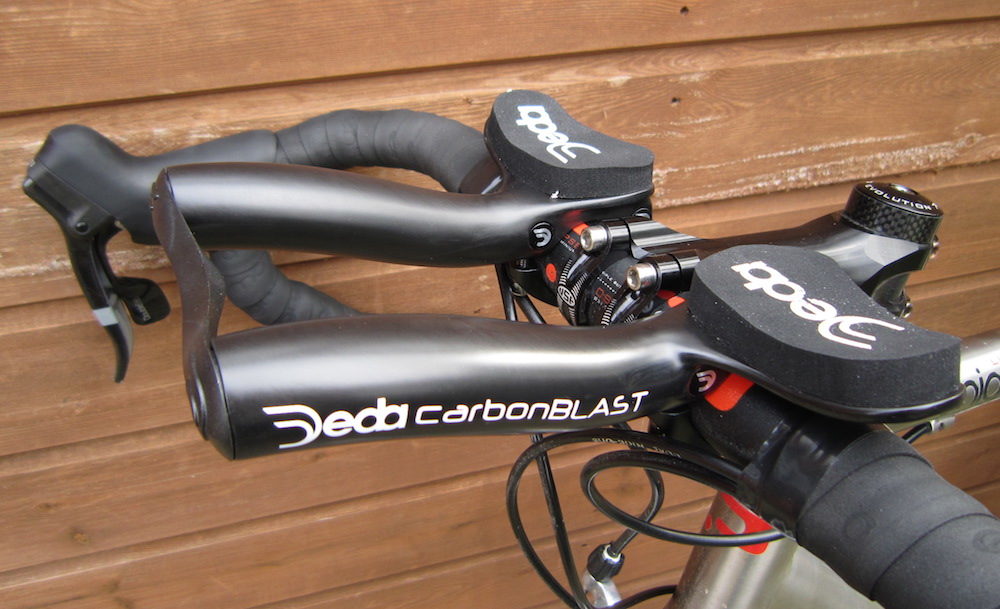
Armrest Adjustment. The vast majority of aerobar armrests are limited to a fixed position only (or a few millimetres of adjustment). In order to optimise your bike for comfort, however, you will probably need to bring your aerobars closer to your saddle using armrest adjustment. The only downside to this aerobar design is that they aren’t compatible with flip-up armrests (I’ll talk more about flip-up armrests below).

Arm Pad Adjustment. Most arm pads can be rotated inward up to about 15-degrees, allowing you to dial in your position. Arm pads are often available in multiple thicknesses too. Profile Design offer 16mm and 20mm, the latter is preferred for dirt road riding.

Extension Adjustment. The two bars that stick out from the front of aerobars are the ‘extensions’ or ‘skis’. These are normally adjustable in terms of length, rotation and width.

Height Adjustment. Some aerobar models have compatible riser kits that allow 50-70mm / 2-3″ of height adjustment. Getting the appropriate height will not only allow you to maintain a good hip angle but will also decrease the overall reach, resulting in a more comfortable riding position (I’ll talk more about aerobar height below).

Fred Bar Steerer Mounting Kit

A steerer mounting kit like the Fred Bar puts your aerobars directly above your stem, reducing your aerobar-to-saddle distance by approx. 40-80mm / 2-3″. This 133-gram steerer mounting kit was originally designed for flat handlebar bikes but is also a great option if you’re using aerobars without adjustable armrests (see picture above). A side benefit to the Fred Bar is that you can quickly add or remove your aerobars from your bike by simply removing your stem top cap.

Recommended Aerobar Setup Height

On a touring or bikepacking bike, you’ll probably want to fit your aerobars a few centimetres higher than your saddle. The reason for this isn’t to optimise comfort, but rather to ensure your hip angle doesn’t change when switching between your aerobar and regular riding positions.

A radically different hip angle requires a different saddle position in relation to your crankset. That’s why you’ll find such steep seat tube angles on time trial bikes. With a lower and more forward riding position, you’ll also need a different saddle shape that’s wider and more padded on the nose.

For bike travel, you’ll be best off setting up your aerobars high to start with. You can then reduce the height until you’re low enough to be fast, but also comfortable enough to maintain your riding position for long periods of time. If you find yourself sliding forward to the nose of the saddle, you’ll either need to move your saddle further forward, or increase the height of your aerobars. For moderately low riding positions (ie. aerobars a touch lower than your saddle), sliding your saddle forward on the rails will be enough to accommodate for the small changes to your hip angle.

You can raise your handlebars on your steerer if you have space, but the preferred option is to use aerobar riser kits. This will allow you to keep your existing handlebar height but also optimise your aerobars independently of everything else. If you prefer a slightly lower handlebar position but don’t want your aerobars to affect your hip rotation, an aerobar riser kit with up to 70mm / 3″ rise will be 100% necessary.

Do you still want a riding position that’s aerodynamically optimised? You should look into:

Dual-Position Seatposts
A really neat workaround for the hip-angle thing is to install a Redshift Switch seatpost. In just a second you can move your seat 50mm / 2.0″ forward, providing 3-4 degrees of effective seat tube angle change. Then when you’re done using your aerobars, you can shift your seat back to a more suitable position for riding upright.

Time Trial Saddles
Lower and more stretched-out riding positions put much more weight on the nose of your saddle. To be comfortable, you’ll need to test out a few time trial or triathlon saddles. If your position isn’t too low, a great all-around saddle for both a time trial and road position is the Selle SMP Pro.

Aerobar Types

bikepacking aerobars

Shape and Construction Material
Aerobars often come with two individual extensions (skis), but they can also be connected at the front. You’ll probably prefer individual extensions because that will allow you to adjust the width between armrests too. The extensions themselves are available in many different shapes to suit different wrist angles; the more angled versions tend to feel the most natural (but are slightly less aero). Aerobar extensions are constructed out of aluminium, carbon or titanium, but other than the 40-50 gram weight saving, you’ll find very little difference between them.

Fold-Up Armrests
There are two reasons to use fold-up armrests. The first is to gain more handlebar real estate on a narrow drop handlebar. By getting the armrests out of the way, you’re able to make use of, rather than lose the top of the handlebars. Fold-up armrests also offer a much better fit for bikepacking stem/feed bags (more on that below). The downside to fold-up armrests? They’re only available for aerobars with fixed position armrests (no forward or backward movement). I recommend fitting fold-up armrests only once you’ve worked out what position works for you first – they’re normally only available as an upgrade anyway.

Mini Aerobars
These small and lightweight aerobars (~200 grams) are designed for particularly short riding durations (eg. sprint distance triathlons). Most people who have used mini aerobars for bike adventures have found that the short extensions simply put too much force into their wrists, rending them useless after only a few minutes. That said, it’s possible mini aerobars could work for you if you put very little upper body weight on them; you’d have to have a particularly short and upright riding position for this to be the case, however.

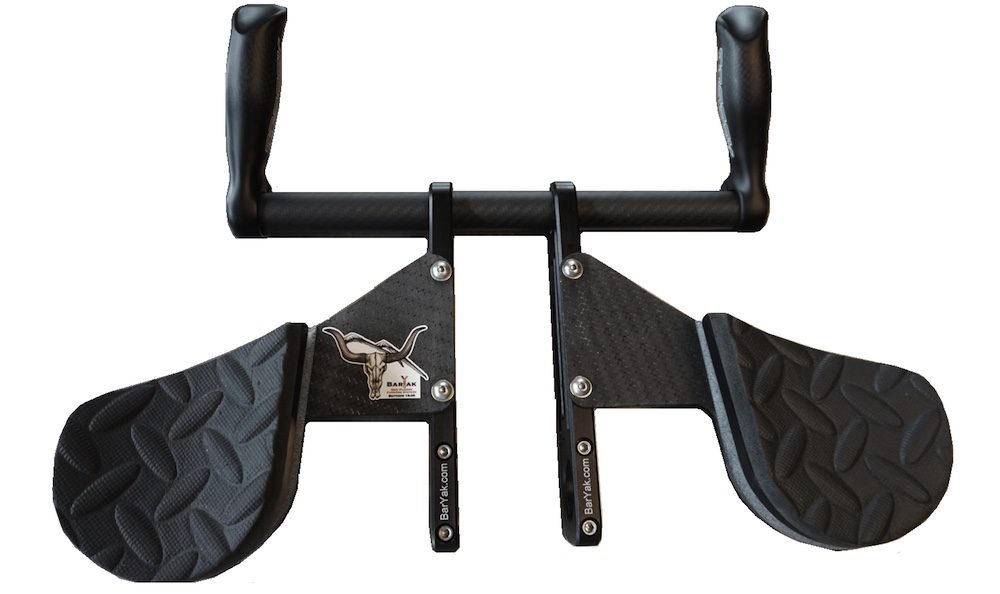
baryak

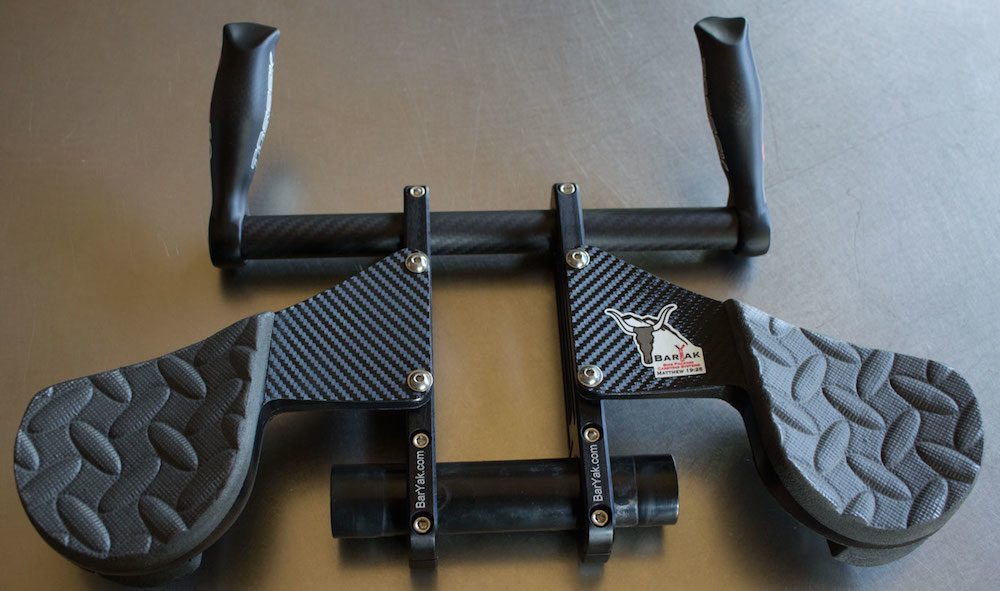
BarYak Expedition
BarYak aerobars have been designed specifically for bikepacking with flat handlebars in particular. Unlike other aerobars, the wide elbow pad width allows for feed bags to be used on either side of your stem. While these aerobars aren’t quite as short as a mini aerobar, you will still have to compromise a bit on length. Other advantages to using the BarYak system include being able to mount a Revelate Sweetroll handlebar pack at four locations (rather than two), extra space for accessories and the fact you can angle the bar-ends to your preferred wrist angle.

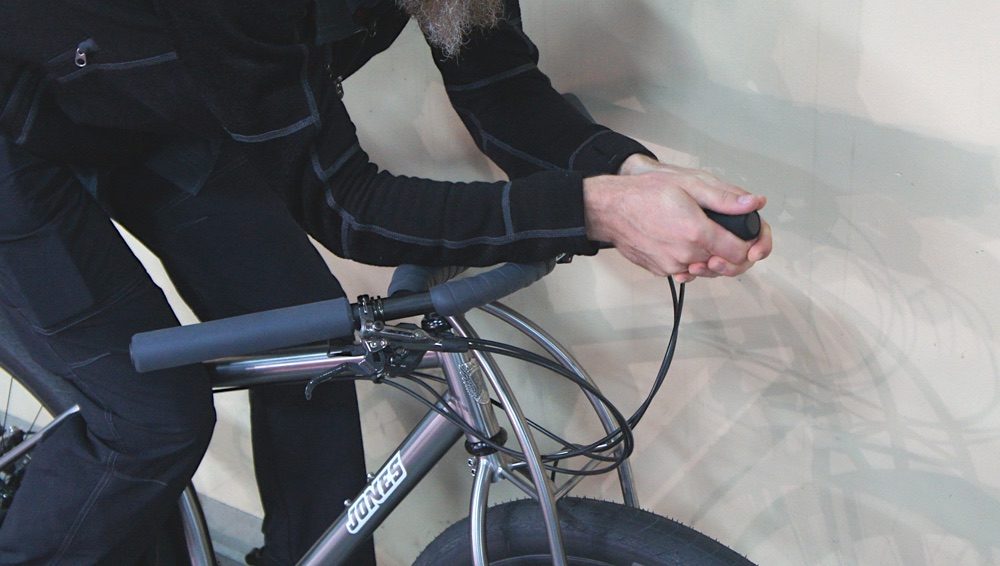
Jones Gnarwhal
A little-known product that gives an aerobar-like position is the Jones Gnarwhal. This single bar-end is fitted out the front of a Loop bar like a rhino horn (or narwhal tusk!). The Gnarwhal gets quite mixed reviews; a few users have found that simply running their arms along the ends of the Loop bar achieves a very similar body position. If you do decide to give the Gnarwhal a try, make sure to install some thick foam under your bartape to ensure maximum elbow comfort.

Bikepacking Bags and Aerobars

bikepacking aerobars

Jonas Deichmann fitted his stem bags out to the side for his 97-day ride from Alaska to Argentina.

Feed Bags (aka Stem Bags)
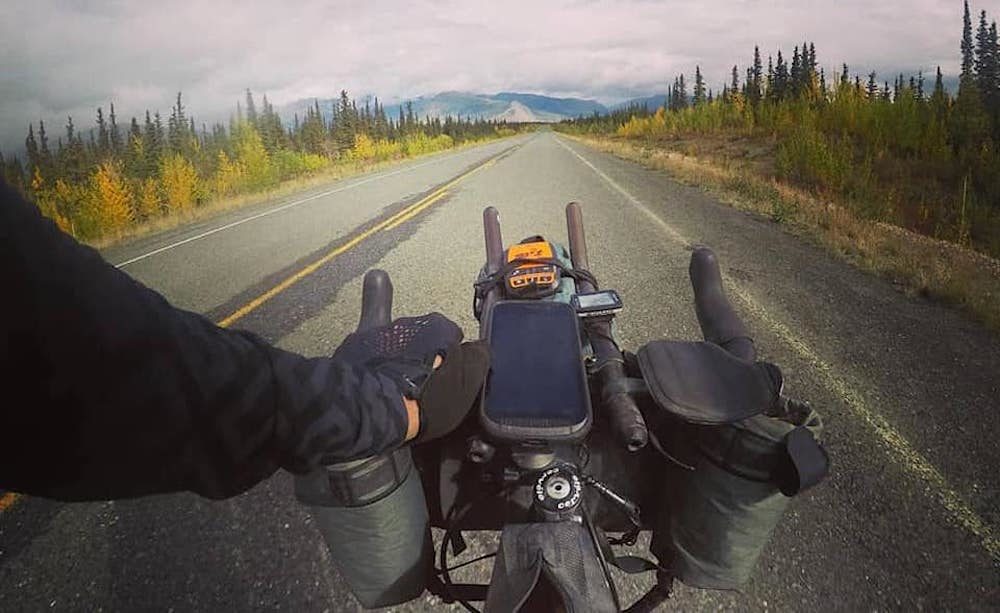
Aerobars typically share the same handlebar real-estate as stem bags. That doesn’t stop people mounting their stem bags wide, or directly from the aerobar extensions out front.

bikepacking aerobars

Ultra racing legend Kristof Allegaert using the Apidura aerobar pack on a Curve Belgie road bike.

Bikepacking Bags Designed For Aerobars
Bikepacking handlebar packs have no problem mounting to a bike fitted with aerobars. There is one handlebar pack designed to fit directly to aerobars though: the Apidura Racing Handlebar Pack. This bag mounts at four locations, keeping it stable and reducing the strain on your brake and gear cables. It also has integrated feed bags on either side to quickly stow additional bidons or snacks.

mark beaumont bike

Mark Beaumont rode 18-hours per day around the world record (78-days) with this aerobar cockpit. See his KOGA bike HERE.

Handlebar Bags
It’s almost impossible to use aerobars in conjunction with a typical touring handlebar bag. The only way I’ve seen this work is if the handlebar bag is mounted very low on a t-bar, but this will depend entirely on your bike setup. For the vast majority of bikes, I’d suggest handlebar bags are incompatible with aerobars.

Recommended Touring & Bikepacking Aerobars

*If you want to buy any of these aerobars, doing it via the Amazon links gives CyclingAbout a small commission (no cost to you) which goes into creating more great resources for the bike travel community.

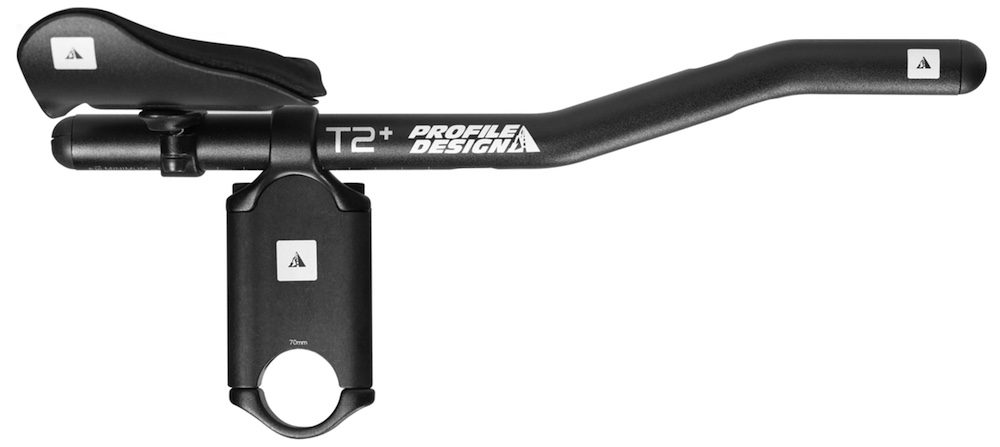
Profile Design T+ Series – 500 grams – T1+ (US $119), T2+ (US $92), T3+ (US $169), T4+ (US $106)

Thanks to their huge adjustability, the entire T+ series are popular for bikepacking. Some riders can even get the adjustable armrests back far enough to be comfortable on flat bar bikes without requiring a Fred Bar. This series of aerobars comes in five different extension bends (T4+ highly recommended) and two different pad kits (16mm or 20mm for extra comfort). Extension adjustments include the length, width and rotation; the arm pad angle can be adjusted 15-degrees too.

Riser kits for the T+ series are available up to 70mm. If you’re happy to lose the armrest adjustment, the flip-up bracket kit (US $88 on Amazon) adds more handlebar usability and only 20 grams.

Pro Missile S-Bend – 484 grams – US $179

The closest aerobars to the T+ series are the Pro Missile. While they have great adjustability, there’s only two extension shapes available and no riser kits that I know of. They may be easier to get your hands on, however, as they are available through all Shimano dealers.

bikepacking aerobars

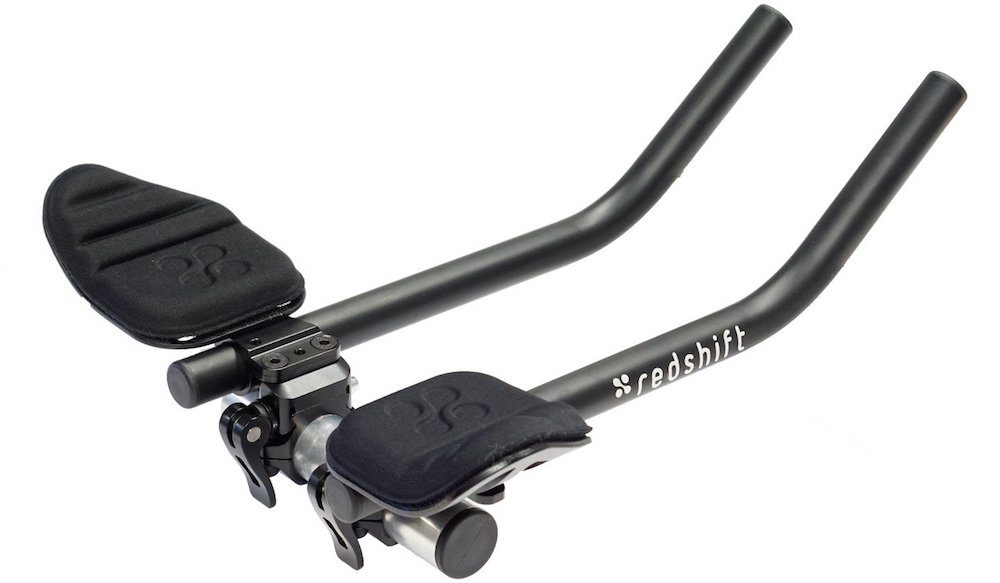
RedShift Switch Aero System – Carbon 564g and US $249 – Aluminium 640g and US $179

If you’re planning on fitting and removing your aerobars regularly, you’ll want a set of RedShift Switch aerobars. These quick release bars take just a few seconds to install/remove and you can even have clamps on multiple bikes! There are two extension shapes available – L-bend (recommended) and a flatter and more aerodynamic S-bend. The only limitations of the Switch bars are the extra weight and lack of armrest adjustment. That said, these bars could be a great fit on many bikes in combination with a Fred Bar steerer mount.

BarYak Expedition – 484 grams – US $365

I talked about the BarYak above – with these fitted you’ll get feed bag space, accessory space and more mounting points for a Revelate Handlebar Harness. The main downside is the lack of length and adjustability of the armrests, so this could be a great upgrade once you’ve already found a position that works on your more adjustable aerobars.

Aerobars For Bike Travel. Yes Or No? Tell Us Your Experience Below.

The post Bikepacking Aerobars: Increase Your Comfort And Speed On Your Bike Adventures appeared first on CyclingAbout.com.

List Of Fat Bike Fenders and Mudguards For Wide Off-Road Tires (2.2″ to 5.0″)

$
0
0

Sourcing fat bike fenders is a difficult task if you don’t know where to look. The good news is that a few off-the-shelf and custom fender options have recently been made available. I won’t be covering the nuances of fenders in this article, so please start with my comprehensive fender resource to understand everything there is to know about fenders.

A Surly Wednesday dressed with some wide Honjo aluminium fenders. Image: Found In The Mountains

Before I take you through the available fender options, here’s some info specific to fat bike fenders:

Fender Widths
Fenders are measured on the outside (not the inside) so a good rule is to subtract 10mm off the fender width to determine the maximum tyre clearance. You’ll ideally need a 20mm gap between the top of your tyre and fender, and about 5mm on either side of the struts. For example, a 75mm (3.00″) wide fender will comfortably clear a 65mm (2.60″) wide tyre. That said, manufacturers are usually very conservative with the maximum tyre clearances they recommend. You can often stretch the maximum tyre clearance to match the fender width, provided the struts allow it. A small bend to the strut near the tyre may be required.

Front Derailleur Clearance
The only other thing to know about fat bike fenders is that they can sometimes inhibit the action of a front derailleur. To get around this, you can use a Dremel to cut a small section of the fender off near the chainstay.

Clay Mud
You’ll be surprised how much terrain you can cover without your fat bike fenders clogging. I normally hit sticky mud just 2-3 times per year (travelling off-road fulltime), but some regions of the world are notorious for their sticky mud. It’s probably best to leave the fenders at home if you’re expecting rain and clay/volcanic mud!

Right, let’s take a close look at the fat bike fenders available.

Honjo H95 Fenders – 65mm Wide

ahearne pinion gearbox

You can see this gorgeous Ahearne Outback in detail HERE.

The fanciest fenders for mid-fat tires have got to be Honjo H-95s. As the struts go over the top of these aluminium fenders they get tyre clearance far beyond the 2.20″ maximum they recommend. For example, the Honjo H95 mudguards fitted to the Ahearne Outback above are comfortably wrapped around Schwalbe G-One 27.5 x 2.80″ tyres, but other riders have even squeezed in 3.00″ rubber. You can get these in 27.5″ or 29″ lengths (polished silver) for US $145.

Planet Bike Cascadia ALX 65 Fenders – 65mm Wide

Chip’s Soma Wolverine. Image: What Bars

The Cascadia ALX aluminium fenders have been a popular option for touring bikes for quite some time. These are some of the longest fenders available too because they’ve been designed around a 29er wheel diameter. Planet Bike recommends a 2.00″ maximum tyre, but many have managed to squeeze in 2.40″ provided you mount the fenders high. You can find these fenders in black or silver for US $70, and it’s handy to know that mounting hardware is available aftermarket too.

Sim Works Flat 65 Fenders – 65mm Wide

Stephanie’s Surly Wednesday with 2.80″ tyres. Image: Found In The Mountains

The Sim Works Flat 65 fenders are actually re-branded Honjo H-95 aluminium ‘guards. With an extra bend made to the strut near the tyres, they will even clear a 3.00″ tyre (see Stephanie’s Surly Wednesday in detail HERE). They’re available in polished silver (US $135) or black (US $151), a colour that’s unique to Sim Works.

SKS P65 Fenders – 65mm Wide

For a long time, SKS has been making these wide mudguards for 26″ mountain bike wheels. You can find the P65 fenders matched to 2.40″ tyres on many touring and electric bikes include the KOGA WorldTraveller Signature builds. The main downside to this option is that they’re a little bit short when paired to a 29er wheel. The SKS P65s are available in black or silver for US $49 on Amazon.

SKS Bluemels 75 U Fenders – 75mm Wide

SKS released these off-road fenders in late-2018. Officially they’re good for 2.60″ but we know that the combination between flatter-profile ‘guards and bent fender struts should suit even wider tyres – 3.00″ are theoretically be a breeze. You can get SKS Bluemels 75 in matte black for US $75 on Amazon.

Honjo H101 Fenders – 78mm Wide

Coming soon from Honjo is the new H101 model. Honjo says it’s designed to clear 2.30″ tyres but given the flat profile and strut design, there should be no reason why you can’t squeeze in 3.00″ rubber too. Honjo will make these in two lengths; one to suit 27.5″ and a longer version for 29″.

Wald Balloon 962 Fenders – 81mm Wide

Chip’s Crust Evasion with Wald fenders. Image: What Bars

These wide Wald fenders were originally designed for lowriders and cruisers, but they tend to make a great fender for off-road tread too. Chip from Whatbars.com has his wrapped around some 27.5 x 3.00″ tires. You can get the 962s in black or chrome for just US $34 on Amazon.

Surface604 Fat Bike Fenders – 120mm Wide

fat bike fenders

These are the only off-the-shelf fat bike fenders available. They’ve been designed specifically to suit a Surface 604 fat bike but should be adjustable enough to suit most bikes with tyres 4.50″ wide or less. You can get them in black for US $119.

Kelpie Cycles Titanium Fenders – Custom

Kelpie Cycles are one of the only companies that make hammer-rolled titanium fenders. They can whip them up in any width and length you desire – check out the 36er fenders found on this Black Sheep cruiser!

MK Wooden Fenders – Custom

MK Fenders are hyper-customizable wooden fenders made in Iowa, USA. You can choose the wheel size, fender length, fender width, wood type and colour inlay. The base price is US $200, but they can be optioned-out to over US $400.

Woody’s Wooden Fenders – Custom

Woody’s Fenders of Oregon, USA make fenders that are works of art. They’re available in a number of shape profiles and wood patterns (you’ve got to check out the options on the website!). The built-and-ready fenders start from US $120, but expect a full custom set to be north of US $250.

DIY Modified Fat Bike Fenders

You can make your own fat bike fenders by slicing a set of off-the-shelf fenders in half (Planet Bike Cascadia are popular), widening them with a 3.00″ strip of aluminium and attaching it all back together with rivets. There are a few good tutorials floating around online to complete this hack. The other popular DIY option is to source some ‘trials motorbike’ fenders and match them to some bicycle fender hardware.

Click HERE To Find Out More About Mounting Fenders To Your Bike

The post List Of Fat Bike Fenders and Mudguards For Wide Off-Road Tires (2.2″ to 5.0″) appeared first on CyclingAbout.com.

What’s The Weight Difference Between Derailleur and Pinion / Rohloff Bikes?

$
0
0

I’ve recently noticed some very inaccurate numbers being thrown about regarding the weight difference between gearbox bikes and derailleur bikes (hint – it’s not even close to 3kg). In this article, I’ll try to clear things up by calculating the precise weight difference between 11 common drivetrain options found on touring and bikepacking bikes.

Let’s do this!

Derailleur Drivetrains

It is well-known that derailleur systems offer the lightest drivetrain weight. But what’s the weight difference between 1x, 2x and 3x setups? What about between brands and models? Below you’ll find the most popular derailleur options on stock bikes.

I’ve tried to keep the gear range above 500% to make the drivetrains comparable in terms of use (eg. a SRAM 10-50t cassette instead of the standard 10-42t cassette). I’ve also added the weight of a DT Swiss 350 hub to each drivetrain so we can draw a direct comparison to the internally geared hubs below.

The only things to note for this section:
– The SRAM Force1 and Shimano Ultegra drivetrains include the brake lever(s) as they’re integrated with the shifter.
– The gear range is 420% and 455% for the Force1 and NX drivetrains, compared to 500%+ on everything else.

2019 Bombtrack Beyond

2019 Bombtrack Beyond+ 2 with a SRAM GX drivetrain.

SRAM GX Eagle 1X // 2273 grams
Crankset/chainring/BB (703g), shifter (122g), derailleur (290g), cassette (450g), chain (258g), hub (300g), cables (150g)

2019 Kona Unit X with a SRAM NX drivetrain (note: 42t cassette pictured).

SRAM NX Eagle 1X // 2581 grams
Crankset/chainring/BB (787g), shifter (112g), derailleur (339g), cassette (615g), chain (278g), hub (300g), cables (150g)

2019 salsa warbird

2019 Salsa Warbird with a SRAM Force1 drivetrain.

SRAM Force 1X // 2247 grams
Crankset/chainring/BB (761g), shifter (153g), derailleur (261g), cassette (366g), chain (256g), hub (300g), cables (150g)

2018 Co-Op Cycles ADV

2019 Co-Op Cycles ADV 4.2 with a Shimano SLX drivetrain.

Shimano SLX 2X // 2700 grams
Crankset/chainrings/BB (822g), shifters (246g), derailleurs (456g), cassette (369g), chain (257g), hub (300g), cables (250g)

carbon touring bikes

2019 Diamondback Haanjo 7C with a Shimano Ultegra drivetrain.

Shimano Ultegra 2X // 2638 grams
Crankset/chainrings/BB (756g), shifters (438g), derailleurs (302g), cassette (335g), chain (257g), hub (300g), cables (250g)


2019 Salsa Marrakesh

2019 Salsa Marrakesh with a Shimano Deore drivetrain.

Shimano Deore Touring 3X // 2723 grams
Crankset/chainrings/BB (930g), shifters (178g), derailleurs (448g), cassette (360g), chain (257g), hub (300g), cables (250g)

Gearbox Drivetrains

Gearboxes come in two different forms – as an internally geared rear hub and as a crank-based gear system. For this comparison, I’ve listed the most popular options for bike travel: the Pinion P1.18 gearbox, the Pinion C1.12 gearbox, the Rohloff 14-speed hub and the Shimano 11-speed Alfine hub.

The things to note for this section:
– The Alfine hub has a 408% range, compared to 526% on the Rohloff and 600%+ on the Pinion.
– A chain would add around 70 grams to each of the Pinion gearbox systems over the belts specified.

Belt Drive Touring Bike

Idworx oPinion with a Pinion P1.18 drivetrain.

Pinion P1.18 Belt Drive // 3850 grams
Gearbox w/ cables (2640g), shifter (96g), cranks (420g), c-plate (235g), rear hub (303g), sprocket (37g), cog (42g), belt (77g)

2019 Velo De Ville P400 with a Pinion C1.12 drivetrain (chain pictured).

Pinion C1.12 Belt Drive // 3310 grams
Gearbox w/ cables (2100g), shifter (96g), cranks (420g), c-plate (235g), rear hub (303g), sprocket (37g), cog (42g), belt (77g)

Koga World Traveller

2019 Koga WorldTraveller-S with a Rohloff drivetrain.

Rohloff 14 Speed Belt Drive // 3125 grams
Hub/shifter/cog (1958g), crankset/chainring/BB (780g), belt (87g), cables (300g)

2019 Tumbleweed Prospector with a Rohloff drivetrain.

Rohloff 14 Speed Chain Drive // 3194 grams
Hub/shifter/cog (1921g), crankset/chainring/BB (753g), chain (220g), cables (300g)

2019 Tout Terrain Via Veneto with a Shimano Alfine 11 drivetrain.

Shimano Alfine 11 Speed // 3058 grams
Hub/shifter/cog (2041g), crankset/chainring/BB (780g), belt (87g), cables (150g)

Lightest to Heaviest: The Drivetrain Weights

SRAM Force 1X – 2247 grams
SRAM GX 1X – 2273 grams
SRAM NX 1X – 2581 grams
Shimano Ultegra 2X – 2638 grams
Shimano SLX 2X – 2700 grams
Shimano Deore Touring 3X – 2723 grams
Shimano Alfine 11 Speed Belt Drive – 3058 grams
Rohloff 14 Speed Belt Drive – 3125 grams
Rohloff 14 Speed Chain Drive – 3194 grams
Pinion C1.12 Belt Drive – 3310 grams
Pinion P1.18 Belt Drive – 3850 grams

The Main Talking Points

– A bike with SRAM GX Eagle will be 850 to 900 grams lighter than the equivalent Rohloff bike.
– A 1x drivetrain saves 300 to 400 grams over a 2x or 3x drivetrain.
– A Rohloff hub is 400 grams heavier than a 2x or 3x drivetrain.
– There isn’t a big weight difference between 2x and 3x because you need practically the same amount of parts.
– The Rohloff 14s hub saves you 700 grams over a Pinion P1.18 gearbox.
– Belt drivetrains offer a 70-gram weight saving over chain drive.
– The Shimano Alfine 11 is actually lighter than a Rohloff hub.

How Much Do These Weight Differences Matter?

As some of you are aware, I’ve done a lot of testing over the years, including one with different weight amounts in my panniers. I ended up calculating that an extra kilogram over 100km is worth somewhere between 10 and 90 seconds – that’s depending on if the terrain is flat or hilly. You can check out my full test HERE.

We can say that a minute or so will be the approximate time penalty between a SRAM GX Eagle drivetrain and a Rohloff hub over 100km on moderately hilly terrain. The difference between a Rohloff hub and a Pinion gearbox will also yield a similar result based on weight alone, however, the Pinion P1.18 also has additional friction losses in the gearbox system itself, resulting in a further 3-4 minute time penalty over 100km (check out my gearbox efficiency testing HERE).

Summary & Final Thoughts

I hope this article has cleared up a few weight myths between drivetrain components.

With all things equal, you can expect a 1x bike to save:
– 350 grams over a 2x
– 450 grams over a 3x
– 850 grams over a Rohloff w/ belt
– 900 grams over a Rohloff w/ chain

Given how narrow the weight range is here, I certainly wouldn’t choose a drivetrain based on weight alone. The exception would be if you were planning on building up a sub-10kg carbon race bike for a bikepacking ultra.

Instead, it makes more sense to focus on a drivetrain that suits your budget with appropriate gearing for the terrain you ride. For a small weight penalty, a 2x or 3x drivetrain has smaller gaps between gears when compared to 1x, which is a nice feature for flatter terrain. Front derailleur systems also offer a better chainline, increasing the life of your chain and the efficiency of your drivetrain at both ends of the cassette. That said, 1x is certainly nice to use given its simplicity.

Gearboxes are quite ideal for bike travel, especially with a belt drivetrain, as the cogs are all sealed away from the elements. Other than the odd oil change and a quick brush with a toothbrush, these drivetrains are practically maintenance free. Plus you’ll find you can get 10,000km out of your chain or 25,000km out of your belt. The main downside is that gearboxes come at a very high initial cost.

Anyway, things for you to mull over…

The post What’s The Weight Difference Between Derailleur and Pinion / Rohloff Bikes? appeared first on CyclingAbout.com.

It’s Bike Pushing, Not Bike Riding: Techniques and The Ultimate Hike-A-Bike Setup

$
0
0

Some people spend a lot of time on bike adventures… but without actually riding their bike! Perhaps the most famous for this is the Iohan Gueorguiev who seeks out the most off-the-beaten tracks through the Americas. I’ve also spent my fair share of time pushing bikes around the world, so I thought I might be able to give you some insights into these crazy places.

But… why would you use a bike if you’re going to spend so much time pushing it?
Sometimes you just want to get to the world’s most remote areas. It may take a longer time to get through a hiking trail section with a bike, but guess what, you’ve now got wheels for when you get to the dirt road on the other side.

Let me share a few techniques, show you a few bike setups, and then give you an idea for how I’d optimise my luggage for a trip with hike-a-bike galore!

Hike-A-Bike Techniques

Trans Ecuador Mountain Bike Route

I rarely push my bike…
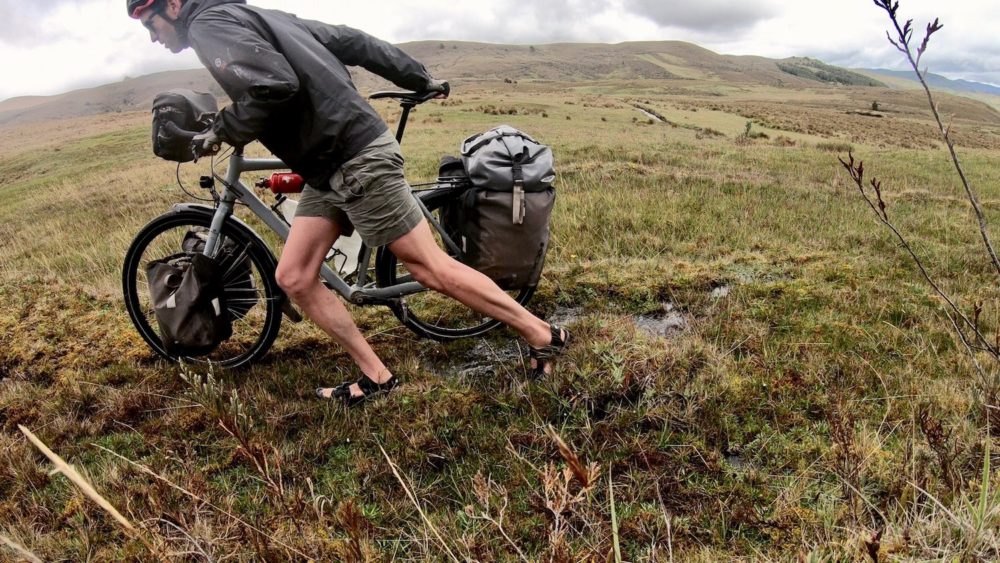
…I pull it. I pull it through the mud, through rivers and up the rocky trails. One hand sits on the bars for control and the other pulls behind the seat. The only time I push with both hands on the bars is when the ground is hard and completely flat (but normally you can ride those sections).

When it gets steep, I pull my bike from behind the seat tube.
Pulling from the seat is only good up until a certain gradient (20-25% in my experience). After that, you’ll then need to tuck your hand in the gap behind your frames’ seat tube. I also find lifting my bike from the seat tube is ideal.

I use my rear brake. A lot. (When it’s steep)
My hand that I keep on my bars is always hovering over the rear brake lever. I often move my bike a bit, grab the brake and use the stationary bike to pull myself up!

When it’s insanely steep, I take off my front panniers first. 
I’ve found that it’s easier to drag a heavy rear load than lift a heavy front one up crazy steep inclines.

Iohan Gueorguiev’s Fat Bike

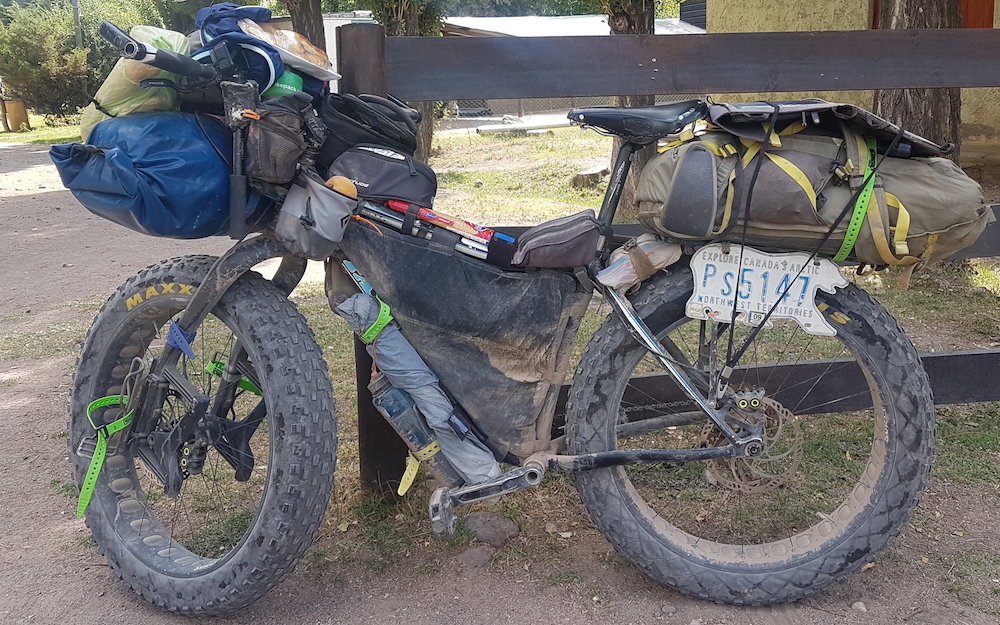
The key feature of Iohan’s Fatback Rhino FLT is the removable 30-litre backpack. When Iohan needs his bike to be lighter and more manoeuvrable for the steeper hike-a-bike sections, he is able to carry a decent percentage of his gear on his back. Otherwise, he is carring equipment in a Cleaveland Mountaineering framebag, massive Sea-To-Summit front drybag and multiple Blackburn cargo cages on the frame and fork.

You can read more about Iohan’s Fatback Rhino FLT HERE.

Sylvain St-denis’ Surly Troll

If I recall correctly, Iohan was inspired by Sylvain’s rear rack backpack when they were travelling through Peru together. Sylvain uses a Surly Troll with a similar-sized backpack to Iohan, strapped to the rear Surly rack. To carry the rest of his gear he’s using full frame bag, front drybag and a few cargo cages. More recent photos of Sylvain’s bike show a front rack to support a small and large drybag.

Ryan Wilson’s 44 Bikes Maurauder

Photography wizard, rmdub, uses a custom 44 Marauder bike with Pass and Stow front rack to support a removable camera backpack for the hike-a-bike sections. Ryan keeps his electronic gear in this padded bag – camera gear, laptop, hard drives etc. Rather than a heavy rear load, the majority of Ryan’s weight is off the rear wheel. He’s using front Ortlieb panniers, two stem bags, a few cargo cages, a Porcelain Rocket frame bag and Porcelain Rock seat pack.

It’s worth taking a closer look at Ryan’s bike and gear on the Radavist. Great article.

How Would I Optimise My Luggage For Hike-A-Bike?

hike-a-bike

There are a few key principles here:
– Most of the weight is found in the centre-to-rear as it makes lifting the front of the bike easy.
– Weight can be removed from the bike easily. By using a backpack and drybag you can easily take 10kg/22lbs off the bike.
– Waterproof everything. This goes without saying, I have no time for anything else!

Front Top Rack w/ 30-Litre Waterproof Backpack
– The backpack would ideally have 5-7kg inside it while riding and could be combined with the separate rear drybag to remove over 30% of the bikes weight.
– I’d probably keep my electronics (laptop etc) in this bag.

Fork Cargo Cages
– These would stay on the bike when pushing and would allow the bike to be light enough to lift, even on a steep incline.
– No more than 2kg/5lbs of gear each side – probably a tent and sleeping gear as it packs well.
– Easily removable from the bike (I like the Dom Gorilla Cage system) for camping.

Full Framebag
– Heaviest items go in here, along with food and tent poles.
– Space for water storage down low in the bag for optimal bike handling.

Rear Panniers
– These waterproof bags would store clothes, toiletries, cooking gear, spare parts, shoes etc.

Rear Drybag + Straps
– The drybag would be able to be removed and strapped to the backpack when the hike-a-bike got serious.

Have You Got Any Setup Tips For Hike-A-Bike Sections?

The post It’s Bike Pushing, Not Bike Riding: Techniques and The Ultimate Hike-A-Bike Setup appeared first on CyclingAbout.com.

Gates Carbon Belt Drive: Everything You Ever Need to Know

$
0
0

Carbon Belt Drive has been developed over the last 30 years. It’s a power transmission technology used to run the blowers on 10,000 horsepower racing engines, the powertrains of 150 horsepower motorbikes, and more recently, the drivetrains of many bicycles.

The belts themselves are a series of nylon teeth that are reinforced using multiple carbon fibre cords. Belts are then paired with stainless steel cogs and durable alloy chainrings, which results in a super tough chain alternative that will handle temperatures ranging from -65°F (-53°C) to +185°F (+85°C).

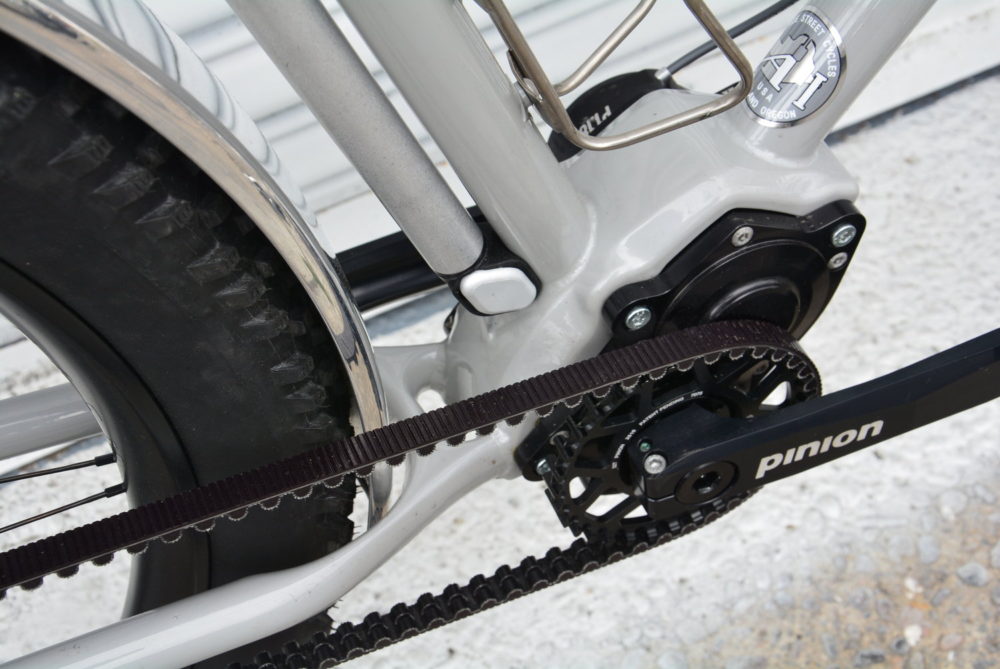
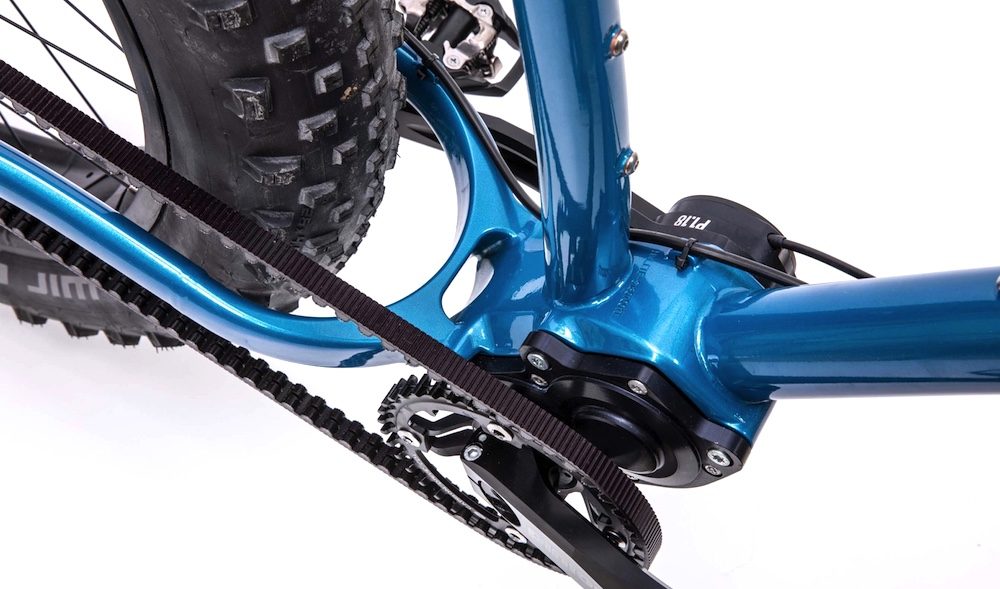
Belt drive is a great alternative to a chain because it’s very low maintenance and it offers 3-4x the service life of a chain. The reason it’s not more widespread in the bike industry is that it cannot be used with derailleurs; instead, it’s limited to internally geared hubs such as Rohloff or Shimano, or crank-based gearboxes like the Pinion P1.18.

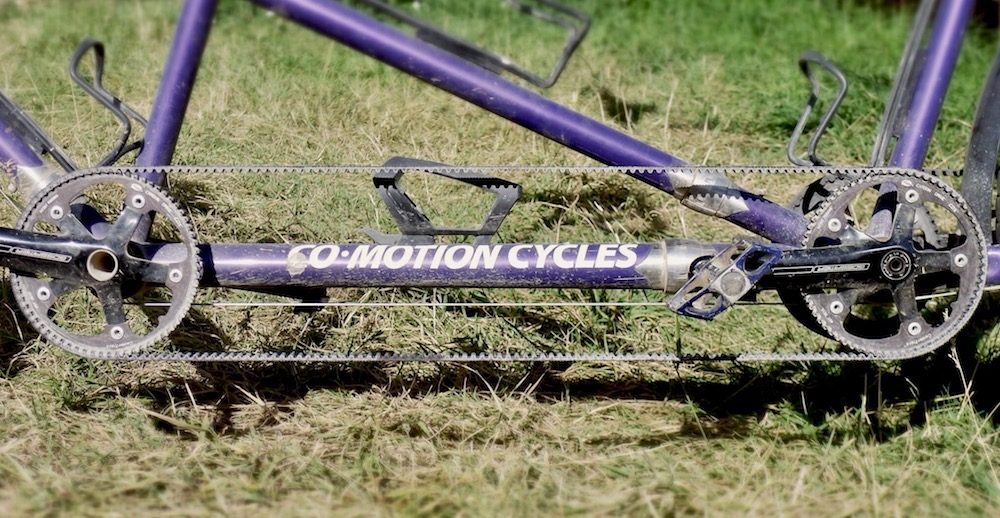
I’ve been using belt drivetrains paired with Rohloff 14-speed gear hubs since 2010. This has included a 31,000km (19,000mi) bike ride between Europe and Australia, my current 40,000km adventure from Argentina to Alaska and lots of multi-month tours in between. I started playing with belts on a modified Surly touring bike, later building up a custom Co-Motion tandem and am now riding a Koga WorldTraveller-S touring bike.

Note: This article was originally published May 2012 but has been completely overhauled Feb 2019.

Why Use Belt Drive?

belt drive

Belt drive combined with a Pinion gearbox on a Hilite bicycle.

Belts Have A Long Service Life
You can expect a regularly cleaned belt drivetrain to last upwards of 30,000km/19,000mi. Additionally, belts will not rust if you leave them in the rain for long period of time.

Belts Require Little to No Maintenance
You don’t need to lubricate or degrease your belt. The most maintenance you’ll have to do is get a toothbrush and give the belt a scrub from time to time.

Belt Drivetrains Are Silent
You know when your chain is freshly cleaned and lubed and running perfectly silent? That’s a belt drive all the time.

Belts Are Marginally Lighter Than Chains
You can expect a weight saving of around 100 grams when compared to chain drive.

Are There Any Downsides?

Belt drive on a custom Surly Troll. Take a close look at this build HERE.

You Need A Belt Compatible Frame
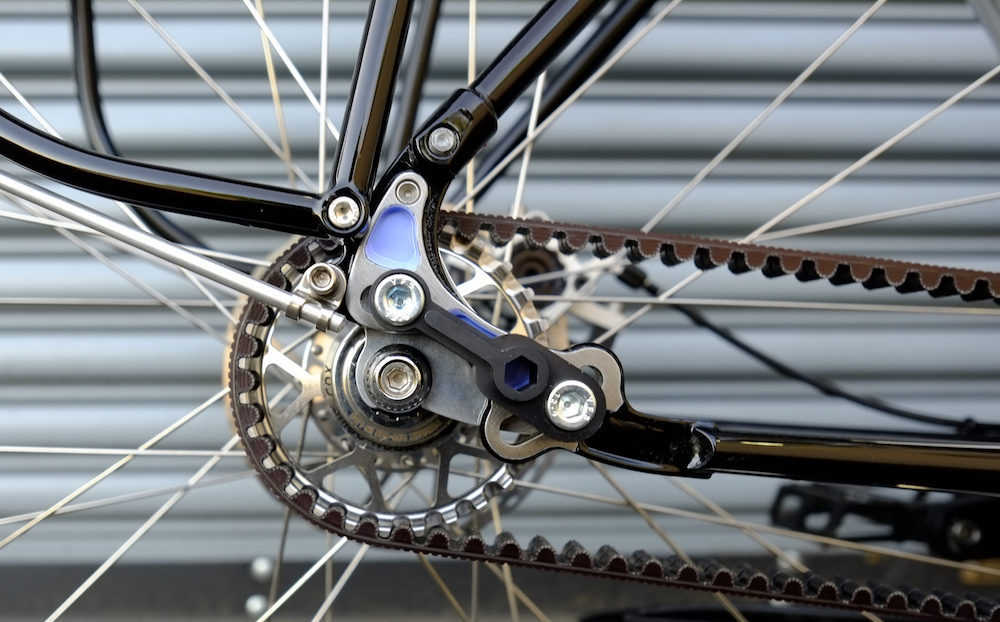
As belts are one-piece, your frame will need to be designed with ‘belt splitter’ in the rear triangle. The frame will also ideally be ‘stiffness test approved’ – but more on frame stiffness below.

Belts Are Less Efficient Than Chains
As belts require a high tension, they’ve been tested to be less efficient (likely somewhere in the 1-5 watt range) than a perfectly lubed chain drivetrain, but may have the advantage when the conditions get nasty.

Replacement Parts Are Not Often Found In Shops…
… that said, with the high service life, you won’t need to obtain replacement parts often. It’s prudent to carry a spare belt (87 grams) to get you out of trouble on a bike trip (they fold up nice and small). I’ve never carried a spare chainring or cog as they’re very unlikely to be damaged even on a multiyear bike tour.

There’s A Higher Upfront Cost…
… but provided you get the full mileage out of your belt drivetrain, I’ve estimated you’ll go about 125km per dollar. This is the equivalent of a chain drivetrain costing you about $60 per 7500km (typical max distance for a chain).

Gates Belt Drive Models

CDX: High-Performance
The CDX High-Performance belt drivetrain is the most common belt option. You’ll find this model on almost all touring and adventure bikes. This system now has 16 belt lengths, 7 front sprocket sizes and 8 rear cog sizes to give you the most drive ratio options.

CDX: EXP
Gates more recently released an oversized version of the CDX drivetrain with 25% more surface area. This product is designed to get an even better range and durability, but still isn’t commonly found on touring bikes. There are currently five front sprockets and 4 rear cogs available.

CDN: Urban
The budget belt drivetrain from Gates is CDN Urban. The idea is to bring belt drive to city bikes in the €500 complete price range. These products are designed for the ‘casual rider’ and are not approved for use on mountain bikes, mid-drive eBikes, fixed gear bikes, or high mileage trekking/touring bikes. From what I’ve heard, people have had a few problems with the CDN rear cog, but they’ve all been upgraded to a cross-compatible CDX stainless cog.

Belt Drive Frames: Rear Triangle Stiffness

belt drive

Gates CDX: High-Performance on a Koga WorldTraveller-S.

I’ve found that one of the most important factors for a belt drivetrain is that it is paired with a particularly stiff rear frame triangle – this is particularly important when carrying luggage on your bike. On my older belted touring bikes I was able to generate enough flex through my frames to make the belts skip under load. But no matter how much power I put through my pedals on my Koga WorldTraveller-S, I cannot get this to occur, indicating a higher degree of stiffness.

Gates offer a ‘stiffness test approved’ label to frames which pass their standard. But it’s worth noting that this is a minimum stiffness level, so some touring manufacturers do a better job than others to keep their rear triangle stiff. I recommend hunting for frames that use oversized tubes for the chainstays/seatstay section (my detailed article on frame stiffness is HERE).

You can find a list of every Gates approved frame HERE.

Belt Drive Frames: Belt Tensioners

belt drive

The Bushnell eccentric bottom bracket on a Van Nicholas Amazon touring bike.

A belt drivetrain requires a way to tension the belt. There are a three different frame features that allow tensioning, each with their pros and cons.

EBBs: Eccentric bottom brackets allow you to move your crankset around 13mm forwards and backwards. The design also gives you the option to run your crankset high (nice for off-road) or low (better for the road). I’ve found EBBs a bit ‘creaky’ on long bike trips (more maintenance required) and additionally, they can get water in them, making them sometimes hard to adjust (again, maintenance required). The main upside is that companies like Koga have tested EBBs to offer the stiffest rear triangle possible.

Sliding Dropouts: Sliding dropouts offer about 20mm of adjustment and are a great option because they are very easy to adjust. Like EBBs, you do not need to tension your belt every time you take your wheel out; it simply drops out and then slots back in at the perfect tension. The downside to these dropouts is that some lower-quality frames have the propensity to move forward using belts, resulting in inadequate tension.

Horizontal Dropouts: Belt frames with horizontal dropouts are rare. They’re not recommended by Gates as you need to set the belt tension every time you take your wheel out. That said, if you are using belts and horizontal dropouts, you’ll need a minimum of 10mm left in the dropout before the belt is tensioned – this space is required to get the belt onto the chainring.

Belt Drive Frames: Splitters

belt drive

Can you make out the frame splitter just above the dropout on this Ahearne?

Unlike a chain, belts are one-piece, so a split in the frame’s rear triangle is essential. Splitters can be found in the seatstay, dropouts or sometimes even the chainstay. The most common splitters are integrated into the rear dropout, but some manufacturers have tested seatstay splitters to produce the stiffest possible rear triangle.

In the past, frames have been modified with splitters so that people can upgrade to belt drive. I no longer recommend making this modification because you simply can’t guarantee that your rear triangle will be stiff enough for a belt. Plus, there are so many dedicated belt frames out there nowadays which are similarly priced to the cost of a frame mod and re-spray.

If you still want to get this modification made, make sure to contact a reputable frame builder. I’ve used Ewen Gellie for my work in Australia. Cycle Monkey in Northern California (USA) can also make this modification.

Belt Drive and Rohloff Hubs

Belt drive combined with a Rohloff hub is a dreamy setup, but there are a few conditions attached. Not adhering to these may result in the partial loss of guarantee and warranty cover for your hub. But don’t worry, it’s easy to meet these conditions!

Firstly, your frames rear-triangle must withstand a minimum stiffness level. In short, bike manufacturers must prove frame stiffness levels on a specialist testing jig in order to be considered ‘stiffness test approved’. You can find a list of every approved frame HERE.

And the second condition is that you use a ‘belt snubber’. This product prevents the belt from walking off the cog under high load (or insufficient belt tension). When the belt lifts onto the top of the cog it can compromise the internal carbon fibres in a belt, so it’s recommended to use a snubber in any case.

Previously, belt cogs screwed directly onto Rohloff hubs, but now there is a much more user-friendly ‘splined carrier’ (part #8540L) with three splined belt cogs available (19t, 20t, 22t). This carrier makes cog changes much easier. There was a known issue for the 1st-generation splined carriers, but this was fixed mid-2018 (and warranty parts sent out), so won’t be an issue going forward.

Belt Lines and Frame Clearance

page street cycles

Pinion+Belt Drive on a Page Street Outback. See the build HERE.

A straight ‘chain line’ or ‘belt line’ is absolutely essential for a properly functioning belt drivetrain (+/-1mm). The location of the rear cog is often fixed, so the majority of the adjustment will be at the crankset.

Belt Lines of various drivetrains:
– Alfine Di2: 39.8mm
– Alfine 8 or 11: 43.7mm
– Nexus 8: 44.35mm
– Nexus 7: 43.05mm
– Pinion C-Line: 52mm
– Rohloff 148mm, splined carrier: 51.7mm
– Rohloff 135/142mm, splined carrier: 54.7mm
– Pinion P-Line: 56mm
– Rohloff 170/177/190/197mm: 72.2mm

You’ll need to look up the chain line of the crankset you’re planning to use with your belt drivetrain. A triple 104BCD crankset has a 55mm chain line (when the chainring is mounted on the outside location), making them popular for Rohloff belted setups. It’s worth noting that Gates make their own cranksets with different beltlines to suit most belt drivetrains: 39.8mm, 43.7mm, 45.5mm and 54.7mm.

The other thing to mention is chainring clearance, in particular with Shimano hubs. As the gear selector on Shimano hubs is external and on the drive side, it results in a very narrow chain line. If a frame has inadequate chainring clearance at the chainstay, it may be incompatible with a Shimano hub. It’s worth getting in contact with a frame manufacturer to check on chainring clearance if you’re planning on using a Shimano hub with belt drive.

Gear Ratios

You might think that having fixed belt lengths reduces the ability to get your gear range right. But it’s worth noting that there are eight belt lengths and quite a few chainring and cog sizes, so the jumps between drive ratios aren’t large.

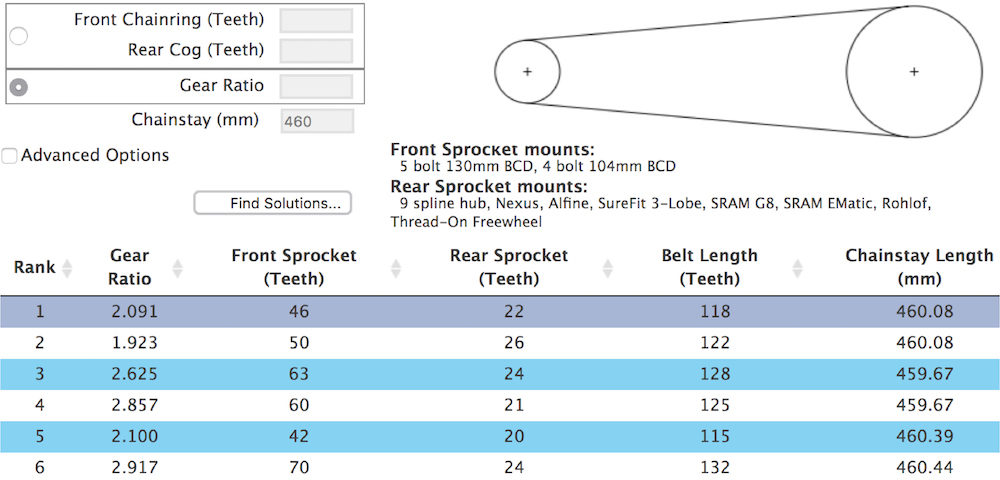
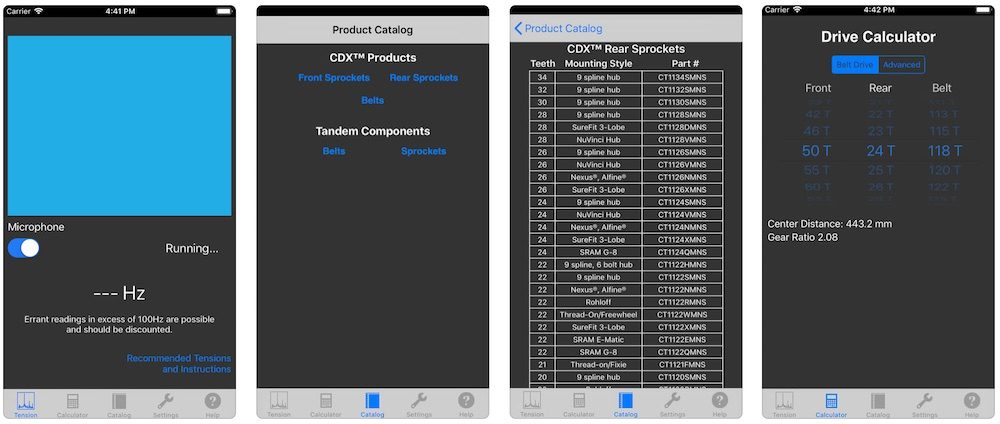
The Gates Calculator is a great tool to help determine which chainring and rear cog to use (this calculator is also available as a smartphone app). I find that if you plug in your optimal chainstay length (eg. 460mm) and hit ‘Find Solutions’, it will come back with the different combinations that will suit your frame first and foremost. You now just need to narrow down your ‘Gear Ratio’ options so they best suit your terrain. This will need to be done in accordance with the chainrings/cogs that are available for your Rohloff/Shimano/Pinion etc.

As mentioned above, if you are using belt drive and horizontal dropouts, you must have a minimum of 10mm left in the dropout before the belt is tensioned.

Belt Drive and Tandems

Belt drive is great for timing belts on tandem bikes. This saves you about 250 grams over the equivalent chain and chainrings. In order for belt drive to work on your tandem, your frames boom tube must be 724mm between bottom brackets. You’ll also need to be using 130BCD cranks. It is possible to run belts on both the drive and non-drive side of your tandem but the latter is recommended.

Maintenance and Cleaning

belt drive

Belt drivetrains are almost maintenance-free. Cleaning is often as simple as rinsing the belt/cogs using a water bottle and an old toothbrush. No degreaser. No chain cleaner. No dirty hands.

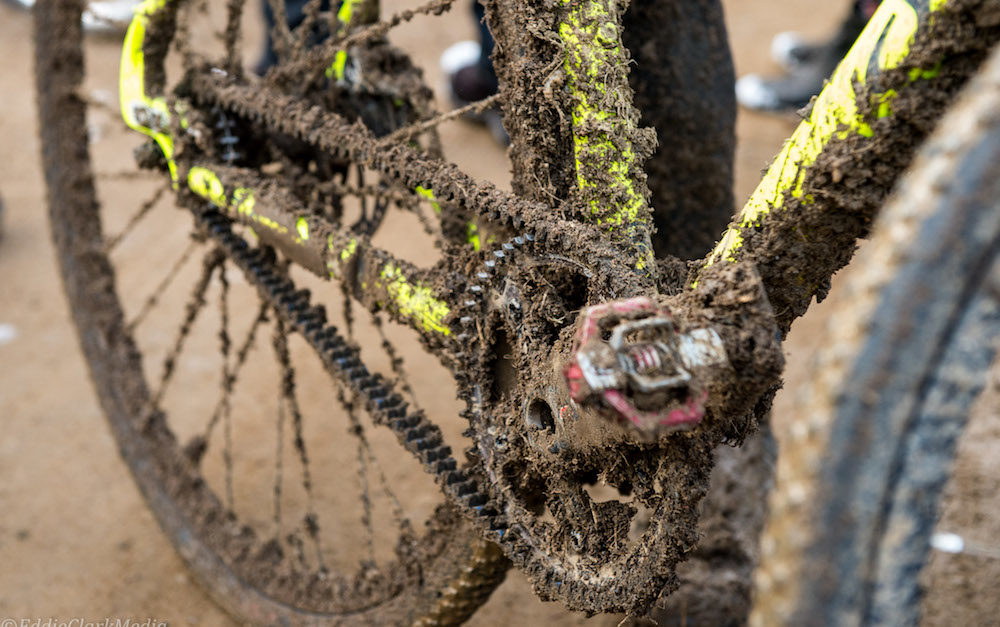
The amount of work you do to maintain a belt will depend on the conditions you’re cycling through. In the driest, dustiest regions of the world, I’ve needed to apply a silicone lubricant to my belt every couple of days. Other times, its months between any maintenance or cleaning. While the belt system seems to do a pretty good job of removing mud and grit, you’ll want to keep the teeth of your belt as clean as possible to get optimal mileage.

Silicone Lubricant: I use a general purpose silicone spray when I hear the first squeak from my belt. My current spray bottle was purchased from an automotive store in rural Bolivia, so I have no doubt similar products can be found all over the world. Gates recommend THIS heavy duty silicone lubricant, in particular.

Hanseline Belt Drive Care Stick: This product has been designed to keep your belt running nicely. It is undoubtedly the most compact product to carry on a bike trip too, but I haven’t yet had the chance to test it.

Handling Belts

You have to be careful with how you handle belts, as misuse can lead to internal carbon fibre damage… and trust me, you don’t want a snapped belt. The main thing is to ensure you don’t stress the fibres in any direction. If you’re storing a belt for a long time, it’s best to leave it fully open.

When installing your rear wheel, it is essential that you do not ‘crank’ the belt back on like you may with a chain. Instead, simply put the belt onto the chainring and cog, then slide your wheel into the dropout.

The great thing about belts is that they coil up nice and small so that you can easily carry them as spares. I generally tuck my spare belt into the pocket of one of my panniers. You’ll need to be careful folding and unfolding your belt – make sure you don’t force it, it should coil very naturally. When it’s folded correctly it should naturally sit in a loop which folds three times.

Tensioning Belts

Gates Carbon Drive tension will vary depending on whether you use a singlespeed or internally geared hub, and how powerful you are as a rider. There are a few different ways to get your tension to what Gates recommend.

Smartphone App: You can download a simple app which will measure how much tension your belt has with your smartphone microphone. Simply hold the phone next to the belt and give it a few plucks and it will quickly give you an average frequency rating.

Gates Tools (Sonic Tension Meter, Krikit Gauge): More accurate tension gauges can be found at specialist bike shops, but I’ve never needed to use these products.

Tension variation (tight spots) may occur when the crank is rotated, so Gates recommends taking several tension measurements at different crank arm locations to find an average. Around a 10lb or 15Hz variation is considered acceptable. If significantly more variation exists, Gates recommends centring the chainring on the crank spider.

Cost

belt drive

Belt drive on a Hilite fat bike using a Pinion gearbox.

CDX: High Performance
Chainring: US $70-110
Rohloff Cogs: US $93-105
Alfine Cogs: US $120-125
Pinion Chainring: US $154
Pinion Cogs: US $128-140
Belts: US $80-105

Kit Total Rohloff: from US $243
Kit Total Alfine: from US $270
Kit Total Pinion: from US $362

Belt Drive Touring Bike Manufacturers

Koga World Traveller

Like the sound of belt drive? I’ve compiled a list of touring bike manufacturers HERE. For those wanting to do a custom build, my list of touring frame manufacturers is found HERE. Expect to spend more than US $1000 / €1000 on a complete belted bike and a minimum of US $500 / €500 on a belted frameset.

If You Have Any Further Questions, I Will Try My Best To Answer Them Below

The post Gates Carbon Belt Drive: Everything You Ever Need to Know appeared first on CyclingAbout.com.


11 Reasons To Tour With A Pinion Gearbox (And 8 Reasons To Not)

$
0
0

In 2010, the first Pinion gearbox was fitted to a bike that was cycled across the Himalayas. By 2012, the world’s biggest bike trade show, Eurobike, had a handful of bikes built around the 18-speed Pinion P1.18 gearbox, impressing bike travellers – myself included. Today, over one hundred bike manufacturers build their frames around the seven different models of Pinion gearbox.

A Pinion gearbox is a fully sealed oil bath of cogs located at the crankset which offers 6, 9, 12 or 18 different gears covering a wider gear range than most 2x and 3x drivetrains. The Pinion system bolts directly onto frames designed to accommodate the technology, meaning there is no chance for a retrofit to your current frame.

How Does It Work?

Pinion Gearbox

The Pinion Gearbox is integrated with the crankset and inside are two gearing sub-transmissions. When you pedal, energy first travels along the lower crankshaft before transferring to one-of-six cog sets in the 1st sub-transmission. The energy is then sent along the upper shaft to the 2nd sub-transmission which offers a high, medium or low version of the initial six gears (6 x 3 = 18 speed). The energy then makes its way back down to the crankshaft again where it can be sent directly to the outside chainring (these three output cogs are free-floating on the crankshaft). The job of the gearbox is to change the chainring speed based on the gear selected, meaning the chainring always spins faster or slower than the crankset. Pretty cool! If this description made no sense to you, check out THIS video describing the process in much more detail, or THIS series of diagrams on the Pinion website.

In this resource, I’ll be discussing the pros and cons of the Pinion gearbox, then I’ll compare it with the Rohloff hub, and lastly, I’ll be nerding out on everything else you can possibly know about this engineering marvel!

Note: This article was originally published in September 2012 but has been completely overhauled April 2019.

11 Reasons To Travel With A Pinion Gearbox

Belt Drive Touring Bike

A Rennstahl 931 stainless steel touring bike equipped with Pinion gearbox.

1. The Ultra Wide Gear Range
The key feature of the Pinion P1.18 gearbox is its 636% gear range. Compared to any other drivetrain, you’ll have easier gears for the steep mountain roads (4km/h) while also having harder gears for the high-speed descents (50km/h+). In comparison, other gearboxes available like the Rohloff 14-speed gear hub measure in at 526% and the Shimano Alfine 11-speed hub at 409%. A 30-speed derailleur drivetrain is the only option that can get close to this range (620% maximum).

2. The Sealed Gear Unit
Pinion gearboxes are a fully sealed gear system, making them impervious to mud, grit, dust, snow and sand. If you spend a lot of time riding in harsh conditions, these gearboxes may just be your savior.

3. The Maintenance-Free Design (Almost)
The only maintenance that you need to complete to the gearbox is a 60ml oil change every 10,000km (or every year, whichever comes first). This job is easy enough to do yourself in remote areas as long as you carry the appropriate syringe, line and oil.

4. The Sturdiness
Pinion drivetrains have very few parts that are susceptible to external damage. You’ll find no exposed derailleurs, delicate hangers or brittle cassettes on a Pinion-powered bicycle. This is especially handy if you fly with your bike, as baggage handlers are notoriously ruthless with the way they throw around bike boxes.

Pinion gearbox

5. The Minimal Drivetrain Cleaning Required
Getting the brushes between your cassette teeth, derailleur pulleys and chainrings is time-consuming and annoying on a bike trip. You can avoid almost all of this nuisance with a Pinion gearbox, especially if you pair it with a carbon belt drivetrain.

6. The Ability To Shift Your Gears Without Pedalling
This is a particularly handy feature for a loaded touring bike. For example, you can pick your gear before you take off at the traffic lights, or select the appropriate gear for starting on an incline.

7. The Ability To Change Many Gears At Once
Thanks to the Pinion gearboxes twist shifter, you can change multiple gears in one go; the limitation is the range of motion in your wrist. You should be able to change about eight gears at once, which I’ve had to do under rapid deceleration on sandy roads.

8. The Equally Spaced Gear Ratios With Small Gear Steps
There is a constant 11.5% jump between each gear, making gear changes very predictable. These gear steps are also very small, allowing you to fine-tune your pedalling cadence at whatever speed you are travelling (P1.18). In comparison, the Rohloff hub has a slightly bigger jump between each gear (13.6%).

Belt drive combined with a Pinion gearbox on a Hilite bicycle.

9. The Instant Gear Changes With No Chance Of Gear Skipping
As soon as you change the gear at the shifter, the gearbox is instantly engaged in the next gear and ready to go – there’s no dilly-dallying around here! As the Pinion gearbox doesn’t require tuning like a derailleur, so there’s no chance of gear slipping either.

10. The Straight Chain/Belt Line
The chain line on a Pinion drivetrain is perfectly straight, resulting in less chain wear. This equates to a longer chain life; I know people who’ve toured for 10,000km+ with a single chain. Choose carbon belt drive with your Pinion gearbox and you’ll likely achieve 20,000km+.

11. The Near Zero-Dish Wheel Build
The Pinion gearbox allows you to use a single speed rear hub design. As the cassette body section of a single speed hub is shorter, it allows hub manufacturers to offer a wider hub shell, resulting in a near zero-dish wheel build. What this means is that you’ll have extra wheel strength and durability thanks to the more even tension across the spokes.

8 Reasons To Not Tour With A Pinion Gearbox

Pinion Gearbox

The two shifting cables connect to the non-drive side of the Pinion gearbox.

1. The Gearbox Design Is Heavier Than Most Drivetrains
The Pinion gearbox adds 200 to 700 grams when compared to the equivalent Rohloff hub, and 600 to 1100 grams when compared to a 3x touring drivetrain (the weight variance depends on the gearbox model). The Pinion-specific frames also add a few hundred grams. But remember to keep these numbers in perspective; when you consider the weight of a bike loaded with luggage, food and water, these figures are rather insignificant. My precise drivetrain weight analysis can be found HERE.

2. They Are Less Efficient Than Derailleur Gears and Rohloff Hubs
The Pinion has additional frictional losses when compared to other drivetrains. I’ve actually estimated it to lose 3-4 minutes per 100km when compared to a Rohloff hub or derailleur gear system. You can read my full analysis HERE.

3. The Price
There’s no beating around the bush here – Pinion gearboxes are the most expensive drivetrain you can buy. Expect to pay a minimum of €3000 for a bike complete with a P1.18 gearbox. You can somewhat justify the cost of buying a bike with a Pinion gearbox knowing that you won’t need to replace anywhere near as many cassettes/chains/chainrings – but you’ve got to ride your bike for many years to get that payoff. Luckily the gearbox will probably last as long as you do!

Pinion gearbox

A bare Santos frame showing the six mounting points for a Pinion gearbox.

4. The Dedicated Frame
While an internal gear hub can be fitted to almost any frame, Pinion gearboxes require a dedicated frame design that’s specific to its six-bolt design. This essentially means that you can’t change your mind and go back to derailleurs (or an internal gear hub) down the track.

5. The Need To Send The Gearbox In For Repair
In the event of some kind of mechanical failure, you will need to ship your Pinion gearbox to Germany for repair. I can understand that this may be a deterrent for you if you spend a lot of time in remote locations. That said, many people have already travelled to some of the hardest-to-access parts of the world with Pinion gearboxes, and the consensus is that complete failure is highly unlikely. I know a few people who’ve had oil leaks on their bike trips (luckily this probably won’t stop you being able to ride), and there were some early issues with the crank arms working themselves loose. But year-on-year the Pinion gearboxes are getting more reliable.

6. The Spare Parts Need To Be Shipped In
Need a new cog, some cables or some gearbox oil? You can’t just go to any old bike shop to pick them up. Most of the time you’ll have to plan ahead of time and order any replacement parts online or through a dealer.

pinion gearbox

Pinion offer their gearbox with a neat twist shifter, but there are also aftermarket options available (more below).

7. The Twist Shifter
The twist shifter divides people; I personally love twist shifters as I can dump many gears at once. The good news is that if you use flat bars you can now switch to some aftermarket trigger shifters. And for those with drop handlebar bikes, there are a few nice aftermarket shifter options for you too!

8. The Fact You Can’t Shift Under Load
While it’s not best practice to shift under load on any drivetrain, a derailleur has a much higher tolerance for it. There is a technique to shifting with a Pinion gearbox where you’ll need to back off on your power for a split second to make the shift. This takes a bit of time to master but becomes second nature in no time.

Pinion Gearbox VS Rohloff Speedhub

pinion gearbox

Don’t know whether to go with Pinion or Rohloff? Why not combine both so you can have 168 individual gears! *this is a joke*

Pinion 18-Speed P1.18 Gearbox
– Pinion gearboxes have a wider gear range at 636% compared to 526% for a Rohloff hub.
– Smaller gear steps at 11.5% compared to 13.6%.
– Five-year warranty compared to two-years with a Rohloff hub.
– It runs silently in all gears whereas the Rohloff makes a whirring sound in gear 1-7.
– 10,000km oil changes (or one-year) compared to 5,000km with a Rohloff hub.
– You can change wheelset sizes (eg. 29″ and 27.5+) if your bike permits it (as opposed to needing two Rohloff hubs).
– Easy to swap out the entire gear system if there is a failure (compared to dismantling/rebuilding a Rohloff wheel).

Rohloff 14-Speed Internally Geared Hub
– The numbers suggest the Rohloff hub is more efficient in terms of energy transfer than a Pinion gearbox.
– Rohloff frames are a touch lighter to build. The hub itself is 700 grams lighter than the equivalent Pinion P1.18 gearbox too.
– Rohloff bikes are around €700-1000 cheaper (that’s US $1000+).
– Faster ‘pickup’ between pedal stroke and gear engagement (the gearbox and hub freewheel need to engage on a Pinion).
– Gear cable changes are much easier.
– Compatible with mid-drive eBike motors.
– With over 20 years in production Rohloff have had more time to iron out any kinks in the product (Pinion have been producing gearboxes for eight years in comparison).

Click HERE to read my article 16 Reasons To Tour With A Rohloff Hub.

Pinion Gearbox Models

P-LINE
The P-Line is most commonly found on touring and bikepacking bikes as the gear range and gear steps are unparalleled by any other drivetrain type (P1.18). In addition, the extra weight of this gearbox is almost insignificant by the time you add equipment, food and water to your bike.

P1.18 // 18 gears. 636% range. 11.5% gear steps. 2700 grams. Best for touring and bikepacking bikes.
P1.12 // 12 gears. 600% range. 17.7% gear steps. 2350 grams. Best for mountain bikes.
P1.9XR // 9 gears. 568% range. 24.3% gear steps. 2200 grams. Best for e-bikes.
P1.9CR // 9 gears. 364% range. 17.5% gear steps. 2200 grams. Best for urban bikes.

C-LINE
The C-Line may have a slightly reduced gear range and larger steps between each gear, but these gearboxes have the advantage of a 250-gram weight saving due to the magnesium body, plus they’re 8mm narrower between the pedals (q-factor).

C1.12 // 12 gears. 600% range. 17.7% gear steps. 2100 grams. Best for mountain bikes and off-road bikepacking bikes.
C1.9XR // 9 gears. 568% range. 24.3% gear steps. 2000 grams. Best for e-bikes.
C1.6 // 6 gears. 295% range. 24.3% gear steps. 1800 grams. Best for urban bikes.

P1.18 VS C1.12
Weighing up between these two gearboxes? For touring/bikepacking, it’s recommended to go for the P1.18 as the gear steps are much smaller. This allows you to keep your pedalling speed (cadence) much more constant with gear changes (most noticeable when cycling on the flat). If you’d like to get a feel for what each of the 17.7% gear jumps would be like, you can shift from the 36-42t on a mountain bike cassette or 11-13t on any other cassette.

Pinion Gearbox Frames: Tensioners

Pinion Gearbox

Sliding Dropouts
The most common form of chain/belt tensioner is sliding dropouts. By incorporating a small adjustable retaining bolt, you’re able to ensure the wheel is perfectly aligned when setting up, and it makes wheel installation/removal a breeze. Pictured is a lovely stainless steel dropout manufactured by Co-Motion Cycles.

Eurobike 2018

Eccentric Gearbox Mount
Tout Terrain offer belt/chain adjustment up front via an eccentric gearbox mount which is super neat. A small dial makes any fine tuning very simple.

Santos Travelmaster

Belt or Chain Tensioner
A handful of companies use a roller at the gearbox which is said to maximise the rear triangle stiffness for belt drivetrains. Pictured is a belt tension designed by Santos Bikes.

Pinion Gear Ratios

Belt Drive – Gates Carbon Drive
A 32 tooth front sprocket can be combined with 20-34 tooth cogs in two-tooth intervals (eg. 20, 22, 24). A common drive ratio for Pinion gearbox touring bikes is 32-28t as that can have you pedalling at 5km/h with a decent cadence for climbing, and 53km/h in the top gear on the downhills. The closer you get to 1:1, the steeper the hills you will be able to cycle – 32-32t is recommended for off-road riding.

Chain Drive – Pinion Longlife
Pinion has a series of sprockets/chainrings for travelling in extreme conditions. The teeth of the ‘Longlife’ series chainrings are 1mm wider and are designed for use with their extra wide X101 chain. The front chainrings are available in 30 teeth, and the rear sprockets are available in 30 or 26 teeth. A recommended setup for touring would be 30-26t, which matches very closely to a belt drivetrain running 32-28t.

You can calculate your gear inches, or speed at certain cadences HERE.

Belt Drivetrains

pinion gearbox

Belt drivetrains, when combined with Pinion gearboxes, will decrease your drivetrain maintenance significantly.

You’ve probably already noticed that the majority of Pinion touring bikes are combined with belt drivetrains. That’s because belt drive offers:
– An extremely long service life of 20,000km+
– Little to no maintenance other than a spray with your water bottle (and maybe some silicone spray)
– Silent engagement similar to a perfectly lubed chain
– A marginally reduced weight when compared to a chain

You can find out everything you ever need to know about Gates Carbon Belt Drive HERE.

Pinion Gearbox Fat Bikes, Tandems and Recumbents

Fat Bikes
Pinion have created a special offset spider and extra-wide crank arms so that you can mount their gear system to a fat bike. Pictured above is a Centurion, but you can also find Pinion fat bikes from Mi Tech, Nicolai, Ventana, Carver and Hilite (pictured).

pinion gearbox

Tandems
Wondering why there is only one Pinion tandem in existence? Well, it requires some custom machined parts plus three belts to pull it off – and Co-Motion Cycles did just that! The difficulty is that you cannot fit the gearbox at the rear crankset (stoker) because Pinion does not offer a tandem crankset. And you cannot locate the gearbox at the front crankset (pilot) because the Pinion chainring spins at a different rate depending on the selected gear (therefore, it can’t be used as a tandem ‘timing chain’).

Pinion Gearbox

Recumbents
Pinion gearboxes are becoming more and more popular on touring recumbents. Pictured above is a dual suspension Azub Mini with red Pinion P1.18 gearbox.

Shifters

Cinq5 have just released these neat trigger and road shifters for the Pinion gearbox.

Along with the stock grip shifter, there are a few aftermarket products available, including the:
Cinq5 Shift:R Road shifter & hydro brake levers for drop bars
Cinq5 Shift:R Tour thumb shifters for flat bars
Co-Motion Twist Shifter for drop bars
Van Nicholas Divisible handlebar to fit the standard Pinion shifter to drop bars

Rear Hubs

pinion gearbox

While you can use any cassette hub with a Pinion gearbox, single speed hubs are the most ideal because the distance between hub flanges is wider and almost zero-dish, resulting in stronger wheel builds. Due to the slow-ish engagement of this Pinion drivetrain, you’d ideally fit a hub with as many engagement points as possible to reduce the delay between pedal stroke and rear wheel drive. Top-notch single speed hubs include the Onyx Hyperglide SS with instant(!) engagement, Industry Nine Hydra with 690 engagement points, Pinion H2R with 120 engagement points and Chris King ISO with 72 engagement points.

Electric Bikes and Pinion Gearboxes

pinion gearbox

Santos uses GoSwissDrive hub motors for their Pinion eBike builds.

As the Pinion gearbox occupies the space of a mid-drive electric motor, it means front or rear wheel motors are the only compatible options. While many excellent rear hub motors are available, it’s worth noting that the mid-drive motor design is often regarded as the ‘best’ motor type overall. This is because mid-drive uses your bike’s gears, resulting in optimal torque in a variety of situations (eg. climbing or on the flat). Mid-drive motors tend to be both a bit more efficient (better range) and effective (especially on hills).

You can read all about electric touring bikes HERE.

Cost

pinion gearbox

The Co-Motion Divide Pinion is custom made for you from US $6715. In comparison, the Rohloff version tallies up to US $5560.

Pinion gearboxes are only available for bike and frame manufacturers. Touring bikes with Pinion gearboxes start at €1999 for a P1.9CR model and €2949 for a P1.18 model, while most premium bike brands offer builds in the €4000-5000 range. Framesets with Pinion gearboxes are often in the €2000-3000 price range.

When comparing complete bike prices between Pinion and Rohloff builds, most manufacturers charge a premium of €700-1000 for a Pinion P1.18 equipped bike, with all other components equal.

Pinion Touring Bike Manufacturers

Belt Drive Touring Bike

The IdWorx oPinion aluminium touring bike.

There are more than 30 bike companies that produce touring and bikepacking bikes with Pinion gearboxes. You can find a complete list of the bikes available including pricing HERE.

Have You Travelled With A Pinion Gearbox? How Are You Liking It?

The post 11 Reasons To Tour With A Pinion Gearbox (And 8 Reasons To Not) appeared first on CyclingAbout.com.

Designing The Ultimate Touring & Bikepacking Handlebars, the KOGA Denham Bars!

$
0
0

It was late-2017 and I was in the final stages of planning my 3-year bike adventure from Argentina to Alaska. I was chatting to Aloys from KOGA who was interested in what the ultimate touring handlebar would look like to me. I told him they’d have to be optimized around the three most important characteristics for touring: bike control, comfort and speed – but we left it at that.

With lots of ideas buzzing around my head, I started sketching. I was notably inspired by the Velo Orange Crazy Bars that I’d been using for the two years prior to this trip – in particular, I liked the combination of the drop bar and flat bar features. I was sure this design was on the right track, but the angles and widths didn’t quite gel with me. The 45° rearward bar sweep put my hands diagonally across the grips, which resulted in hand numbness if I didn’t wear my gel-padded gloves. And the bullhorns worked out to be too long for comfort and not optimized in terms of ergonomics.

After a few weeks of thinking about and testing various handlebar styles, I was ready to unleash the ultimate handlebar design. I submitted my drawings to KOGA and waited for them to do their magic…

The KOGA Denham Bars

koga denham bar
KEY INFORMATION:
• 34° sweep at the grips
• 15° inward bend at the bullhorns
• 8° sweep at the bar tops
• 711mm width
• 25.4mm stem diameter
• Barend shifter compatible
• Black colourway
• 400-450 grams
• $80 / €70 / £65 RRP

Creating The Perfect Handlebar

KOGA Denham Bars

Steering Leverage & Optimal Bike Control
Fitting a wide handlebar to my touring bikes is the most important modification I’ve ever made. That’s because wide bars increase the steering leverage up front, which allows you to maintain a light steering feel, even with a front load. As a result, you can expect better bike control at high speeds (thanks to the quicker steering inputs) and low speeds (thanks to the micro adjustments you can make to help with your balance). This is most noticeable when you’re climbing slowly up a hill, or when you need to quickly avoid something on the road while travelling at speed. Oh, and the bar width I’ve chosen suits smaller riders too – for comparison, standard bars fitted to extra-small women’s mountain bikes are actually a touch wider (720mm).

Maximizing Aerodynamics
If you’ve been following this site for a while, you’ll know I have a keen interest in aerodynamics. In fact, I once spent a whole day riding around a velodrome to determine the precise speed differences between various luggage setups. The key aero feature of the Denham Bars is the 40cm wide ‘bullhorn’ section which mimics the brake hoods of a road handlebar (see pic below). When using this position your elbows will naturally tuck in to reduce your body’s frontal area, granting you the ability to go faster with the same pedalling effort. In fact, my experience is that the ‘bar tops’ are more aerodynamic than the bullhorns as this narrow/sweptback section allows you to naturally lean further forward! I haven’t measured the actual speed difference between the hand positions on the Denham Bars, but given your body is a big wind sail – the difference is certainly noticeable. And even if you don’t intend to cycle anywhere fast, by putting your body in a more aerodynamic position you’ll be able to better tackle those pesky headwinds.

Denham Bar

Optimizing Comfort
These handlebars not only increase your bike control and aerodynamics, but they’re also supremely comfortable for a few reasons. Firstly, there are three distinct hand positions that give you the opportunity to change the pressure points on your hands. As the positions are quite varied, you will also make use of different muscles in your arms, back and neck with each position change – resulting in less muscle loading throughout the day. The 34° rearward sweep at the grips is perfect for any bike setup where the handlebars are approximately level with the saddle or higher. My handlebars are actually about 8cm lower than my saddle, which I would consider the limit for this amount of sweep – any lower and you’ll be better off with a bar in the 20-30º sweep range (perhaps I’ll design a ‘performance’ version of this bar in the future). In addition, the bullhorns are super short and have been angled inwards by 15° to give you a really snug fit, and the ‘bar tops’ offer a gentle 8° backsweep to pull your shoulders in on the open road.

Handlebar Reach
A very important aspect of these handlebars is the usability of each of the hand positions. By cleverly optimizing the widths and angles, I’ve been able to create a handlebar that offers a very similar effective ‘reach’ from saddle to bullhorn, bar top or grips. In short, your body won’t be excessively stretched when using any of the hand positions, allowing you to comfortably ride for long periods of time wherever your hands prefer.

Trans Ecuador Mountain Bike Route

Suitable For Drop Bar Frames
As the handlebar ‘reach’ is not all that different between hand positions, the cool thing about these bars is that they can be retrofitted to almost all touring bikes! By switching from drop bars to Denham Bars, you’ll still have your hoods position and bar tops, but you’ll also be able to take advantage of the steering leverage too. I’ve got a few other reasons for making the switch HERE.

Suitable For Mountain Bike Frames
These bars are also a nice upgrade to an off-road touring bike like the Surly Troll or Ogre. If you’re coming from a typical flat bar or Jones Loop bars you can fit the Denham Bars without a stem change. The Surly Moloko is a bit different as the effective ‘reach’ is longer in all hand positions, so in order to maintain the same body positioning, you’ll need to add a few centimetres to your stem length if switching to the Denham Bars.

Appropriate Stiffness
KOGA have minimum standards when it comes to handlebar stiffness and strength. A high degree of handlebar stiffness is important for safety, but it’s also about getting the right steering ‘feel’ – make them too stiff and you reduce rider comfort. In my opinion, the Denham Bars are spot on in terms of stiffness, comfort and feel.

Handlebar Bag and Bikepacking Bag Compatible
One of the biggest differences between the Denham Bar and a Jones Loop or Surly Moloko handlebar is that it fits a handlebar bag. I like to keep my DSLR camera in a handlebar bag because it best protects my camera from shock and vibrations. I also keep other valuables in this bag (passport, money etc), allowing me to take it off my bike in seconds and run into a supermarket, for example.

Grip and Bar Tape Recommendations

My favourite grips for bike travel are the ESI Chunkys ($16 on Amazon) as they dampen vibrations like nothing else. I’ve also heard great things about the Ergon GC1 grips ($26 on Amazon) which are optimized for rearward-swept handlebars and distribute pressure better across the whole palm. I plan to fit a set of GC1s soon, so I’ll let you know how they go!

For the bullhorns and bar tops, I’d recommend a nice thick bar tape (or even a double wrap!) as it will dampen more vibrations. Check out the gel cork bar tape from Cinelli ($16 on Amazon) for something nice and comfortable.

Buying The KOGA Denham Bar

2020 Koga WorldTraveller

As KOGA is a bicycle company first, their components are exclusively available through their dealer network only (much like Giant or Specialized parts and accessories). I know that Vakantiefietser (NL) keep these in stock and ship internationally, and so does CycleSense (UK). If you know of other dealers that ship internationally, please let me know.

Alternatively, you can spec a KOGA Denham Bar with your WorldTraveller 2.0 custom build! You can read all about the recently released WTS 2.0 HERE.

2020 Koga WorldTraveller-S

For a €2530 upgrade, you get a KOGA WTS 2.0 touring bike with your Denham Bars! 😎

Do You Have Any Questions About The KOGA Denham Bars?

The post Designing The Ultimate Touring & Bikepacking Handlebars, the KOGA Denham Bars! appeared first on CyclingAbout.com.

Saddle Comfort for Cyclists: The Best Bicycle Touring Seats

$
0
0

Is your saddle comfortable?

Over the years, I’ve experimented with, sold and met people with all kinds of different saddles. Unfortunately, there is no ‘go-to’ saddle because we all have different riding positions, different levels of flexibility and variations in our sit bone widths.

All of these factors rule out a wonder-saddle that we can just pull off the shelf and fit on our bikes. Instead, we have to know a bit about seats and how comfort works, and after that, we can narrow our options right down to just a few.

I’ve compiled a list below of 30 saddles that have worked for many riders. But first, let’s learn about discomfort, body positioning and saddle characteristics so you can optimize the saddle shape and style for your needs.

This article was originally published Sep 2015 but has been updated in May 2019.

UrbanVelo Image

Selle Anatomica Saddle. Image: Urbanvelo.org

Why Do We Get Saddle Discomfort?

Arteries and Nerves of the Pubic Rami

Saddle pain is mostly linked to nerve and artery compression, but can also come in the form of saddle sores. Discomfort is recognised through acute pain, numbness and tingling. If you experience any of these, you’re likely putting excessive pressure on sensitive nerves and arteries running along your pubic rami. Pressure here reduces blood flow, stymieing oxygen delivery to tissues and in turn, may lead to broader medical issues. In general, women are more susceptible to direct perineal pressure given their wider subpubic angle which exposes more of their pubic rami.

Saddle discomfort can be eliminated with a more suitable body position, and/or more appropriate saddle for your needs.

Saddle Sores

These skin irritations are mostly due to the continuous pressure and friction between your skin and bicycle seat, but can also be attributed to hair follicle infections and chaffing. You can eliminate saddle sores through a good riding position, a suitable saddle, chamois cream and a good pair of cycling shorts.

I got into much more detail on how to prevent and treat saddle sores HERE.

pelvic-bone-diagram-bicycle-saddle-contact-points

Bike Fit

Have you had your bike fitted by a professional?

One of the biggest factors in saddle comfort is bike fit and positioning. First, you’ll need to make sure you have the correct saddle height and position in relation to your pedals. If you’re up too high or too far back, the chances are that your optimal saddle won’t be working the way it should.

You’ll next need to check how your bike fit is dictating your pelvic positioning by going for a ride. Unless you’re riding in a performance position, you’ll want to be sitting towards the rear of your saddle. That’s the widest, flattest part of the seat, and the best place to support your weight. If you find yourself sitting on the front of your saddle constantly, that’s often a sign that something is wrong with your positioning. This may be based on your bike setup or even your flexibility.

Lower Back Flexibility

People with flexible lower backs tend to be able to rotate their pelvis up, and use their sit bones more effectively. If you’re less flexible, you’ll rotate your pelvis forward and experience pressure on your nerves and arteries. If this is the case, a bike fitter will raise your handlebar height and give you a saddle which can take pressure off your pubic rami.

Trek Precision Fit

Body Position and Riding Style

What pressure zone are you?

Your body position on a bike has a big impact on how you use your saddle. Bicycle saddles are often designed to minimise pressure, resulting in all kinds of different padding types, profiles, curvatures and widths.

The Bontrager diagrams below are fantastic for mapping pressure zones in different riding positions. A good way to determine what position you ride in is to get a friend to take a photo of you while you’re riding along.

In general:
– Comfort/upright body positions require saddles with more padding, more width and a flatter top to support your sit bones.
– Performance body positions require saddles that are lightly padded, curved and narrower to support your pubic rami.

bontrager-biodynamic-saddle-posture-comparisons bontrager-biodynamic-saddle-posture-transition bontrager-biodynamic-saddle-posture-profile bontrager-biodynamic-saddle-posture-curvature

Sit Bone Width

Everybody has a natural variation in sit bone width. In my experience, you want to measure your sit bone width and add about 20mm to get a suitable saddle width. If your saddle is too wide for your pelvis you’ll experience excessive rubbing. If it’s too narrow you’ll find your sit bones are not cradled well.

In general, the more upright your position is, the wider the saddle you should use. You’ll find saddle widths ranging from about 125 to 180mm. You can measure your sit bones by heading into a bike shop and using a sit bone sizing tool. These are available from Trek, Specialized, WTB and more.

Trek Inform Sit Bone Tool

Bontrager Inform Sit Bone Tool. Image: BikeRumor.com

Saddle Firmness

When you’re travelling by bike, you’ll find yourself sometimes doing long days. A general rule is that the further you ride, the firmer you’ll prefer your saddle. Miles Smith is currently attempting the year record (400km every day!) using a plastic saddle with minimal give (it’s simply the right shape). Doing just 80km on a soft gel saddle, you’ll find your sit bones moving about, resulting in undesired chaffing.

Best Bike Seat

Miles Smith is currently doing over 400km per day, for 365 days on this saddle!

Saddle Shape

Bicycle saddles have a ‘nose’ for both balance and bike control; the benefits of the nose are often most noticeable when descending. Some brands forgo a saddle nose in order to reduce pubic rami pressure, but the reason they aren’t widespread is due to the importance of bike control when riding a bike!

Noseless Saddle

Women’s Specific Saddles

Women have different downstairs regions. We know that. But how different are women’s saddles?

Women’s saddles are often wider than male offerings, but interestingly the difference between male and female pelves isn’t actually that significant. If you compared bell curves of pelvic widths for males and females, you’d find a huge overlap. The major differences found in anatomy are almost all soft tissue related.

Cutouts to the saddle nose are generally more important for women who employ a performance position on their bike. This is due to the subpubic angles of their pelves which are wider in women, making soft tissue compression more of a risk.

If your bike offers an upright/comfort position, you’ll experience less soft tissue pressure and don’t need to limit yourself to just women’s specific saddles.

SMP Dynamic Lady Saddle

Cycling Without Padded Cycling Shorts

Padded cycling shorts are not mandatory, and can certainly be left at home if you set up your touring bike accordingly. You’ll need to employ an upright/comfort body position, putting more of your weight on your sit bones and less on your pubic rami. Couple this with a slightly wider saddle with a bit of ‘give’, and chamois-free riding may be possible!

The more performance-oriented your position, the more likely you’ll need a set of padded shorts to help you out.

The Best Bicycle Touring Saddles and Seats

Here’s where I’d start for a universally comfortable saddle:
Best Performance Mens – WTB Rocket V – $53 on Amazon
Best Comfort Mens – Brooks B17 – $76 on Amazon // Serfas RX – $56 on Amazon
Best Performance Womens – Selle Italia Lady Gel Flow – $116 on Amazon
Best Comfort Womens – Brooks B17 Imperial S – $106 on Amazon // Serfas RX – $56 on Amazon

Brooks Bicycle Touring

If you think these saddles may not suit you, I’ve met a lot of people who’ve had success with the following:

Performance Men (Posture 1, 2 or 3)
Bontrager Montrose – Popular MTB saddle
Brooks Cambium C17 Carved – Firm saddle that flexes with your sit bones – $83 on Amazon
Charge Spoon – Popular MTB saddle – $32 on Amazon
Fizik Aliante – Popular upright road saddle – $99 on Amazon
Prologo Zero II – Popular road saddle – $89 on Amazon
SDG Belair – Popular MTB saddle – $35 on Amazon
Selle Italia Gel Flow Man – Popular upright road saddle – $108 on Amazon
SMP Pro – Mark Beaumont’s favourite saddle for his around the world records – $239 on Amazon
Specialized Phenom – Often good for both men and women
Tioga Spyder – Miles Smith’s year record saddle – $84 on Amazon
Velo Race 3D FC / Senso Sport IIO – This is my personal touring/bikepacking saddle of choice
WTB Rocket V – Popular MTB saddle, more padded than the Silverado – $53 on Amazon
WTB Silverado – My personal MTB saddle of choice – $35 on Amazon

Upright/Comfort Men (Posture 4 or 5)
Brooks B17 – The most common bicycle touring saddle for men – $76 on Amazon
Brooks Flyer – A sprung B17 for a little extra comfort – $105 on Amazon
Rivet Cycle Works – Leather saddle available in three widths 
Selle Anatomica X2 – Another widely popular leather touring saddle – $159 on Amazon
Selle Italia FLX Gel – This Italian saddle manufacturers upright riding option – $27 on Amazon
Serfas RX – Very good value and widely comfortable – $56 on Amazon

Performance Women (Posture 1, 2 or 3)
Bontrager Ajna – Popular road saddle with minimal padding
Selle Italia Lady Gel Flow – A little extra padding, but still designed for performance positions – $116 on Amazon
Specialized Ruby – Highly popular road saddle with minimal padding

Upright/Comfort Women (Posture 4 or 5)
Brooks Imperial B17S – A common leather touring saddle for women – $106 on Amazon
Rivet Cycle Works – Leather saddle available in three widths
Selle Anatomica X2 – Another widely popular leather touring saddle – $159 on Amazon
Selle Italia FLX Gel – This Italian saddle manufacturers upright riding option – $36 on Amazon
Serfas RX – Very soft saddle with a long cutout – $56 on Amazon
Terry Liberator / Butterfly – Soft saddles with cutouts – $72 on Amazon
WTB Deva – Padded saddle that’s good for men and women – $49 on Amazon

Summary

You should now be armed with enough knowledge to make an informed decision on which type of saddle will suit you best.

Remember that body position, sit bone width and your lower back flexibility will hugely dictate optimal saddle shapes. For upright body positions, you’ll need to employ a saddle that’s a bit wider with more padding. Firmer saddles are often better for distance riding in sportier positions when coupled with padded shorts. Before you start making saddle changes, make sure to optimize your saddle height and bike fit.

If you’ve got a saddle that you love and think people should know about it, drop a comment below.

Head HERE For My Article On How To Prevent And Treat Saddle Sores

The post Saddle Comfort for Cyclists: The Best Bicycle Touring Seats appeared first on CyclingAbout.com.

Seatposts: Often Overlooked Yet Critical For Your Comfort (Lab Testing)

$
0
0

A good seatpost is the key to achieving a comfortable ride. That’s because along with your tyres, seatposts actually make up the bulk of your bike’s comfort – in fact, a well-designed carbon seatpost flexes at a rate 7x greater than a steel frame!

The Ergon CF3 carbon seatpost requires 69N of force to flex one vertical millimetre (0.04″). To put that into context, the CF3 will flex 7mm (0.3″) when you simply sit in your saddle. In comparison, a typical bike frame requires more than 500N of force to flex one vertical millimetre, demonstrating how much a seatpost (and how little a frame) plays in the comfort equation.

In short, flex seatposts are a great way to achieve a super comfortable ride as they:
(a) Reduce high-frequency road vibrations, and;
(b) Take care of the bigger impacts (think rough dirt roads) thanks to their 20mm+ (0.89″) of vertical flex.

In this article, we will discuss the different seatpost types and materials, before looking at the difference between vibration damping and seatpost deflection. We’ll then check out some of the lab testing that’s been completed and will finish up with my seatpost recommendations.

Note: This article was originally published July 2015, but has been updated in May 2019.

Niner Seatposts

The Most Overlooked Bike Component

Very few people think about the ride quality of a seatpost, which is precisely why I think they’re the most overlooked bike component. They’re arguably even more important for bike travel as touring and bikepacking bikes are usually set up with higher handlebars, resulting in a larger proportion of our body weight on our saddles (normally 80%+). Couple that with our penchant for seeking rough roads, and seatposts really are the key to unlocking all-day comfort on your bike.

Bikes fitted with narrower tyres have the most comfort to gain from using a flex seatpost. This is because a larger proportion of the overall shock and impacts will need to be taken up by the seatpost. Bikes with wider tyres still have a lot to gain too, as flex posts help to take the edge off bigger impacts.

Trek’s IsoSpeed Decoupler allows the seat tube to flex independently of the top tube.

Over the last decade, bike manufacturers have been optimizing their bikes around comfort, and the seat tube has been the main focus. Trek have developed what they call an ‘Isospeed Decoupler’ which is integrated into their seat tube, offering around 20mm of vertical compliance. Giant created a unique seatpost shape called D-Fuse which will flex around 12mm underneath you. And Cannondale has stuck with something a bit more traditional, using a smaller-than-usual seatpost diameter paired with a flat-section carbon layup to achieve a super comfortable ride.

The good news is that you don’t need to buy a fancy new bike to achieve a high degree of comfort. A handful of aftermarket seatposts can match the vertical flex and vibration damping of the Trek, Giant and Cannondale designs, allowing you to transform whatever you ride into something that rides ultra smooth.

The Different Types of Seatpost

Carbon, Aluminium and Titanium Seatposts
Seatposts are manufactured using three different construction materials. The majority are made from aluminium which is lightweight, reliable and very cheap to manufacture. Titanium seatposts are much less common and are typically paired with titanium frames for a nice aesthetic. Carbon seatposts are lighter and more expensive, but more importantly, they can be optimized using different layering techniques to achieve an unparalleled ride quality.

Suspension Seatposts
There is a handful of suspension seatpost manufacturers, but perhaps the most common is Cane Creek. The advantage of a suspension seatpost is that it will help absorb big hits and other impacts from the ground below, allowing you to pedal through bumps while also reducing the fatigue on your body. Suspension seatposts have been measured to be multiple times more effective than any rigid seatpost. The main disadvantage is the increase in weight.

Elastomer Seatposts
Specialized has been incorporating elastomers into their flex seatposts for over a decade so that they can achieve their desired ride characteristics. The latest-generation carbon elastomer post (pictured on the right) is said to offer 18mm of vertical flex, is reasonably lightweight and is also reliable as there are no moving parts.

Straight and Setback Seatposts
Seatposts are available in different offsets ranging from 0 degrees to 35 degrees. A setback post puts you further behind your crankset and a straight seatpost moves you closer. The amount of setback or offset is best determined through a basic bike fit at a participating bike shop. They will look at the relationship between your knee and pedal axle, as well as your hip angle/mobility and will determine how far you should sit behind your crankset. You can read more about bike geometry HERE and about getting a personalized bike fit HERE.

Seatpost Damping

Microbac Laboratories’ test jig for comparing the different characteristics of seatposts. Image: BikeRadar

Damping is the speed at which a seatpost will move over repeated bumps, and it’s the most important characteristic for cycling on smoother surfaces.

A seatpost that dampens vibrations effectively will insulate a rider from much of the road buzz coming up through their bike. Seatposts with the best damping characteristics have been tested to be more than twice as effective than those which perform poorly.

We currently have two damping lab tests to draw some conclusions from:

Seatpost Damping

Velo Magazine’s damping test results with 14 different 27.2mm seatposts.

Velo Magazine’s 2012 test results show that:
– Almost all carbon seatposts performed better than the aluminium or titanium options.
– Straight seatposts (carbon, titanium & aluminium) are worse at damping shock than setback seatposts.
– The Cane Creek suspension seatpost was surprisingly not as effective at mitigating road buzz as two carbon seatposts.

Microbac Laboratories collected data on many of the newer flex seatpost models. This test includes the Ergon CF3, Ritchey WCS Carbon Flexlogic, Canyon S13 VCLS, Specialized CG-R and Syntace P6 Hi-Flex. Image: BikeRadar

The Microbac Laboratories’ 2016 test results show that:
– The Ergon CF3 leaf-sprung seatpost absorbs 2-3x more shock than other flex carbon seatposts.
– The only aluminium seatpost in the test (Thomson) is simply no match in terms of damping.
– The Specialized post is somewhat underwhelming on the road considering its radical design.

There is a caveat here! This data only applies to bikes without luggage fitted. Why? Rear panniers and bikepacking seat packs are highly effective at mitigating vibrations, so you won’t notice a huge difference between a carbon or aluminium seatposts when travelling with luggage.

Seatpost Deflection

Deflection is the total movement that a seatpost will move after an impact.

A seatpost with more deflection will reduce the fatigue on your body as it protects you from harder jolts like unexpected potholes or dirt road corrugations. It’ll also allow you to pedal through bumps on rougher terrain.

When testing seatpost deflection, two axes of measurement are usually taken – vertical and horizontal – but they almost always track proportionately. The Velo Magazine lab test data shows that under the specific force applied, some seatposts were able to deflect twice as much as others.

Seatpost Flex

Velo Magazine’s deflection test results with 27.2mm seatposts.

The results are a bit hard to read, so let me type that out:
1. Cane Creek Thudbuster ST (13.7mm, 19.3mm)
2. Ritchey Carbon Straight (5.8mm, 4.8mm)
3. Ritchey Carbon Setback (5.5mm, 5.0mm)
4. Cannondale Carbon (5.4mm, 4.3mm)
5. Zipp Straight Carbon (4.9mm, 4.2mm)
6. Ritchey Setback Aluminium (4.8mm, 4.5mm)
7. Specialized FACT Carbon (4.8mm, 4.4mm)
8. FSA Straight Carbon (4.8mm, 4.2mm)
9. Thomson Straight Aluminium (4.8mm, 4.2mm)
10. FSA Setback Carbon (4.3mm, 4.2mm)
11. Moots Straight Ti (4.3mm, 4.2mm)
12. Moots Setback Ti (4.2mm, 4.0mm)
13. Zipp Setback Carbon (3.9mm, 4.0mm)
14. Thomson Setback Aluminium (3.5mm, 3.6mm)

The conclusions we can draw from the Velo Magazine test:
– The best performing regular seatposts offer 50-60% more flex than the worst performing.
– Carbon is able to deflect more than both aluminium and titanium.
– Setback seatposts tend to be worse performing, making up places 10, 12, 13 and 14 in this test.
– In another league altogether is the Cane Creek Thudbuster suspension seatpost which offers 3-4x more flex than a regular seatpost. It’s also worth noting that this is under half of what it can flex (33mm).

seatpost

The Microbac Laboratories deflection test using the minimum and maximum seatpost insertions at different rates of force.

The conclusions we can draw from the Microbac Laboratories test:
– There is a linear relationship between deflection and force (for a small range), helping us to predict flex at different force rates.
– Lighter riders are better suited to the Ergon/Canyon seatposts and heavier riders the Syntace/Ritchey.
– The minimum (high seatpost) and maximum insertions (low seatpost) affects the amount of deflection by 1.5-2x.
– The Ergon CF3 is the king again, outperforming all other seatposts at the maximum and minimum insertions.
– The Ritchey and Syntace seatposts rely on a high seat height to achieve their flex (2x greater flex).
– The Specialized CG-R was again quite underwhelming, flexing under half as much as the Ergon CF3 and Canyon S13 VCLS.

Do You Want More Damping or Deflection? Or Both?

If you’re looking for a firm ride on the road (less saddle movement), you’ll want to select a seatpost with a lower deflection but a higher damping ability. According to the Velo Magazine results, that’s something like the FSA K-Force or Zipp Service Course SL, while the Microbac Lab results suggest the Ritchey WCS Flexlogic is the go. That said, this information is applicable mostly to road riding – you’ll find a bikepacking seat pack or rear panniers will dampen road vibrations appropriately with whichever seatpost you choose.

For dirt road use, deflection is king. Straight carbon seatposts offer the highest degree of vertical flex on big bumps, however, they tend to be a bit more jarring on the high-frequency small bumps. Suspension seatposts are simply on another level in all regards, with lots of deflection as well as excellent damping abilities.

Seatposts and Rider Weight & Height

Carbon seatposts are tuned with set spring rates.

For example, at 300lb force, the Ergon CF3 would theoretically flex its maximum amount of 20mm while the Specialized CG-R will only be halfway through its travel. Essentially, lighter riders will be far better suited to the Ergon or Canyon seatposts, while heavier riders should look towards the Ritchey, Syntace or Cannondale options.

Riders with less exposed seatpost will also benefit from the Ergon or Canyon seatposts, as they are shown to flex twice as much at the maximum seatpost insertion. But then again, seatpost height reduces the deflection by half, so a suspension seatpost is a great option for riders with less seatpost exposed. But more on that below.

Tyre Width & Seatposts

best bikepacking bikes

There is little need to fit a flex seatpost to a fat bike because the tyres absorb the majority of the overall shock.

Tyres do an exceptional job of damping vibrations and absorbing bigger hits.

In the wider widths, tyre sidewalls can flex as much or even more than the best seatposts. If you’ve got tyres that are narrow (30mm to 50mm wide), you’ll benefit a lot from a seatpost with more flex like the Ergon CF3 or Canyon S13 VCLS. Between 2.0″ and 2.5″, flex posts are still really effective but you can usually get away with a little less flex if you like (eg. Cannondale SAVE or Ritchey WCS Flexlogic). The comfort effects start to diminish once you get into the plus-size tyre range (3.0″) or wider (4.0-5.0″) where the tyres are absorbing so much that aluminium posts work fine.

One cool thing about a flex seatpost (and matching Redshift Shockstop stem) is that it allows you to use narrower tyres without sacrificing any comfort. The benefit of this setup would be that you could reduce your rolling resistance and overall bike weight while still travelling in comfort.

Carbon vs Suspension Seatposts

The Cane Creek eeSilk is a touch heavier than a carbon seatpost yet has five different spring rates available.

Ok, so both carbon and suspension seatposts are sounding pretty good here. But how would you go about choosing between the two?

There are two disadvantages to using a carbon post:
– There is only one spring rate available, and;
– The comfort is dependent on the amount of seatpost sticking out of your frame.

By having a set spring rate, a heavier rider will enjoy a more comfortable ride, while a lighter rider will feel more vibration and big hits. Carbon seatposts also perform much better with more exposed seatpost (2x more flex), which hands the better performance to taller riders.

A suspension seatpost is able to solve both of those issues. Most of the suspension options have four or five different spring rates, which allows both light (45kg/100lb) or heavy (150kg/330lb) cyclists to achieve the equivalent ride feel, no matter the seatpost height. With a suspension post, you can also tune the ride quality based on the surfaces you ride: a stiffer elastomer/spring for the road, or a softer one if you like rougher terrain. Most suspension seatposts have an adjustable pre-load too, which allows you to change the amount of force required to make the saddle start moving.

The main downside to choosing a suspension seatpost is the weight. Most of them tip the scales between 450-550 grams (1.0-1.2lb) which is more than twice the weight of most carbon seatposts available. That said, there is one truly lightweight suspension seatpost…

The Cane Creek eeSilk is perhaps the ultimate seatpost. At 295 grams, it’s barely heavier than many of the carbon offerings. With five different spring rates, riders of any weight can tune it to achieve the perfect ride quality. And it will work just as effectively whether set high or low in your frame. The price isn’t cheap – it’s around US $300, but then again, that’s the same price as a top-end carbon seatpost.

Flex: How Much Is Too Much?

There is certainly a point where you’ll find excessive seatpost flex, but that will depend on the terrain you ride, your body weight, your seatpost height and your personal preferences.

If you have a good amount of seatpost exposed, have an average body weight and want a flexible but firm ride, three suitable seatposts come to mind here: Cannondale SAVE, Ritchey WCS Flexlogic or Syntace Hi-Flex P6. These posts will still flex between 5-15mm on impact but are otherwise tuned to be reasonably firm.

For lighter or shorter riders, a seatpost with a lighter spring rate will yield similar amounts of deflection. That’s where the Ergon CF3 and Canyon S13 VCLS are great. These posts are also suitable for taller/heavier riders that prefer more flex rather than less.

On particularly bumpy surfaces it’s fatiguing on your body to cycle for long periods of time. That’s why I fit my Cane Creek suspension seatpost to my bikes when I know the terrain will be rough – the extra 10-20mm of deflection is sometimes a godsend.

My Seatpost Picks For Comfort

Flex Post w/ Wider Tyres: Cannondale SAVE (208g/7.3oz)
I’ve used a Cannondale post in my mountain bikes for years, and think it provides the perfect amount of flex across all types of terrain, from smooth roads through to bumpy gravel roads. I think it’s the pick particularly if you’re using 40mm or wider tyres. If you’re coming from an aluminium seatpost, it will completely transform your ride! The SAVE is somewhat firm compared to a suspension seatpost, but it really does a great job of taking the edge off everything. Highly recommended for $199 on Amazon.

Flex Post w/ Narrower Tyres: Ergon CF3 or Canyon S13 VCLS (both 220g/7.8oz)
If you’re using narrower tyres (eg. 700x30c to 700x40c), it’s worth picking up a seatpost with a bit more flex to make up for the fact your tyres don’t deform as much. The Ergon CF3 (US $299) is certainly the best performer here as it has 20mm of vertical flex and weighs just 220 grams. A ‘flip head’ kit is available for the Ergon post, giving you the option to increase or decrease the setback to suit your needs. The Canyon S13 VCLS performs almost as well and is substantially cheaper (US $170), so it had to make the list too.

Vibration Absorbing Post: FSA K-Force Light (210g/7.4oz)
For something that offers a firm ride but still does a great job at absorbing road buzz, you can’t go past the FSA K-Force seatpost. This is the perfect upgrade for a road bike without any bike luggage attached. You can find the K-Force Light for $199 on Amazon.

Suspension Post: Cane Creek Thudbuster ST (454g/1.0lb)
My Cane Creek seatpost performed flawlessly on my big bike ride from Europe to Australia! While 250 grams heavier than a carbon post, you can take advantage of more than twice the vertical travel, plus five different spring rate options so you can tune your ride from soft to firm. It works out lighter than all comparable suspension post options and is also great value at $143 on Amazon.

Carbon Seatpost Options

Cannondale SAVE – My overall pick, a great performer for both vibration damping and absorbing big hits – $199 on Amazon
Canyon S13 VCLS – 2nd best deflection results, good at max insertion, great for lighter riders – US $170
Canyon VCLS 2.0 – Best deflection/damping results, great at max insertion, well-suited to lighter riders – US $299
Ergon CF3 – The same post as the VCLS 2.0 as it’s a shared product between companies – US $299
FSA K-Force – The Velo Magazine best-tested seatpost for vibration damping, great for road riding – $199 on Amazon
Ritchey WCS Carbon Flexlogic – Decent deflection results, great at damping vibrations, lightweight – $199 on Amazon
Specialized CG-R – The Specialized CG-R may be the go for heavier riders with its heavy spring rate – US $199
Syntace P6 Carbon Hi-Flex – 3rd best deflection results, but doesn’t perform well at max insertion – $198 on Amazon
Zipp Service Course SL – Like the FSA seatpost, this offers great vibration damping for the road – $133 on Amazon

Suspension Seatpost Options

Cane Creek eeSilk – 20mm of suspension travel, five spring rates, 295g – $310 on Amazon
Cane Creek Thudbuster ST – 33mm of suspension travel, five spring rates, 454g – $143 on Amazon
Cane Creek Thudbuster LT – 67mm of suspension travel, five spring rates, 540g – $127 on Amazon
Kinekt 2.1 Aluminium – 35mm of suspension travel, four spring rates, pre-load adjustment, 525g – $249 on Amazon
Kinekt 3.1 Carbon – 35mm of suspension travel, four spring rates, pre-load adjustment, 471g – $329 on Amazon
Suntour NCX – 50mm of suspension travel, two spring rates, pre-load adjustment, 765g – $114 on Amazon
Redshift ShockStop – 35mm of suspension travel, eight spring rates, pre-load adjustment, 497g – US $199

The post Seatposts: Often Overlooked Yet Critical For Your Comfort (Lab Testing) appeared first on CyclingAbout.com.

Drivetrain Efficiency: What’s The Difference In Speed Between 1X and 2X?

$
0
0

The most efficient bicycle chain runs in a perfectly straight line, in fact, a drivetrain without gears (singlespeed) can operate with 97% efficiency. The result is that 97% of the power that you put into the pedals goes into driving your rear wheel. When we add derailleur gears to a bike, the chain has to bend in a number of ways as it moves through the cogs on the cassette, increasing the frictional losses and reducing the overall drivetrain efficiency.

With the advent of wide-range rear cassettes (eg. 10-42 or 10-50t) we have been able to eliminate the front derailleur while maintaining a similar gear range. 1X drivetrains are a great way to drop some weight from your bike and reduce the amount of maintenance required. We have also been able to design bicycle frames with greater tyre clearance when we don’t have to accommodate for front derailleurs.

One of the bigger disadvantages of 1X is that it requires the chain to bend at a greater angle to access the biggest and smallest rear cogs. This not only increases the chain wear but also results in additional frictional losses. In comparison, a 2X drivetrain allows you to maintain a straighter chainline as you can pair your small chainring with larger cassette cogs, and large chainring with smaller cassette cogs.

So, how much higher are the 1X frictional losses when compared to a traditional 2X drivetrain?

In May 2019, VeloNews and CeramicSpeed tested the frictional differences between 1X and 2X drivetrains. Let’s take a look at their testing protocol, their results and then I’ll do some number crunching to determine how these frictional losses will affect your cycling speed.

The Test

drivetrain efficiency

The CeramicSpeed test machine set up with the 1x drivetrain. Image: VeloNews

VeloNews/CeramicSpeed tested two different drivetrain setups:
– The 1X drivetrain used a SRAM Force 1 rear derailleur, 48-tooth narrow-wide chainring, PC-1170 chain, and a 10-42t cassette
– The 2X drivetrain used a Shimano Ultegra rear derailleur, 53/39t chainrings, HG701 chain, and a 11-34t cassette

These drivetrains were selected as they have the same gear range which will help us compare the frictional losses at the equivalent gear ratios. Both drivetrains were fitted to a test machine that could calculate the frictional losses in each gear combination. The machine simulated a rider output of 250 watts pedalling at a cadence of 95RPM.

The chainlines were matched: the 1X drivetrain was set up to have a straight chainline in the 5th from smallest cassette cog, while the 2X drivetrain was aligned from the 53t chainring to the 5th from smallest cog, and from the 39t chainring to the 8th from smallest cog.

CeramicSpeed also stripped the factory lubricants and re-lubed them with the same mineral oil. Both chains were run for the same test duration.

Note: CeramicSpeed has previously found no increase in friction when using 1X narrow-wide chainrings when compared to uniform tooth 2X chainrings. They have also found no difference between the derailleur pulleys.

The Results

The 1X vs 2X drivetrain friction test results. Image: VeloNews

A few conclusions from the results:
– The frictional losses typically increase as you move up through the gear ratios
– The 2X drivetrain was more efficient in every gear (assuming you swap to the big ring after 39x21t)
– The difference in frictional loss is as small as 1-watt (48x21t / 53x23t) and as large as 6-watts (48×10 / 53×11)
– There are more frictional losses with a perfect chainline on the 1X drivetrain (48x18t) than the 2X (53x19t)
– The 1X drivetrain is as efficient as 96.0% and as inefficient as 92.4%. On average it’s 95.1% efficient.
– The 2X drivetrain is as efficient as 96.8% and as inefficient as 94.8%. On average it’s 96.2% efficient.

CeramicSpeed calculated that the average friction for the 1X drivetrain was 12.24 watts. This was determined by adding together the drivetrain power losses in each of the 11 gears, then divided by 11. The same was done with the 2X drivetrain using the 15 optimal gears divided by 15. The result was 9.45 watts, or just under a three-watt average difference between the two drivetrains.

Why Is 1X Less Efficient Than 2X?

There are four main sources of frictional loss in a chain. The obvious one is the chain bend angle, which results in the chain plates scraping harder on the cogs. But the chain tension, chain link articulation and chain speed also play a key role.

Chain tension results in the chain pushing harder on the chainring and cog teeth, and it’s higher when you use smaller chainrings and cassette cogs. Chain link articulation is the amount the chain has to hinge at the pins, where wrapping on a smaller cog causes higher friction. The chain speed is the tooth interactions per minute, which increases as the chain runs on the smaller cassette cogs.

Ultimately, a 1X drivetrain cannot run as straight chainline across its gear range, its smaller chainring results in more chain tension, the chain has to articulate more over the smaller cassette cogs, and the chain has to run faster on the smaller cogs.

These additional factors help to explain why in the gear with the straight chainline, the 1X drivetrain is still consuming 2 watts more than the 2X. It also explains why the 48x21t gear has the lowest friction despite the chainline not being perfectly straight – the reduced chain articulation and lower chain speed is yielding more friction savings than those from the straighter chainline.

What Is The Speed Difference Between Drivetrains?

Here’s the fun bit!

Using BikeCalc we can determine the speed a bike will travel in each of the gear ratios by plugging in a cadence of 95RPM with a 700x44C wheel. We can then add the different rates of power (231 to 242 watts depending on gear ratio) as well as a rider+bike weight (85kg) into Bike Calculator* to find out the speed and time differences over 100km.

Smallest Difference in Efficiency:
In the 48 x 21t (1X) and 53 x 23t (2X), you would cycle at 29.12km/h @95RPM. There is a 1-watt difference which results in a 0.06km/h speed advantage to the 2X drivetrain. Over 100km the 1X drivetrain would add 25 seconds (0.2% slower).

In The Highest Gear:
In the 48 x 10t (1X) and 53 x 11t (2X), you would cycle at 61.28km/h @95RPM. There is a 6-watt difference which results in a 0.14km/h speed advantage to the 2X drivetrain. Over 100km the 1X drivetrain would add 14 seconds (0.3% slower).

In The Smallest Gear:
In the 48x42t (1X) and 39x34t (2X), you would cycle at 14.49km/h @95RPM. There is a 2.5-watt difference which results in a 0.15km/h speed advantage to the 2X drivetrain. Over 100km the 1X drivetrain would add 3 minutes and 50 seconds to your cycling time (0.9% slower).

*Through my weight testing, I’ve determined Bike Calculator to be close to accurate.

How Does Derailleur Drivetrain Efficiency Compare To Gearboxes?

pinion gearbox

We actually have some drivetrain efficiency data for gearboxes, so let’s see how these numbers stack up!

Unfortunately, the gearboxes were all tested at 200 watts rather than 250 watts, so this isn’t a perfect comparison by any means. Let’s assume that the derailleur efficiency is the same at 200 watts which will give us a rough idea of the speed differences between derailleurs and gearboxes.

The different drivetrains achieved an average efficiency of:
– 96.2% for 2X Shimano Ultegra
– 95.1% for 1X SRAM Force 1
– 94.5% for Rohloff 14-speed
– 90.5% for Pinion 18-speed

On A Flat 100km Route (0% Gradient):
– 2X Shimano Ultegra would average 31.13km/h
– 1X SRAM Force 1 would average 31.00km/h (52 seconds or 0.5% slower)
– Rohloff 14-Speed would average 30.92km/h (1 min 20 seconds or 0.7% slower)
– Pinion 18-Speed would average 30.41km/h (4 mins 35 seconds or 2.3% slower)

On A Hilly 100km Route (10km up, 10km down x5 @ 2% Gradient):
– 2X Shimano Ultegra would average 28.8km/h
– 1X SRAM Force 1 would average 28.6km/h (1 min 10 seconds or 0.6% slower)
– Rohloff 14-Speed is 28.5km/h (1 min 49 seconds or 0.9% slower)
– Pinion 18-Speed is 27.9km/h (6 min 20 seconds or 2.9% slower)

Note: For the gearbox test, the results showed a marked increase in efficiency as the rate of power increased, so it is likely that if we were to test the gearboxes at 250 watts, they would achieve higher rates of efficiency. I would imagine the Rohloff hub would actually leap-frog the 1X SRAM Force 1 drivetrain in the higher gear ratios!

Does Derailleur Efficiency Really Matter?

Only a little.

To put the 1X/2X frictional losses into perspective we can compare the 0.3-0.9% slower speeds with:
– 7.9% slower cycling speeds when using four panniers as opposed to bikepacking bags
– 5.4% slower cycling speeds when using Schwalbe Marathon Mondial as opposed to Schwalbe Almotion tyres
– 3.2% slower cycling speeds when carrying 30kg extra luggage on a flat road
– 1.5-2.7% slower cycling speeds when a dynamo hub is switched off or on

If you’re spending a lot of time in the smallest gear, you have the most to lose with a 1X drivetrain. The 1X system is 0.9% slower than a 2X drivetrain which results in a 3 minute and 50 second time penalty over 100km.

When travelling at faster speeds, the higher wind drag negates the additional frictional losses resulting in the 1X drivetrain being 0.3% slower. This translates to a 14 second time penalty over 100km if using a 1X drivetrain. In other words, you have the least to lose when cycling at high speeds with a 1x drivetrain.

When the chainline is almost straight, the drive efficiency is within 1-watt between 1X and 2X drivetrains, resulting in the 1X drivetrain being 0.2% slower. This translates to a 25 second time penalty over 100km if using the 1X drivetrain.

Click HERE To Check Out My Weight Testing, HERE For The Tyre Resistance Testing and HERE To See My Aero Testing

The post Drivetrain Efficiency: What’s The Difference In Speed Between 1X and 2X? appeared first on CyclingAbout.com.

All About The Best Dynamo USB Chargers For Bicycle Touring and Bikepacking

$
0
0

There is a wide array of dynamo USB chargers available (24 of ’em, in fact), and while most do an adequate job of keeping your electronics charged at high speeds, there is only a select few which can provide a decent charge at ‘touring’ speeds.

Dynamo USB charger technology is actually improving at an incredibly fast rate. Very small companies (ie. often just one person) are designing both hardware and software that exploits the very modest power offered by a dynamo hub. The result is powerful USB chargers that offer high levels of efficiency, that can be neatly fitted to any bike.
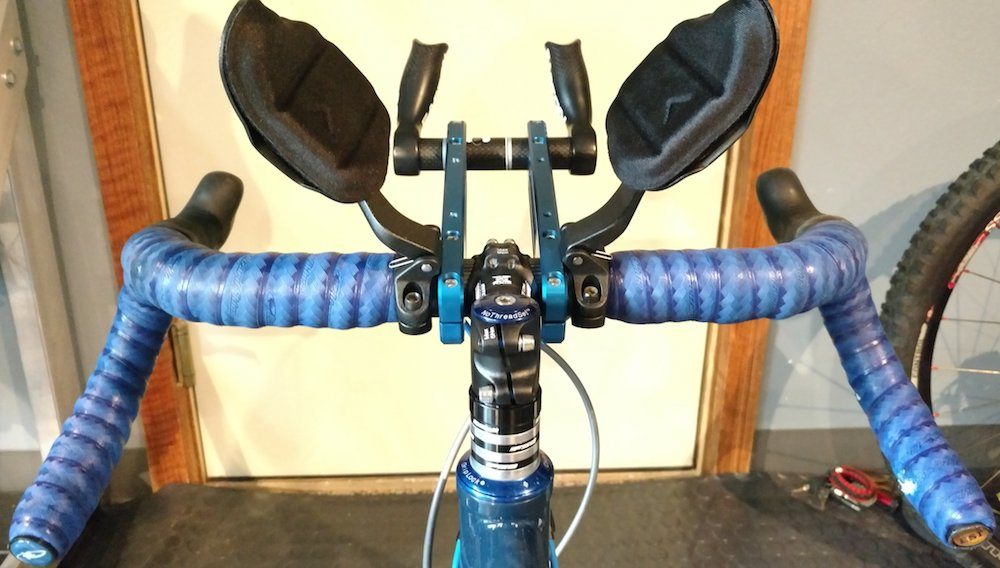
This is a pretty technical resource, so strap yourselves in and take it slow. A big focus will be the power output of different chargers at different speeds, but we’ll also look at dynamo hub drag, charger efficiency, form factor and how quickly you can expect your batteries to charge.

This article was originally written September 2017 but has been re-written in July 2019 with the latest information.

dynamo usb charger

The Cinq Plug5 Plus charger on my KOGA WorldTraveller-S.

Watts, Volts and Amps

Firstly, let’s quickly cover a few basic electricity units of measurement. It’ll take a moment to get your head around this, but the knowledge will help, promise!

Today we’ll be discussing voltage (in volts or ‘V’) and current (in amps, or ‘A’). A common analogy for these units of measurement is in terms of a water pipe. Voltage is the water pressure and current is the flow rate. By increasing the water pressure in a pipe, you will increase the flow rate too. It’s the same with electrical systems; increasing the voltage increases the current.

Watts (W) is the total electrical system power, equal to the voltage (V) multiplied by the current (A). The equation is, therefore:
Watts (W) = Volts (V) x Amps (A).

A 3-watt dynamo hub will put out 6 volts at 0.5 amps (3W = 6V x 0.5A) in AC power. Once the power is converted to DC it’s more like 5V and 0.5A, which is the power required for USB charging. While some USB chargers will start charging at lower rates of power, most devices like to charge above 2-watts (5V x 0.4A) to ensure the charging level is stable.

2-watts can be reached by the best dynamo USB chargers at speeds between 11-13km/h. If you’re cycling at lower speeds for short periods of time, a buffer battery will need to be incorporated into your charging system to help meet the power needs of your device. And when cycling for long periods of time below 11-13km/h, you’ll need to look to other charging solutions (solar or power banks are usually best for off-road bikepacking).

Most dynamo USB chargers use chipsets with a current limit to prevent overheating (eg. Sinewave Revolution is 1A, therefore the maximum power is about 5W (5V x 1A)). It can be said that any USB charger that puts out high watts will also be putting out a high current.

The Most Powerful Dynamo USB Chargers

Fahrrad Zukunft has conducted some very extensive testing over the years that determines the amount of power (in watts) that can be produced by various dynamo USB chargers. The three below charts (2016, 2016 and 2019) compare 13 different models.

To put the below numbers in perspective, consider that a smartphone consumes around 3-4 watts in navigation mode with full-screen brightness. Therefore, just to keep the battery at the same level will require cycling speeds of 15 to 25km/h depending on the model of USB charger. Even then, there’s only a handful of products that generate enough power for this activity.

Let’s take a look at the numbers.

dynamo usb chargers

Horizontal Axis: Cycling speed. Vertical Axis: Maximum output power at the USB. Image: Fahrrad Zukunft

The graphs above show the output power at the USB port at various cycling speeds. You’ll notice that most power curves are rather linear from 5km/h until they plateau somewhere between 20-40km/h. The exception is the Forumslader V5, which uses a special series of capacitors to boost the power potential of a dynamo hub at low speeds.

Power at different speeds:
1 Watt – 
Most chargers will hit 1w between 7-10km/h.
2 Watts – At 11km/h the highest performing charger hits 2w (Plug5 Plus). Most other chargers will hit 2w between 12-15km/h
3 Watts – At 14km/h the highest performing charger hits 3w (Plug5 Plus). Other chargers hit 3w between 15-25km/h
4 Watts – At 17km/h the highest performing charger hits 4w (Plug5 Plus) – Other chargers hit 4w between 27-28km/h
5 Watts – At 20km/h the highest performing charger hits 5w (Forumslader) – Some chargers hit 5w above 35km/h

The top-performing chargers:
Cinq Plug5 Plus – 2w@11km/h, 3.5w@15km/h, 4.5w@20km/h, 5w@25km/h – Best for sub-20km/h speeds
Forumslader V5 – 2w@12km/h, 3w@15km/h, 4.75w@20km/h, 6.5w@25km/h – Best for above-20km/h speeds
Lumi-Con P5 – 2w@12km/h, 3w@15km/h, 4w@20km/h, 4.25w@25km/h
Dynamo Harvester Plus – 2w@14km/h, 2.5w@15km/h, 4.5w@20km/h, 6.25w@25km/h

dynamo USB chargers

Igaro reveals the power for a few missing dynamo USB chargers, including their D1 and the kLite unit.

Igaro has been recently publishing (non-independent) results for its prototype D2 model. These numbers don’t perfectly align with Fahrrad Zukunft, but they are within 10% when examining the Sinewave Revolution charger. The x-axis is measured in amps, but we can use the equation to convert amps to watts by multiplying by 5 (volts).

Here are some quick conversions:
10km/h – E-Werk (0.9w), Sinewave (0.9w)
15km/h – Igaro D1 (2w), kLite (1.75w), Sinewave (1.75w), E-Werk (1.75w)
20km/h – Igaro D1 (3w), kLite (2.75w), Sinewave (2.75w), E-Werk (2.75w)
25km/h – Igaro D1 (3.75w), kLite (3.5w), Sinewave (3.5w), E-Werk (3.5w)
30km/h – Igaro D1 (4.75w), kLite (4.5w), Sinewave (4.5w), E-Werk (3.5w)

Dynamo Hub Drag

There is no such thing as free energy! Do you want a powerful charging system? Ok, well you’re going to have to pedal a bit harder for it. Let’s take a look at dynamo hub ‘drag’ from using different charging systems.

dynamo usb chargers

Horizontal Axis: Cycling speed. Vertical Axis: Power at the USB charger when a buffer battery is full. Image: Fahrrad Zukunft

The charts above show the power created at the dynamo hub by different USB chargers. The efficiency of a high-quality dynamo hub at low power (eg. cycling at 10-20km/h) works out to be around 50-60%. This means that when the charger is making between 1-3 watts you can roughly double that figure to work out the drag (in watts) at the hub.

Therefore, when making 2.5 watts for USB charging, you’re using about 5 watts of your pedalling power. That drag equates to ~0.4km/h slower riding speeds than if you weren’t charging (80kg rider / 15kg bike and gear / 150 watts / flat road). Or a ~3-minute time penalty over a 100km ride.

The efficiency increases to 70-80% at high power (ie. cycling at 30km/h). This means that a charger like the Forumslader V5 will be taking 15-watts from your pedalling power while charging at 10.5 watts. That drag equates to ~1.1km/h slower riding speeds than if you weren’t charging at 10.5 watts (80kg rider / 15kg bike and gear / 150 watts / flat road). Or a ~9-minute time penalty over a 100km ride.

That’s a decent chunk of time, so it’s in the best interests of charger manufacturers to make efficient units that don’t create too much power, or the drag becomes particularly noticeable when riding.

Power Banks & Charging Batteries

hub dynamo cache battery

The Cinq5 Smart Power Pack II is an aftermarket buffer battery for charging at low speeds.

Once you drop below around 2-watts, a dynamo charger will not be able to provide power to most devices. But luckily, some chargers have integrated buffer batteries that will swoop in and provide the power needed for low-speed riding. For this feature, check out the Cinq Plug5 Plus, NC-17 Appcon 3000, Lumicon P5, Forumslader V5 and B&M USB-Werk.

Charging Batteries or Power Banks
If your speed is regularly dropping above and below 11-13km/h, it’s best to charge into a power bank for later use. But this is not the most efficient way to keep your devices charged because there are energy losses in the additional circuitry. When power is stored in a battery, it experiences a storage loss of around 15-20%. This means you lose around 1-hour of power generation per 5-hour ride, which adds up!

If you’re cycling faster than 11-13km/h, make sure to minimise this loss in efficiency by charging your electronics either straight from the USB charger or by using batteries with a ‘pass-through’ feature (the Cinq Smart Power Pack is the best available).

How Long Does It Take To Charge A Battery?
This depends on the dynamo USB charger and your cycling speed. Let’s take a look at two different power outputs.

Example One: 2.5-Watts (12.5km/h on the Cinq Plug5 Plus)
Once a 3-watt dynamo hub has been converted from AC to DC the output will translate to roughly 5V and 0.5A, which for an hour of riding is 500mAh. Charging a 5000mAh battery will, therefore, equate to 10 hours of riding. However, when we factor in the small losses in the charging circuitry, we lose around 20% of the total generated power. Adding the 20% extra ride time (10 hours + (10 hours x 0.2)) and we’re looking at 12 hours of riding to fill the battery from scratch.

Example Two: 4-Watts (17km/h on the Cinq Plug5 Plus)
If we use fancy circuitry to boost the output power to 4-watts (5V and 0.8A), we can fill a 5000mAh battery in 6.25 hours of riding. When we account for the ~20% losses in the charging circuitry, this results in 7.5 hours of riding to theoretically fill the battery from scratch.

You can usually find out the battery size of your USB device in the product specifications or written on the battery itself. Read more about power banks and buffer batteries in my resource HERE.

20-Minute Charging Test

While the graphs above give us an idea of the power output at specific speeds, in the hills, it is unusual to cycle at a constant speed for long periods of time. To help simulate hilly or undulating riding conditions, Fahrrad Zukunft created a dynamic test with varied cycling speeds to see which dynamo USB chargers could generate the most power. The test is probably a little over the top in speed variation, but it’s still pretty interesting to see the losses in the charging circuitry.

Left: The test cycle showing time in seconds (x-axis) and speed (y-axis). Right: The resulting difference in power after the 20-minute test between the dynamo hub (green) and at the USB port (red). Image: Fahrrad Zukunft

The test changed the cycling speed in 2-second steps from 10km/h up to 30km/h and then back down to 10km/h again. The accelerations between steps took 3-seconds. This 20-minute test essentially exposes the responsiveness of the microcontrollers inside the chargers, which are constantly trying to optimise the output power at different cycling speeds.

Output power at the USB port after 20 minutes:
1. Forumslader V5 (1200mWh or 240mAh)
2. Lumi Con P5 (1000mWh or 200mAh)
3. Plug5 Plus (1000mWh or 200mAh)
4. NC-17 Appcon 3000 (900mWh or 180mAh)
5. USB Werk (600mWh or 120mAh)
6. Zjego (400mWh or 80mAh)

The test also shows differences in charging efficiency. The bigger the difference between the mWa at the dynamo hub and USB port, the more inefficient the charging system. For example, the Zjego turns 1000mWa into only 400mWa in this test, indicating some very big losses in the circuitry (~40% of power retained). On the other hand, the Forumslader V5 retained ~66% of the power created.

Tying this back to battery charging in the previous section, we could expect the Forumslader V5 to charge a 5000mAh battery in 8.33 hours (including losses in the battery circuitry). The Plug5 Plus would take 10 hours. The USB-Werk would take 16.65 hours.

The Neatest Dynamo USB Charging Systems

sinewave reactor

The Sinewave Reactor offers a very low profile charging port above the stem.

Steerer Tube USB Chargers
I don’t know about you, but I really appreciate a neat and integrated charging solution – and the steerer tube mounted systems have got to be the best in this regard. I personally use the Plug5 Plus which integrates a 1100mAh buffer battery inside the steerer for cycling at speeds below 11km/h. A very neat metal ring seals the USB-C port from the elements when needed.

Check out the Cinq Plug5 Plus, Forumslader V5 Aheadring, Sinewave Reactor and Cycle2Charge V2.

Regular USB Chargers
Ortlieb has a handlebar bag called the Ultimate 6 Pro E which has connectors built into handlebar bag mount. This allows you to keep your USB charger and devices inside your waterproof bag, and take the handlebar bag off without unplugging anything. That just leaves a few wires on your bike – a very neat solution!

Sinewave Cycles Beacon

Dynamo Light USB Chargers
Here’s another super neat charger design. There are a handful of lights that also incorporate the circuitry for charging USB devices. This creates a very neat (less cabling) and often cost-effective light+charger. That said, some light/chargers are less efficient than standalone units because they are not optimised around charging.

Check out the Sinewave Beacon, Forumslader IQ-X, Axa Luxx70 Plus and B&M Lumotec IQ2 Luxos.

Testing Your USB Charger

You can use a USB LED voltmeter to determine how much power your charger is making.

If you’re having issues with charging, a cheap USB LCD Voltmeter can help diagnose whether your USB charger is making the right amount of power. If you’ve determined you’re getting the right voltage and current for your device, you may be having issues with the particular cache battery you’re using.

The Best-Performing Dynamo USB Chargers

dynamo usb charger

Cinq Plug5 Plus // Sub-20km/h
Most bike travel is conducted at speeds below 20km/h (12mph), and the charger that offers the most power at these speeds is the Plug5. Not only is it powerful, but it also integrates a buffer battery into the system for the times you’re cycling below 11km/h. The covered USB port is very neat too!

Cinq Plug5 Plus Numbers:
2w @ 11km/h
3.5w @ 15km/h
4.5w @ 20km/h
5w @ 25km/h

page street cycles

Forumslader V5 // Above-20km/h
The Forumslader V5 uses a special series of capacitors to achieve big power from 20 to 30km/h (12-19mph) in particular. It also incorporates buffer batteries (3x700mAh) and a neat USB port near the handlebars.

Forumslader V5 Numbers:
2w @ 12km/h
3w @ 15km/h
4.75w @ 20km/h
6.5w @ 25km/h

Creating Bombproof Dynamo USB Chargers

Kerry from kLite focuses on building dynamo light and charging systems for remote backcountry use. His main aim is reliability, so his charging systems are as simple as possible, using thick internal cabling, full waterproofing and smoothing capacitors that offer ultra-consistent waveforms (best practice for direct charging; Kerry says they take up half of his charger).

Usually, more complex circuitry and small form factors result in more chance of something going wrong, so it’s always best to hunt around for reviews online to see how different USB chargers are performing in the world’s harshest environments.

List Of Different Dynamo USB Chargers

You can see a list of most hub dynamo USB chargers options HERE.

Summary

The top-tier dynamo USB chargers offer very decent power these days, provided your touring speed is above 11-13km/h. Once you hit 15km/h with five of the charging units tested, you’ll be generating more than 3-watts which is a very decent charge for most batteries and devices. And by 17-20km/h you can generate 4-watts for even the most power-intensive smartphones.

You can neatly integrate a USB charger into your steerer tube, front dynamo light or handlebar bag via the Ortlieb Ultimate 6E connectors. There are lots of great options!

Remember that you increase the dynamo hub drag when generating additional power, but this will be necessary if you’re a heavy electronics user (eg. smartphone navigation with the screen always on). That said, if you just want to keep on top of your phone or GPS, almost all USB chargers will do this job just fine.

Learn About Dynamo Hub Systems HERE, About Buffer Batteries HERE and Dynamo Lights HERE

The post All About The Best Dynamo USB Chargers For Bicycle Touring and Bikepacking appeared first on CyclingAbout.com.

List of Hub Dynamo USB Chargers and Charging Systems for Electronic Devices

$
0
0

These days there are more than 20 hub dynamo USB chargers available! I have listed the key specs from each of these chargers and have organised them according to type (headset, regular in-line and light chargers). Within these categories, you’ll also find them ranked in terms of available output power.

Hub dynamo USB chargers are really useful if you carry any battery-powered gadgets. I use my Cinq Plug5 Plus to top up my iPhone, eReader, head torch, GoPro, Garmin GPS and 5000mAh power bank. You can also charge batteries (AA, AAA), USB powered lights, cameras, speakers, MP3 players and much more.

If you’re bikepacking off-road or spending lots of time on steep mountain roads you should consider carrying a power bank or solar charger instead. Dynamo chargers are almost useless if you don’t average over 12km/h (7.5mph) for the majority of your ride. If you’re travelling on terrain that has you cycling above and below 12km/h, make sure to choose a system with an integrated buffer battery that will kick in at low speeds.

Before digging too far into this resource, it’s worth attempting to understand everything there is to know about hub dynamo USB chargers HERE.

Key Stats include:
Speed at 2.5W:
This is the speed you need to ride in order to achieve the minimum charge for most smartphones.
Power at 20km/h:
This is the output power at the USB port at 20km/h.
Power Output Graph: If the charger has been tested, I have listed its power output graph here.
Buffer Battery:
 If a buffer battery is integrated into the system, I have listed the battery capacity here.
Price: Retail price on the dynamo USB charger.

This list was originally published March 2012 but has been updated July 2019.

Cinq5 The Plug5 Plus

dynamo usb charger

Cinq Plug5 Plus dynamo USB charger.

The Cinq Plug5 Plus is the most powerful USB charger below 20km/h and it’s almost certainly the neatest. When you don’t have anything plugged into the unit you can hide the USB-C plug by rotating the ratcheting top cap door. There’s a 1100mAh battery hidden in the steerer tube which will step in when your speed drops below 12km/h, and Cinq says that simultaneous operation of lighting and charging is possible with this unit too. The Plug5 is made exclusively for the new USB-C plugs so you may need to buy an adapter or different charging cable if you select this option.

Speed at 2.5W: 12km/h
Power at 20km/h:
4.6-watts
Power Output Graph: HERE
Buffer Battery: 1100mAh
Price: €259

Forumslader V5 Ahead

page street cycles

Forumslader V5 Ahead dynamo USB charger.

The Forumslader V5 is the most powerful dynamo USB charger on this list over 20km/h (independent testing HERE). It is able to hit 2.5W at 13km/h and 5W at 20km/h. It’s constantly getting updated with the latest tech and circuitry due to the small-scale production.

Speed at 2.5W: 13km/h
Power at 20km/h:
 4.8-watts
Power Output Graph: HERE
Buffer Battery: 2100mAh
Price: €227

Cycle2Charge V3

dynamo usb

Cycle2Charge V3 dynamo USB charger.

This is a headset top cap charging option from Cycle2Charge that’s available at a great price point. According to the manufacturer, it will produce the minimum charging for USB devices at 12km/h (2.5W) and by 21km/h it will be making 5W. The nice thing about this one is that it uses a rotating dome to protect the USB plug when not in use.

Speed at 2.5W: 12km/h (non-independent testing)
Power at 20km/h: 
4.7-watts (non-independent testing)
Power Output Graph:
HERE
Buffer Battery:
No
Price: €69

NC-17 Appcon 3000 (Dynamo Harvester)

dynamo usb

NC-17 Appcon 3000 dynamo USB charger. Image: GPSRadler.de

The NC-17 Appcon 3000 (previously Dynamo Harvester) is one of the more powerful chargers available. The unit fits inside the steerer tube but rather than offering a charging port, it routes the cables into your handlebar bag.

Speed at 2.5W: 13km/h
Power at 20km/h:
 3.5-watts
Power Output Graph: HERE
Buffer Battery:
 3000mAh
Price: €229

Sinewave Reactor

sinewave reactor

Sinewave Reactor dynamo USB charger.

The Sinewave Reactor offers the same functionality as their other chargers, but it has been incorporated into a 43 gram, super slim headset top cap. The electronics are neatly integrated into the fork steerer, making it somewhat theft-proof and elegant. It’s manufactured in the USA and tends to get rave reviews from many users.

Speed at 2.5W: 17.5km/h
Power at 20km/h:
 3-watts
Power Output Graph: HERE
Buffer Battery:
No
Price: US $220

Cinq Plug III

Cinq5 The Plug III

Cinq Plug III dynamo USB charger.

This is the older version of the Cinq Plug5 Plus that has been available since 2013. If you’re travelling in terrain that has you riding above and below 12km/h regularly, you’ll want to pick up a Cinq Smart Power Pack II battery to ensure your devices are always getting a charge.

Speed at 2.5W: 12km/h (non-independent testing)
Power at 20km/h:
3.7-watts (non-independent testing)
Power Output Graph:
HERE
Buffer Battery:
 Available separately
Price: €159

Forumslader V5

Forumslader V5 Dynamo USB Charger

Forumslader V5 dynamo USB charger.

The Forumslader V5 Ahead is also available in a larger unit that will sit inside a handlebar bag for a MUCH lower price!

Speed at 2.5W: 13km/h
Power at 20km/h:
 4.8-watts
Power Output Graph: HERE
Buffer Battery: 2100mAh
Price: €110

NC-17 Connect Appcon GT (Dynamo Harvester)


hub dynamo usb charger

NC-17 Connect Appcon GT dynamo USB charger.

NC-17 also make a more powerful charger that sits in a small bag on the handlebar (or inside a handlebar bag). This charger (previously Dynamo Harvester Plus) is half the price of the Appcon 3000 but offers some of the highest USB outputs above 20km/h!

Speed at 2.5W: 16km/h
Power at 20km/h:
4.5-watts
Power Output Graph:
HERE
Buffer Battery:
 3000mAh
Price: €110

Lumi-Con P5 Bike Harvester

dynamo usb

Lumi-Con P5 dynamo USB charger.

The Lumi-Con P5 offers excellent specs for the price. It has the 2nd highest power output at 15km/h of any charger, and above 20km/h it’s the 4th most powerful according to the testing. Additionally, it’s fitted with 5000mAh worth of batteries which will have saved some power for when you’ve finished your ride.

Speed at 2.5W: 14km/h
Power at 20km/h:
4-watts
Power Output Graph:
HERE
Buffer Battery:
 5000mAh
Price: €85

kLite USB Charger

Kerry at kLite makes some amazing light and dynamo systems for remote backcountry use. His focus is specifically on reliability, so his systems are as simple as possible, using thick internal cabling, full waterproofing and smoothing capacitors that offer ultra-consistent waveforms (best practice for direct charging; Kerry says they take up half the charging unit). The kLite charger also offers solar charger input and 2x USB output ports (1x Spot Tracker or GPS + a smartphone or other power-hungry device).

Speed at 2.5W: 16km/h (non-independent testing)
Power at 20km/h:
3.2-watts (non-independent testing)
Power Output Graph:
HERE
Buffer Battery:
 Available separately
Price: US $140

Sinewave Revolution

Sinewave Revolution

Sinewave Revolution dynamo USB charger.

This small, 38 gram, waterproof charger can be connected directly to phones or power packs and is especially popular given it offers the same performance as the Reactor but with a lower price tag. It will achieve 2.5W at 16km/h, 3W at 20km/h and 4.5W at 30km/h. Like all Sinewave products, it’s made in the USA.

Speed at 2.5W: 17km/h
Power at 20km/h:
 3-watts
Power Output Graph: HERE
Buffer Battery:
 No
Price: US $120

Igaro D1

Igaro D1

Igaro D1 dynamo USB charger.

The Igaro D1 is a very compact unit that’s waterproof and hand-assembled in the UK. It employs titanium for the charging box and comes with a lifetime warranty, in fact, Igaro will ship warranty replacements anywhere in the world for free. The D1 comes with an optional ‘stability bank’ that will temporarily maintain a high current when you drop below 15km/h. I really like that a whole raft of add-ons (such as an on-off switch) that are available so you can easily build a custom dynamo system.

Speed at 2.5W: 17km/h (non-independent testing)
Power at 20km/h:
 3-watts (non-independent testing)
Power Output Graph: HERE
Buffer Battery:
Available separately
Price: US $109

USB2BYK

USB2BYK USB Charger

USB2BYK dynamo USB charger.

USB2BYK make a small, matchbox-sized charging unit that will produce 2.5-watts at 20km/h (about half the power compared to the best chargers). This charger will probably only be useful if your average speed is around 25km/h.

Speed at 2.5W: 20km/h
Power at 20km/h:
 2.5-watts
Buffer Battery:
No
Price: €39

Busch and Muller USB-Werk

Busch Muller USB Werk Dynamo Charger

B&M USB-Werk dynamo USB charger.

The USB Werk is the most recent release by Busch and Muller. It’s a stripped-back version of the E-Werk (below) but with tiny cache battery built-in. It can achieve USB power (5V and 500mA) at about 19km/h.

Speed at 2.5W: 19km/h
Power at 20km/h:
 2.6-watts
Power Output Graph: HERE
Buffer Battery: 300mAh
Price: US $150

Busch and Muller E-Werk

Image: GPSRadler.de

B&M E-Werk dynamo USB charger. Image: GPSRadler.de

The E-Werk is a unique unit as you can control the voltage (2.8 to 13.3 V) and current (0.1 to 1,5 A) to suit the specifications for each device you’d like to charge. It’s a great idea, but it really just makes the charger more complicated than necessary. The only time I can see this device being useful is if you’re regularly travelling ULTRA fast (40km/h+) or slow (<7km/h). In terms of performance, it’ll hit USB charge specification at 17.5km/h (2.5-watts) and by 30km/h it will be producing over 4-watts. This E-Werk doesn’t include a cache battery (extra US $105) like USB-Werk.

Speed at 2.5W: 17.5km/h
Power at 20km/h:
 3-watts
Power Output Graph: HERE
Buffer Battery: Available separately
Price: US $210

Kemo M172N

Kemo 172N USB Dynamo Charger

Kemo M172N dynamo USB charger.

The Kemo M172N is a dynamo USB charger with a built-in switch so that you can choose between sending power to your lights or your USB device. It’s an absolute bargain, and from all accounts, works really well.

Speed at 2.5W: No data
Power at 20km/h:
No data
Buffer Battery:
No
Price: €40

Ullmann Power Station 4

usb chargers

Ullmann Power Station 4 dynamo USB charger.

Speed at 2.5W: No data
Power at 20km/h:
 No data
Buffer Battery:
No
Price: US $130

LightCharge2 Dynamo USB Charger

LightCharge2 dynamo USB charger.

Speed at 2.5W: No data
Power at 20km/h:
 No data
Buffer Battery:
No
Price: US $50

BioLogic ReeCharge Dynamo Kit

Biologic ReeCharge dynamo USB charger.

Speed at 2.5W: No data
Power at 20km/h:
No data
Buffer Battery:
No
Price: US $39

Zzing Battery Kit

dynamo usb

Zzing dynamo USB charger.

The Zzing USB Charger connects to your handlebars via a KLICKfix mount (90 degrees to connect and disconnect it). There’s not too much info on this model, but the price and integrated battery seem great.

Speed at 2.5W: No data
Power at 20km/h:
No data
Buffer Battery:
2000mAh or 2700mAh (+€10)
Price: €99

Light: Sinewave Beacon

Sinewave Cycles Beacon

Sinewave Beacon dynamo USB charger.

The third dynamo USB charger from Sinewave is an LED light with 750 lumens output and an integrated switch for charging. The Beacon uses the same internals as the Revolution and Reactor so you can expect 2.5W at 17km/h. Interestingly, this light also has a ‘Charger Priority Mode’ which will provide the minimum brightness to the LEDs and will send the rest of the power to the USB plug. Pretty cool! I’ve written a detailed article about the Sinewave Beacon light HERE.

Speed at 2.5W: 17km/h
Power at 20km/h:
3-watts
Power Output Graph: HERE
Battery: No
Price: US $350

Light: B&M Lumotec IQ2 Luxos

Busch und Muller Lumotec IQ2 Luxos Dynamo Light USB Charger

B&M Lumotec IQ2 Luxos dynamo USB charger.

Introduced to consumers at the 2012 Eurobike tradeshow, this 90lux dynamo light incorporates a handlebar switch and USB plug so that you can charge and ride. It’s a super neat and integrated design, however, comes with mixed reviews when it comes to its charging ability. Even so, this is a great dynamo light with a nice beam shape for on-road use.

Speed at 2.5W: No data
Power at 20km/h: 
No data
Battery:
No
Price: US $260

Light: AXA Luxx70 Plus

axa luxx70 plus

Axa Luxx70 Plus dynamo USB charger.

The AXA Luxx70 Plus is a similar product to the Lumotec IQ2 light, providing a handlebar switch to select between using the LED light or USB charger. The key advantage of this product is the exceptional price point. From all accounts, it works really well too!

Speed at 2.5W: No data
Power at 20km/h:
 No data
Battery:
No
Price: US $150

Light: Spanninga Nomad

usb charger

Spanninga Nomad dynamo USB charger.

The Spanninga Nomad is, by far, the cheapest light and USB charger combo. It has a small form factor, with the USB plug hidden on the side of the lamp. The Spanninga LED has a lower 40 lux output than the competition (compared to the B&M 90 lux and AXA 70 lux).

Speed at 2.5W: No data
Power at 20km/h:
 No data
Battery:
No
Price: US $50

Learn About Hub Dynamo USB Chargers HERE, Dynamo Wiring Systems HERE, Cache Batteries HERE and Dynamo Lights HERE

The post List of Hub Dynamo USB Chargers and Charging Systems for Electronic Devices appeared first on CyclingAbout.com.


Comparing The KOGA Denham Bar Shape With Similar Alt Bars

$
0
0

The KOGA Denham Bar has recently been added to the WhatBars database, so today we’ll be using this handy web tool to lay different handlebar shapes over each other. This will help you to visualise how the KOGA Denham Bar compares to other popular alt handlebar designs.

My signature handlebar has been super popular, in fact, production hasn’t even been able to keep up with demand! I’m really glad to hear that people are enjoying the shape as much as me. If you haven’t read the considerations that went into their design, it’s worth getting your head around everything HERE.

Right, let’s look at some comparisons!

KOGA Denham Bar vs Velo Orange Crazy Bar

KOGA Denham Bar

The KOGA Denham Bar was essentially born from my experience using the Crazy Bar, so there are many similarities. As a result of playing around with my hand positions on the Crazy Bar:
– I halved the length of the ‘bullhorns’ as I rarely had my hands at the end.
– I gave the bullhorns a tilt inwards by 15 degrees for better ergonomics.
– I curved the bar ‘tops’ by 8-degrees from straight, again, for better ergonomics.
– I reduced the backsweep to 34-degrees, rather than the Crazy Bar’s 45-degrees which put my hands diagonally across the grips (causing numbness).
– I increased the width by about 2cm on each side as a result of the reduced backsweep.

KOGA Denham Bar vs Jones Loop Bar

KOGA Denham Bar

The Jones Loop actually offers a very similar ride position and bike handling to the Denham Bar. The most substantial differences include:
– A 45-degree sweep to the grips on the Loop Bar compared to 34-degrees (which is much more agreeable with my hands).
– Bar-tops that bend forward on the Loop Bar rather than backwards.
– An extra forward hand positioning at the front of the ‘loop’, but no bullhorn equivalent.
– No handlebar bag compatibility on the Loop Bar.

KOGA Denham Bar vs Surly Moloko

KOGA Denham Bar

Surprisingly, there is almost ZERO overlap between the KOGA Denham Bar and Surly Moloko! While the sweep angle is the same between bars (34-degrees), that’s pretty much where the similarity ends. The only sections that overlap are next to the stem, and at the inner part of the grip section on the Moloko. The Moloko offers a very long forward reach, so it’s best paired with short stems. It’s also made of steel rather than aluminium, so expect it to add around 300g/11oz to your bike weight.

KOGA Denham Bar vs Flat Bar vs Wide Drop Bar

KOGA Denham Bar

Here I’ve laid a bikepacking drop bar (Salsa Woodchipper), mountain bike flat bar (Salsa Salt) and the KOGA Denham Bar. This helps us to visualise the very close alignment between the Denham Bar ‘bullhorns’ and drop bar ‘brake hoods’ positioning of a drop bar. It also shows us the degree to which the sweptback design will bring the grips closer to your body, relative to a flat bar.

If you were coming from a drop bar, you wouldn’t need to change your stem. On the other hand, you might consider swapping your stem to something longer if coming from a flat handlebar (although this will also make the bullhorn position more of a stretch).

Play With Handlebar Overlays HERE And Read About My Signature Handlebar Design HERE

The post Comparing The KOGA Denham Bar Shape With Similar Alt Bars appeared first on CyclingAbout.com.

All About Buffer Batteries With Pass-Through Charging For Dynamo Hub Systems

$
0
0

If you’re keen on charging electronics while you ride, you’re probably already aware of buffer batteries.

These special batteries provide continuous power to your devices during times when your speed is too low for USB charging, for example, when cycling on hilly terrain, or when stopped at traffic lights. This prevents your devices from receiving then losing charge (eg. smartphones) or switching themselves off entirely (Garmin eTrex models).

We’ll be taking a closer look at buffer batteries, battery storage, charging times and some dynamo chargers with in-built batteries in this article.

This resource was originally published Sept 2017 but has been overhauled in Aug 2019.

dynamo hub cache batteries

USB chargers are best used in conjunction with buffer batteries in order to supply a constant charge to your devices.

Pass-Through Batteries

Most batteries will either charge OR send their stored power to your device; rarely will they do both simultaneously.

Pass-through batteries are able to deliver power from your hub straight to your device, while also taking a charge if there’s any power leftover.

The reason many battery manufacturers don’t allow pass-through is that it can deteriorate batteries quickly, although you can still expect a minimum of 500 total charge/discharge cycles with most pass-through batteries (two half charges equate to one full cycle).

It’s worth noting that many manufacturers include “pass-through” as a feature on the battery spec sheet, but in my experience, this is rarely the case.

Battery Storage Losses

When power is stored in a battery, it experiences a storage loss of 15-20%. In order to minimise this loss, it is best to try to charge your electronics either straight from the USB charger or by using a pass-through battery. It’s nice to have that power on tap, but when it means you lose 1-hour of power per 5-hour ride… it adds up!

Lipstick Buffer Batteries

Batteries are getting smarter circuitry in order to reduce long-term deterioration. But not all batteries are smart!

Jesse Carlsson and Sarah Hammond use the cheapest lipstick batteries they can find to keep a constant stream of power running to their Garmin eTrex GPS units. It’s not guaranteed that the cheapest batteries will be ‘dumb’ enough to allow pass-through, but the odds are good and given they’re less than $10 – it’s worth giving them a go.

Check out Jesse and Sarah’s video on how to waterproof these cheap buffer batteries in their video HERE.

Variable Current Buffer Batteries

hub dynamo cache batteries

The Cinq Smart Power Pack II.

If lipstick batteries are dumb, variable current buffer batteries are smart!

A ‘current limiting’ buffer battery like the Smart Power Pack II is designed for dynamo hub charging, allowing you to switch between set charging currents (eg. 100, 400 or 900mA) for different riding speeds. The main advantage is that you can optimise your charging current so that your battery can draw a charge at really low speeds (eg. 6-8km/h). This kind of feature is also handy for charging with solar panels in low-light conditions.

You can find out which setting will be best (at different speeds) by looking at the ‘watts’ produced from many charging devices:

dynamo usb chargers

Horizontal Axis: Cycling speed. Vertical Axis: Maximum output power at the USB.

Charging Ceilings:
100mA Setting = Look at the speed @ 0.5 Watts on the graph (5V x 100mA)
400mA Setting = Look at the speed @ 2 Watts on the graph (5V x 400mA)
900mA Setting =Look at the speed @ 4.5 watts on the graph (5V x 900mA)

Example: Sinewave Reactor USB Charger
Under 7.5km/h (0.5W): 100mA setting
7.5 (0.5W) to 15km/h (2W): 400mA setting
15km/h (2W) t0 30km/h (4.5W): 900mA setting

How Long Will A Battery Take To Charge?

To understand this section well, you may need to learn about volts, amps and watts HERE.

A 3-watt dynamo hub will put out an average of around 6-volts at 500mA. Once the power has been converted from AC to DC the output will translate to roughly 5V and 500mA (or 2.5 watts), which for an hour of riding is 500mAh. Charging a 3000mAh battery from scratch will, therefore, equate to 6 hours of riding at 12km/h with the most powerful USB chargers, and 20km/h with other USB chargers.

However, there are also small losses in the charging circuitry, perhaps around 20% of the total generated power. Adding the 20% extra ride time (6 hours + (6 hours x 0.2)) and we’re looking at 7.2 hours of riding to fill the battery from scratch.

You can also use the above assumptions when determining how long it will take to fill a phone battery. My Apple iPhone SE has a ~1500mAh battery, so at 500mA per hour, it should take 3 hours. Adding in the circuitry losses and I’m looking at 3.6 hours of riding to fill it up. Other modern smartphones like the Samsung S8 will have 3000mAh batteries, resulting in 7 hour + charge times.

Having said all that, there are products which use special capacitors to achieve twice the power, charging smartphones in literally half the time. Many of them also come with build-in buffer batteries. Check out the Cinq Plug5 Plus and Forumslader V5 USB chargers which will achieve 4-5 watts power at just 17-20km/h.

Charging Regular Batteries

You can, of course, charge batteries without pass-through too!

Large capacity batteries (5000mAh+) are great for storing power but can sometimes be problematic to charge as they have more internal resistance in the battery cells. In order to overcome the resistance, bigger batteries require a higher input current (eg. 1A) which is easy for a wall outlet but harder for a dynamo hub at touring speeds. This is why many 5000mAh+ batteries don’t charge particularly well from dynamo hubs.

That said, if you’re cycling at speeds over 25km/h, or you use one of the powerful USB chargers, you can sometimes charge batteries up to 10000mAh – but I’d still recommend 2x 5000mAh batteries instead.

Dynamo Hub Chargers With In-Built Pass-Through Batteries

dynamo usb charger

The Cinq Plug5 Plus has an integrated buffer battery.

As dynamo hub charging technology matures, we’re finding manufacturers fitting buffer batteries straight into their chargers. This simplifies the cabling, in particular, making for very neat charging solutions!

You can find integrated buffer batteries in the:
Cinq Plug5 Plus (1100mAh)
Forumslader Ahead (2100mAh)
NC-17 Appcon 3000 (3000mAh)
Lumi-Con P5 (5000mAh)
Busch & Muller USB Werk (300mAh)
ZZing (2000 or 2700mAh)

My full list of dynamo chargers is HERE.

Buffer Battery Recommendations

Cinq Smart Power Pack II / 3000mAh / 85g – €99 on Cinq
Lipstick Battery (I haven’t tested this battery, but it should do the trick) / 2600mAh / $9.99 on Amazon

Check Out Some Of My Other Resources On Dynamo Systems, Dynamo Lights and USB Chargers

The post All About Buffer Batteries With Pass-Through Charging For Dynamo Hub Systems appeared first on CyclingAbout.com.

Eurobike 2019: Bikepacking and Bicycle Touring Mega Gallery

$
0
0

Here’s your Eurobike 2019 round-up!

Eurobike is the world’s biggest bicycle trade show, and today we’ll be taking a look at all the bike adventure gear that was on display, along with all of the touring and bikepacking rigs. And there’s a lot of them, so get ready…

A special thanks to reader Marco de Wit for running around and taking these great photos while I’m cycling through Costa Rica. This event coverage wouldn’t be possible without him!

AcePac

Acepac had a slimmed-down display compared to other years (trade shows are expensive!). The bags on show were also a little more muted compared to the blues, greens, reds and camos of previous years.

Acepac offers their bikepacking bags in lots of different sizes depending on your intended use.

Argon 18

Argon 18 had their Dark Matter gravel bike at the show. This carbon rig has clearance for 45mm tyres and I really like the 3D Plus headset cap system (under the black spacers) that allows you to swap 0mm, 15mm and 30mm spacers up the front of the bike for a super clean look.

Blackburn

The Blackburn Outpost and Outpost Elite (waterproof) bags were displayed on a Look 765 Gravel RS. The Outpost Elite offers great value-for-performance compared to similar bikepacking offerings.

Brooks

Brooks has recently released some rubber bar tape to go with their non-leather series of saddles.

The full Cambium range is very neat and these days come in many classy colours.

Cane Creek

The anodizing on these Cane Creek eeWings titanium cranks are a bit of a showstopper! I think I need some…

EVOC

EVOC only announced their bikepacking bags a few weeks ago. Their bags are not large, so these will be more interesting for ultra-riders or folks looking to tuck a new bag somewhere small.

The 1, 2 or 3 litre seat packs use a Boa cable system to attach to the seatpost and two velcro straps for the saddle rails.

The 2.5 or 5 litre handlebar packs have a single Boa dial to adjust both handlebar straps.

The EVOC bags are all considered ‘water-repellent’, so it’ll be interesting to see how wet they can get before your gear is soaked.

eurobike 2019 To finish off the ensemble EVOC also makes small frame bags and top tube bags (with a neat cable port for electronics).

Extrawheel

The Extrawheel trailers are getting better by the year. The idea behind this trailer design is that they’re easy to pack for flying, you can use the trailer’s wheel as a replacement front wheel and the large wheel diameter means the trailer gets less ‘caught’ on bumps.

A fat bike trailer was recently announced, which will be great for epic desert crossings (hopefully I don’t get too many ideas).

FollowMe Cargo

The Fritz Cargo trailer from last year has been renamed to FollowMe Cargo.

It’s as light as 3.6kg in the SL version and 5.4kg in the regular. It connects directly to a QR rear axle but there are thru-axle adapters available.

Gentle Tent

I’ve seen concepts for ‘micro caravan’ tents before, but I didn’t know there were any in production!

The B Turtle has you covered though. Literally. This two-person tent is erected in 10 minutes using an electric pump. You can now buy it for an eye-watering 3000 euros!

Giro

Giro has been busy expanding their shoe range to suit casual mountain biking, touring and bikepacking.

Kindernay

Announced three years ago, Kindernay were finally ready to bring their 14 speed gearhub to Eurobike.

The Kindernay XIV is a modular system. The ‘gearbox’ is able to be removed from the wheel so that it can be installed on multiple bikes with different wheel and tyre dimensions. This means you could have a touring bike, mountain bike, folding bike and fat bike all running the same gearhub. Kinda cool! You can read my resource about this hub HERE.

Kona

2020 Kona Libre AL

The 2020 Kona Libre AL is a 6061 aluminium version of their popular off-road carbon adventure bike. Unfortunately, it’s only available in Europe (for now); it’s priced at £1800/1900€.

The 2020 Kona Sutra LTD is looking great! You can read about the details of this bike HERE.

KTM

One of the more unique bikes at the show is this aluminium step-through KTM gravel bike. Pretty cool that it’s spec’d with the new Shimano GRX groupset (more below).

A drop bar version of the gravel bike was also set up.

Along with a road/commuter edition complete with fenders and a rear rack!

Look

The Look 765 Gravel RS was unveiled a few months ago. It’s super light (sub-1600g frameset) and it’ll fit 27.5×2.2” (or 700x40mm) tyres if rough roads are your jam! Quite a versatile bike from a brand that’s usually quite narrow in their focus.

Lotus Bags

This is the first I’ve heard of Lotus Bags. It looks like they do every kind of bike bag imaginable.

The seat packs are stabilized and the cargo cages look gigantic!

Marin

This 2020 Marin Pine Mountain eBike is fitted up with 27.5+ tyres, a 120mm fork, a dropper post and ample frame mounts. This prototype Apidura frame pack looks super interesting too…

The 2020 Marin Pine Mountain 2 steps up to 29×2.6″ tyres, a 120mm fork, a dropper post and so MANY mounts. It’s priced really well at US $2099.

eurobike 2019

The Marin Nicasio Plus is a steel gravel bike running 650B wheels and an 11-46t cassette. All for US $899!

Eurobike 2020

Stepping up to US $1575 gets you the steel Marin Nicasio 2, with a full-carbon fork and Shimano Tiagra groupset.

2020 Marin Four Corners

The 2020 Marin Four Corners remains mostly unchanged and is US $1099.

Maxx

Maxx had a top-of-the-line Pinion 18-speed touring bike with a belt set up.

Eurobike 2019

And another touring bike with a Rohloff 14-speed hub and belt drivetrain.

Nicolai

eurobike 2019

Why not fit some panniers onto your super fancy Nicolai eBike so you can go on adventures!?

eurobike 2019

This Nicolai Pinion gravel bike was looking super neat.

Niner

The Niner MCR 9 RDO full suspension gravel bike is shipping in November! Incredibly, the linkages work with front derailleurs and the bike will squeeze in 50mm tyres in 650B or 700C.

eurobike 2019

The Niner RLT9 steel now has 2.0″ tyre clearance, cargo cage fork mounts and frame eyelets for an upcoming bolt-on frame bag.

Ortlieb

eurobike

Jonas Deichmann’s Curve GXR titanium bike was decked out with an Ortlieb bikepacking ensemble.

Ortlieb is using clear windows on many of their bags so you can easily find what you need.

Poison

Poison makes lots of bikes, but their titanium Argentum model with Pinion 18s gearbox is easy on the eyes.

The Poison Cyanit Randonneur was fitted up with front and rear Tubus racks in a matching colour.

Redshift

Redshift Sports have done a lot of innovating over the years. The ShockStop stem uses elastomers to dampen vibrations coming up from the road.

The ShockStop suspension seatpost has a pretty nifty design too and will be available soon. There’s even a dropper seatpost WITH suspension in the works!

The Redshift Kitchen Sink has multiple ergonomic grips built into it, along with an aero section.

Restrap

The Restrap panniers are looking pretty classy.

The olive green, in particular, is both elegant yet modest.

Restrap is now making cargo cage / fork bags too.

And a nice 4L seat pack.

There are some race bags in the works though… keep an eye out.

Ridley

The Ridley Kanzo has big clearance (700x47C or 27.5×2.0″) and lots of mounts for gravel adventures.

Roswheel

Roswheel has been showing some great value bike bags in recent years. They split their bag categories up into “road”, “off-road” and “tour”.

The tour bags are paired with the Roswheel racks.

The off-road series bags are stabilised with metal struts.

This Trek Crosscheck was decked out with the road series bags.

A Trek 920 with the tour series panniers.

And a Trek Procaliber was fitted with the stabilised off-road bags.

Salsa

2020 Salsa Marrakesh

The 2020 Salsa Marrakesh range has a new model with Shimano Sora STI shifters. It’s coming with front and rear racks for US $1799.

eurobike 2019

This Salsa Warroad is decked out with matching Salsa bikepacking bags.

Schwalbe

eurobike 2019

The new Schwalbe G-One UltraBite offers a very aggressive grip for gravel riding, in either 40mm or 2.0″ widths.

The Schwalbe Almotion gets a new tread to make it more suitable for the gravel (perhaps Schwalbe have been watching me cross South America) and the Hurricane is super slick in the middle with small knobs on the sides.

Shimano

Eurobike 2019

Shimano was showing off their new gravel groupset, the GRX. It’s available with smaller chainrings (48/31 tooth!) and better hand ergonomics for rougher trails. This bike was fitted with PRO bikepacking bags that were first shown last year.

Surly

eurobike 2019

The 2020 Surly Bridge Club also got an update with a new colour and a 1X version with 700x41C tyres as standard!

Thule

Thule were showing some updated panniers to suit their clip-on racks.

Trickstuff

Here’s a random entry. 2x four-piston brakes = instant rear wheel lock up!

Topeak

Topeak has added a few models to ensure they have all bag types available.

They’re now making Thule-style mini-racks that clip onto the fork or seat stays. You can then strap a dry bag to the top, or panniers to the sides.

A mountain bike with a full bag ensemble.

These cargo cages probably could’ve been set up a bit nicer…

This dropper seat pack has a very neat design!

A front clip-on rack running panniers.

A rear rack with the MTX style trunk bag that connects via a rail system.

Velo De Ville

Velo de Ville was showing a classic steel touring bike.

VSF

The VSF bikes continue to offer great value. This Shimano XT equipped ride (TX-800) is 1999 euros with Tubus racks, fenders and dynamo lights!

And the TX-400 is 1599 euros with a slightly lower spec.

Zefal

Zefal is now making a monstrous top tube bag with a clear section for your phone. This is actually a pretty great place for a bag, as you can store food, electronics and valuables for easy access.

The top tube bag slots in with the other Zefal bikepacking bags first announced last year.

That’s It, Folks. Thanks Again To Marco For The Eurobike 2019 Pics!

The post Eurobike 2019: Bikepacking and Bicycle Touring Mega Gallery appeared first on CyclingAbout.com.

Here’s How To Achieve Low Gear Ratios From Modern 2X Drivetrains

$
0
0

I’ve been in discussion with bike manufacturers for a long time about fitting appropriate climbing gears on their touring and adventure bikes. These discussions have always sparked as I have a pretty firm idea of the average terrain in most countries (I’ve been cycling around the world for many years), but perhaps more importantly, a keen interest in the physics of riding a bike with all of your equipment.

While some cyclists may pick flat routes so they never have to shift into their lowest gear, the majority of travellers will undoubtedly find road gradients exceeding 5 or 10% on their bike tours. As a cyclist with a high power output, I’ve calculated that using a typical touring bike, the maximum hill gradient I can sustain without fatigue is around 10%. The standard touring drivetrain works fine for the majority of my riding, but yet even as a strong rider, I still yearn for lower gears. That’s why I’ve equipped my KOGA with gears that have me riding up 12% gradients for hours if I need, all without riding in the ‘red’.

Lopping 25% off my power output results in what could be considered the ‘typical’ fit male. Assuming the same touring bike, gear and body weight, this cyclist could expect to comfortably ride up a 7.5% road gradient. This would drop to a 6% maximum gradient for someone with a lower fitness level. You can find my tutorial on how to calculate the steepest hill you can ride up HERE.

Drop bar bikes with 2X drivetrains rarely offer gear ratios that can tackle the equivalent hill gradient of a classic 3X touring bike. But today, we’re actually getting closer to having 2X drivetrains with comparable low climbing gears.

Why Is 2X Gaining Prominence On Touring And Adventure Bikes?

Trans Ecuador Mountain Bike Route

Mountain bike drivetrains are changing, which is in-turn having a big influence on touring and bikepacking bike drivetrains. This is because we rely on mountain bike components to achieve our low gear ratios.

A 3X front derailleur and triple chainring crankset constrains the maximum tyre width, as it uses up space at the frame chainstay. In order to (1) increase the diameter of a mountain bike wheel; (2) provide wider tyres, and; (3) fit short chainstays to a mountain bike frame, drivetrain manufacturers developed wide-range cassettes with 40 or 50 teeth in their lowest gear. These new gear systems worked perfectly, allowing manufacturers to evolve mountain bike frame design without losing much gear range at all.

The only issue with drop bar bikes: shifter-to derailleur compatibility.

In the past, you’ve been able to mix and match road shifters and mountain bike derailleurs (7/8/9 speed with Shimano and 10/11 speed with SRAM). Currently, mid-to-high quality mountain bike drivetrains are using 12 speed rear cassettes, which unfortunately, are all incompatible with STI gear shifters.

SRAM hasn’t released a 2X mountain bike drivetrain in the last seven years, and they haven’t released a 3X drivetrain in the last 10. It is clear that SRAM have no intention in anything but wide-range cassettes for off-road use. Shimano on the other hand is producing multiple 2×12 mountain bike drivetrains, along with 2×10, 3×10, 2×9 and 3×9. Their products will be key for bike manufacturers wanting to fit appropriately low gears for bike travel.

Look, this isn’t a big deal yet, but with more drivetrains moving to 10, 11 and 12 speed – the only compatible parts soon will be from low quality, entry-level groupsets. Let’s hope the next generation of Shimano GRX will incorporate derailleurs with longer cages so that a wide-range cassette can be paired with a 2X front derailleur, without fuss.

2X Drivetrains For Drop Bar Bikes With LEGIT Climbing Gears

2X drivetrain

This is a resource that will show you how to achieve the equivalent low gear ratio of a touring bike using a 2X drivetrain. We will investigate drop bar bikes, in particular, as 2X mountain bike groupsets already offer good climbing gears.

We will be using ‘gear inches’ to compare the lowest and highest gears on a few different 2X drivetrains (you can read how the number is derived HERE). You don’t really need to know what this means other than (a) lower is better, and; (b) a typical 3X touring bike (26-tooth front chainring to 36-tooth rear cassette cog) has a low gear of around 20 gear inches. That’s the number we’re looking to match or surpass.

My hope is that this page gives bike manufacturers an idea how they can spec 2X adventure bikes with appropriately low gears for travel. But it should also give you an idea what parts to use if you’re riding a 2X bike across countries.

NOTE: So we can make direct comparisons between drivetrains, all gear inch numbers below are calculated from a 700C x 38mm wheel.

Fuji Jari 2.3

2X drivetrain

Lowest Gear: 21.2″
Highest Gear: 100.2″

Crankset: Generic Alloy 44/28t
Cassette: Shimano Alivio 12-36t
Front Derailleur: Shimano Sora
Rear Derailleur: Shimano Alivio
Shifters: Shimano Sora

The lowest cost drivetrain in this list is found on a simple steel gravel/bikepacking bike by Fuji! The Jari 2.3 runs one of the lowest sub-compact road cranksets around with nice and small front chainrings – in this case, 28t to 44t. The Shimano Sora 9-speed STI shifters work well with the current generation Alivio derailleurs to result in a decent 21″ climbing gear.

You can find the Fuji Jari 2.3 for US $999.

Diamondback Haanjo EXP

2X drivetrain

Lowest Gear: 20.8″
Highest Gear: 115.2″

Crankset: Praxis Cadet 48/32t
Cassette: Shimano HG500 11-42t
Front Derailleur: Shimano Tiagra 4700
Rear Derailleur: Shimano Deore M6000
Shifters: Microshift M10

Diamondback have mixed a road crankset and front derailleur, with a mountain bike rear derailleur and cassette. Shifting is made possible on this 20-speed drivetrain thanks to some Microshift M10 barend shifters. This drivetrain could have easily been offered with a low gear that’s 19.5″, but unfortunately, the Praxis Cadet crankset spider is limited to 32t as the smallest front chainring.

Idworx Grandone

2X drivetrain

Lowest Gear: 20.5″
Highest Gear: 114.2″

Crankset: FSA Energy 46-30t
Cassette: Shimano XT 11-40t
Front Derailleur: Shimano Ultegra R8000
Rear Derailleur: Shimano Ultegra R8000 GS Long
Shifters: Shimano Ultegra R8000

The Grandone says ‘stuff it’ to the maximum permitted cassette size of Ultegra rear derailleurs (34t)! The big Shimano 11-speed mountain bike cassette looks to fit fine with the Idworx derailleur hanger. Combined with an FSA Energy sub-compact crankset and the Grandone has a 20.5″ climbing gear – all with very high-quality equipment.

You can get your hands on the Idworx Grandone for €3999.

Co-Motion Deschutes

2X drivetrain

Lowest Gear: 20.5″
Highest Gear: 114.2″

Crankset: FSA Omega 46/30t
Cassette: Shimano SLX 11-40t
Front Derailleur: Shimano 105 R7000
Rear Derailleur: Shimano SLX M7000
Shifters: Shimano 105 R7000
Shifting Converter: Wolf Tooth Tanpan

This Co-Motion does a high-quality 2×11 drivetrain a little bit differently to Idworx. They’ve chosen to pair a Shimano SLX rear derailleur with a 105 shifter (two components that are technically incompatible). Luckily, Wolf Tooth make a special component to adapt the different cable-pull ratios for a perfect match! The result is a Shimano 105 bike, with a mountain bike rear derailleur that can accomodate a wide-range MTB cassette. Match that with a sub-compact road crankset and you get a 20.5″ climbing gear that’s similar to a typical touring bike. The Shimano SLX derailleur will even handle a jump to an 11-42t cassette allowing for an even lower 19.5″ gear!

The USA-made Co-Motion Deschutes is US $2499.

Bombtrack Arise

2X drivetrain

Lowest Gear: 19.5″
Highest Gear: 114.2″

Crankset: Bombtrack Lyre 46/30t
Cassette: Microshift H103 11-42t
Front Derailleur: Microshift Centos
Rear Derailleur: Microshift M62L
Shifters: Microshift M10 Barend

Ok, now we’re getting into the sub-20″ gears! Bombtrack fitted a relatively obscure drivetrain to their Arise Tour. Microshift make some highly universal drivetrain and shifting components, allowing for lots of mix ‘n match. This bike in particular uses a rear M62L 10-speed mountain bike derailleur, a front Centos road derailleur, a 11-42t wide range cassette and Bombtrack’s own Lyre sub-compact crankset. Shifting is completed with M10 barend shifters.

You can get the 2020 Bombtrack Arise for €1799.

Co-Op Cycles ADV 3.1

2X drivetrain

Lowest Gear: 18.2″
Highest Gear: 94.4″

Crankset: Shimano Deore 38/24t
Cassette: Shimano HG50 11-36t
Front Derailleur: Shimano Deore
Rear Derailleur: Shimano Deore Shadow Plus
Shifters: Microshift M10 Barend

The Co-Op ADV 3.1 employs 20-speed Shimano Deore mountain bike components, pairing the smallest front chainring size of 24t with a 36t cassette cog. The result is an 18.2% gear that is well-equipped for most mountain roads. I suspect a 11-40t Sunrace cassette would squeeze in too, so technically the climbing gear on this drivetrain could be 16.4″!

The Co-Op Cycles is US $1399.

Moots Baxter

2X drivetrain

Lowest Gear: 17.8″
Highest Gear: 89.4″

Crankset: Shimano XT M8000 36/26t
Cassette: Shimano XT M8000 11-40t
Front Derailleur: Shimano XT M8050 Di2
Rear Derailleur: Shimano XT M8050 Di2
Shifters: Shimano Ultegra R8000 Di2

If you have ultra-deep pockets, this Moots Baxter might tickle your fancy! While 11-speed cable operated road shifters are incompatible with mountain bike derailleurs, the Shimano electronic components are not. So Moots combined Shimano XT Di2 derailleurs and drive components with Ultegra Di2 shifters. With the 36/26t crankset, you can squeeze a really low gear out of this bike. You can even source a 24t front chainring if you’d prefer an incredibly low climbing gear (16.4″).

You can get the USA-made titanium Moots Baxter with a Di2 groupset for US $8999.

You Can Read More Resources About Low Gear Ratios HERE

The post Here’s How To Achieve Low Gear Ratios From Modern 2X Drivetrains appeared first on CyclingAbout.com.

Inside the Future 13-Speed Shimano Gearbox: Weight, Drive Efficiency & More

$
0
0

Shimano recently filed a patent for a new 13-speed gearbox, and in this article, we’re going to talk about why this is awesome, how it works, how much it will likely weigh and how efficient it could be.

But first, a little on gearboxes.

We’ve seen dozens of crank-based gearboxes over the years, but currently, the Pinion gearboxes are the standard to beat. However, let’s not forget that internal gear hubs are gearboxes too – and the Rohloff hub is the gold standard in terms of both efficiency and weight.

shimano gearbox

Don’t worry, I’ll explain how it works later.

The Shimano Gearbox patent application actually reveals a huge amount of information about this gear system. It includes the gear ratios, the cog sizes, the lubricant ingredients, the shifting mechanism, the gearbox-specific chain, suspension details and more. This doesn’t mean it’ll ever see the light of day, but given the level of detail in this patent application, I’d confidently bet that this is more than a concept.

Shout outs to Jack Luke at BikeRadar for picking up on this patent application!

Why Do We Like Gearboxes?

I can tell you because I’ve been travelling around the world on a bicycle with a gearbox hub for over 10 years, and in that time have covered well over 100,000km.

I absolutely LOVE having a fully-sealed gear system, which is impervious to the mud, grit, dust, snow and sand that I plough through. Even in horrific conditions, my bike requires almost zero maintenance and few replacement parts too. The gearbox hides the usual delicate drivetrain components out of harm’s way, and with the wide hub flanges, my rear wheel is built stronger than a cassette wheel too.

For mountain bikers, a crank-based gearbox makes the most sense, by centralising weight on the bike and reducing the unsprung mass at the rear wheel – you can improve the overall suspension performance.

Let’s get into some of the main talking points of Shimano’s new gearbox.

1. The Shimano Gearbox Is Going To Be B-I-G

shimano gearbox

Volume big, that is. The bulk of the Shimano Gearbox is taken up by the opposing seven-cog cassettes with 19 to 41 tooth cogs. Once I appropriately scale the gearbox onto a bike, you can see it will take up a heck of a lot of space!

2. The Gearbox Will Require A Specially-Designed Frame

With that large gearbox volume, it’s going to need a different frame cabinet to anything currently available, but this likely won’t be an issue as Shimano has enormous sway in the bike industry. You can see that Shimano expects their gearbox to be mounted inside a frame sleeve, which would also make the most sense structurally.

3. There Will Be 13 Gears, Unevenly Spaced, Across a 470% Gear Range

The Shimano Gearbox will have a high gear that’s 4.7X harder to push than its easiest gear. This is a smaller gear range than the Rohloff hub at 5.3X, the Pinon gearbox at 6X and the current largest Shimano cassette at 5.1X. This simply means that the range of speeds at which you have the right gear ratio is reduced.

For example, if we set the lowest gear to climb at 5.6KPH at 60RPM, the top speed at 100RPM will be:
Shimano Gearbox – 44.3KPH
Shimano 10-51T Cassette – 48KPH
Rohloff Hub – 48.9KPH
Pinion C1.12 – 56.2KPH

Comparing the steps between each individual gear, the Shimano averages 12% while the Rohloff uses 13.6% and the Pinion 17.7%. That means, on average, each gear will feel closer together than other gearbox systems. However, unlike most gearbox systems, these steps are uneven throughout the gear range (9.7-16.2%), making gear changes feel a little less predictable.

Shimano Gearbox Gear Steps:
Gear 1-2 (9.8%)
Gear 2-3 (10.5%)
Gear 3-4 (16.2%)
Gear 4-5 (11.5%)
Gear 5-6 (13.6%)
Gear 6-7 (12%)
Gear 7-8 (12.3%)
Gear 8-9 (13.6%)
Gear 9-10 (10.8%)
Gear 10-11 (16%)
Gear 11-12 (9.7%)
Gear 12-13 (9.7%)

4. It Uses Roller Chains, Not Planetary or Spur Gears

The Phaser Gearbox works on VERY similar principles, however, the cassette is mounted directly to the driveshaft.

Roller chains and cassettes are very simple to produce and assemble, allowing for large-scale manufacturing at a low cost. This is undoubtedly the biggest advantage of the Shimano Gearbox over the competition. Compare this with a Rohloff Hub which has over 150 individual components (PIC) and a resulting high price (US $1700+) – and it is easy to understand why gearbox systems haven’t yet made it to the mass market yet.

5. There Will Be Electronic Shifting

The patent application talks about both electronic and mechanical shifting. Shimano has proven themselves very adept at the design and manufacturing of electronic components, so this we can expect the execution to be flawless with both drop bar and flat bar shifters.

6. The Shimano Gearbox Is NOT Intended For E-Bikes

Given there are relatively small steps between each gear ratio, plus the fact that the majority of electric bikes now use mid-mount motors – this gearbox has not been designed for eBikes, and the system has no room for motor integration either. That said, this doesn’t mean you can’t have a Shimano Gearbox eBike. The GoSwissDrive rear hub motors are currently very popular amongst Pinion gearbox eBike manufacturers.

7. This Gearbox Could Come Soon

shimano gearbox

Shimano mentions that their gearbox can also be applied to road bikes.

The patent application shows very advanced designs, rather than just simplistic ideas. It’s clear Shimano has been working on this for a while, and I’m certain they have working prototypes hidden at Shimano HQ. The key challenge will be in working with the big bike manufacturers to roll these gearboxes out smoothly.

Ok, So How Does It Work?

It’s actually quite simple, and I can use regular drivetrain components to describe it.

There are four key components here: a crankset, two cassettes, three chains and a derailleur-type mechanism. Pedal power from the crankset is delivered to the first seven-speed cassette, transferred to the second seven-speed cassette and then sent to the rear wheel externally.

The gears are changed using a derailleur mechanism located between the cassettes, which will move diagonally along an angular shaft. The first cassette will move side-to-side, but only the distance of one cassette cog. It’s best to visualise this in action at 5:37 in my Shimano Gearbox video.

In the first gear, both cassettes are aligned and the chain will run from the 19 to 41 tooth cog. For the second gear, the first cassette will shift over so that the chain can now couple the 21 tooth cog on the first cassette, and the same 41 tooth cog on the second cassette. For the third gear, both the derailleur mechanism AND the cassette will shift across, resulting in a change to the 37 tooth cog on the second cassette. This three-step process will shift the chain all the way to up the drive-side of the bike, resulting in the highest gear of 41 to 19 tooth.

This gear system is pretty cool because the chain is always aligned, which maximises drive efficiency. It also achieves 13-speeds within a very narrow gearbox width – typically the number of cassette cogs determines the number of speeds in a chain-driven gearbox.

Gear changes will NOT be instant like those on a Rohloff or Pinion gearbox, but you will be able to shift under a load. The system will also run inside a sealed oil bath, enduring maintenance and replacement parts are at a minimum.

Ok, it’s time to do some speculating!

Shimano Gearbox Weight

shimano gearbox

A typical 1X drivetrain hits the scales at 2273 grams. When we add a 2X front derailleur, another chainring and another shifter, this adds about 400 grams to the total. The lightest gearbox currently available is the Rohloff, which weighs in at 3125 grams and the Pinion C1.12 is not much heavier at 3310 grams.

Example Drivetrain Weights:
SRAM GX Eagle with a chain – 2273 grams
Shimano SLX 2X with a chain – 2700 grams
Rohloff Speedhub with a belt – 3125 grams
Pinion C1.12 with belt – 3310 grams

See my full gearbox vs. derailleur drivetrain weight comparison HERE.

By adding up the approximate weights from the various drivetrain components required to build the Shimano Gearbox, I’ve estimated it could be the same weight as the Rohloff drivetrain, and possibly lighter than a Pinion too. But really, there won’t be much separating all three. The only clincher is that frame cabinets for gearboxes definitely add weight to a bike frame, resulting in a heavier overall bike.

My Shimano Gearbox Recipe:
1.5X chains – 350 grams
2X cassettes – 640 grams 
3X Aluminium chainrings – 120 grams
1X Rear Cog – 40 grams
1X Pinion Rear Hub – 300 grams
1X Derailleur – 100 grams
2X Crank Arms – 420 grams
1X Magnesium Gearbox Body – 500 grams
1X Shifter – 100 grams
1X Cable Set – 150 grams
Misc Small Parts – 100-300 grams
Multiple Bearings – 100 grams
Total: 3120 grams

Drive Efficiency of the Shimano Gearbox

Moving onto drive efficiency, can this system match the high rate of efficiency of a Rohloff Hub? 

I suspect not.

Let’s see, even when accounting for the straight chain lines, there could be as much as 3-watts lost on each chain (x3), the derailleur pulley will lose about one watt, and there are a few extra sets of bearings at each of the transmissions. My napkin maths brings us to ~89% efficiency, which is significantly behind the 95-96% of derailleur drivetrains (HERE), the 94.5% set by a Rohloff hub (HERE) and the 90.5% of a Pinion gearbox (HERE).

That said, as part of the same patent application, Shimano has written in length about lubricating agents including a “fatty acid containing a carboxyl group”. The graph they’ve included shows the friction coefficient could potentially be halved.

In the patent application, Shimano has also shown a unique gearbox-specific chain design which is purposely sheared down to accumulate lubricant between the chain pins and link plates. This should reduce friction for the two chains inside the gearbox.

But even with these measures, I think you can expect only minor improvements to the drive efficiency. I’d suggest the best-case would be efficiency numbers running into the low 90s, matching the Pinion gearbox, but the Rohloff benchmark of 94.5% seems unlikely.

Will The Shimano Gearbox Be A Game Changer?

shimano gearbox

Given that most components for this gearbox are already mature, that the gearbox will be relatively simple and cheap to manufacture, and that Shimano has some of the biggest pull within the bike industry – and it is looking pretty damn likely that this gearbox will be a game-changer if it arrives.

I can see this system rolling out on urban and touring bikes that require low maintenance drivetrains, but equally, it’ll be great on mountain bikes that can benefit from the centralised weight and reduced unsprung mass.

Don’t expect the Shimano Gearbox to be as light or as efficient as a derailleur system though – it won’t be, but it could fall somewhere between the Pinion gearbox and the Rohloff hub. Compared to a 1X drivetrain, you can expect this gearbox to add more than a kilogram to your bike, but that won’t matter when drivetrain maintenance becomes a thing of the past.

Personally, I think the gearbox could do with more gear range – somewhere around 550% would be perfect for bike travel – but hey, if Shimano needs someone to test their gearbox on a bike ride across a continent or two, I will happily put my hand up to push it to the limit.

Are You As Excited About The New Shimano Gearbox As Me?!

The post Inside the Future 13-Speed Shimano Gearbox: Weight, Drive Efficiency & More appeared first on CyclingAbout.com.

Viewing all 154 articles
Browse latest View live