Bikepacking has become rather popular over the last couple of years, and lots of custom bikepacking bag manufacturers have popped up all around the world looking to assist you with your adventures.
Bikepacking bags are great for a number of reasons:
Firstly, because they will fit almost any bike. Just strap it on, fill it up and you’re away;
Secondly, they’re super lightweight. A full system of bags is generally under 1000g, less than the weight of one pannier; and
Thirdly, they encourage you to pack light. Packing light means going uphill faster and reducing the wear on your bike parts.
I’ve created this list to showcase all of the bikepacking bag manufacturers as well as their prices, in order for you to make the most informed purchasing decision possible. The only problem is that there are so many great products out there! It’s worth noting that you often do get what you pay for (to a point). The more expensive products are made with top-notch materials, a choice of colours and are often custom tailored to your bike.
Click HERE for my Complete List of Bicycle Pannier Manufacturers.
Bikepacking Bag Manufacturer List By Country
Updated July 2018
Argentina
Asgard Equipamiento (ARG)
Top Tube Bags // 0.5L, 1.5L – US $9-20
Stem Bags // 1L – US $23
Seat Packs // 4L, 14L – US $18-46
Frame Bags // Custom – US $23-29
Handlebar Harnesses // 20L – US $29
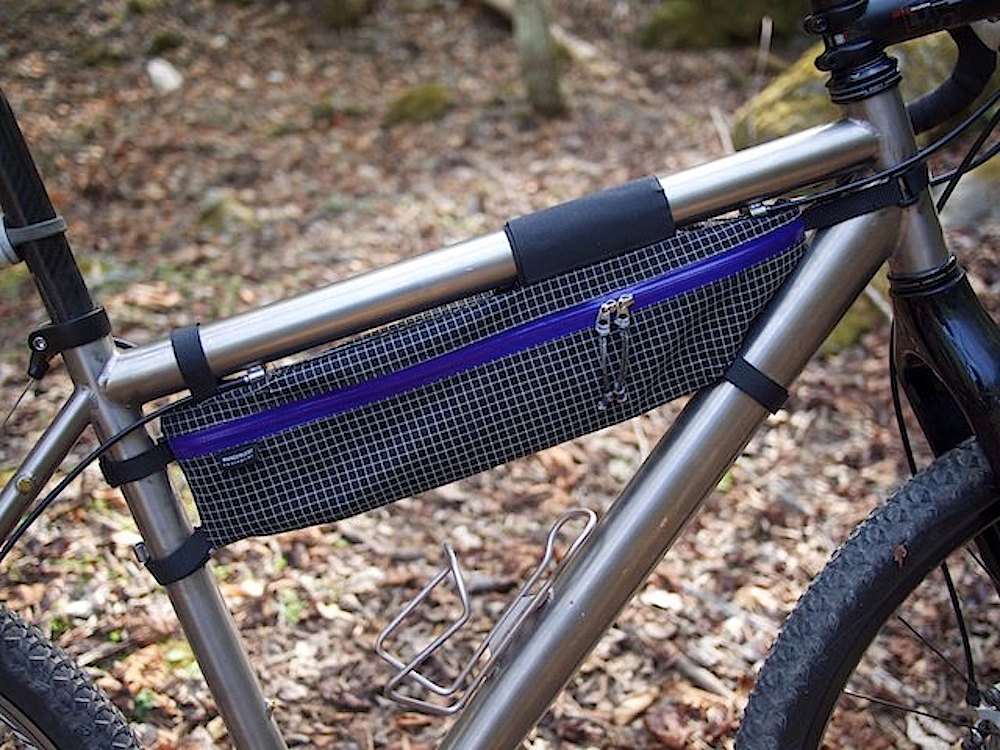
![bikepacking bags]()
Asgard bikepacking bags.
Australia
Bike Bag Dude (AUS)
Top quality bikepacking gear from Down Under, they’re constantly producing new designs to make bikepacking easier for you.
Top Tube Bags // One Size – AUD $120
Stem Bags // One Size – AUD $60
Frame Bags // Two Custom Sizes – AUD $200-340
Handlebar Harnesses // One Size – AUD $80
Handlebar Bags // Three Sizes – AUD $200-240
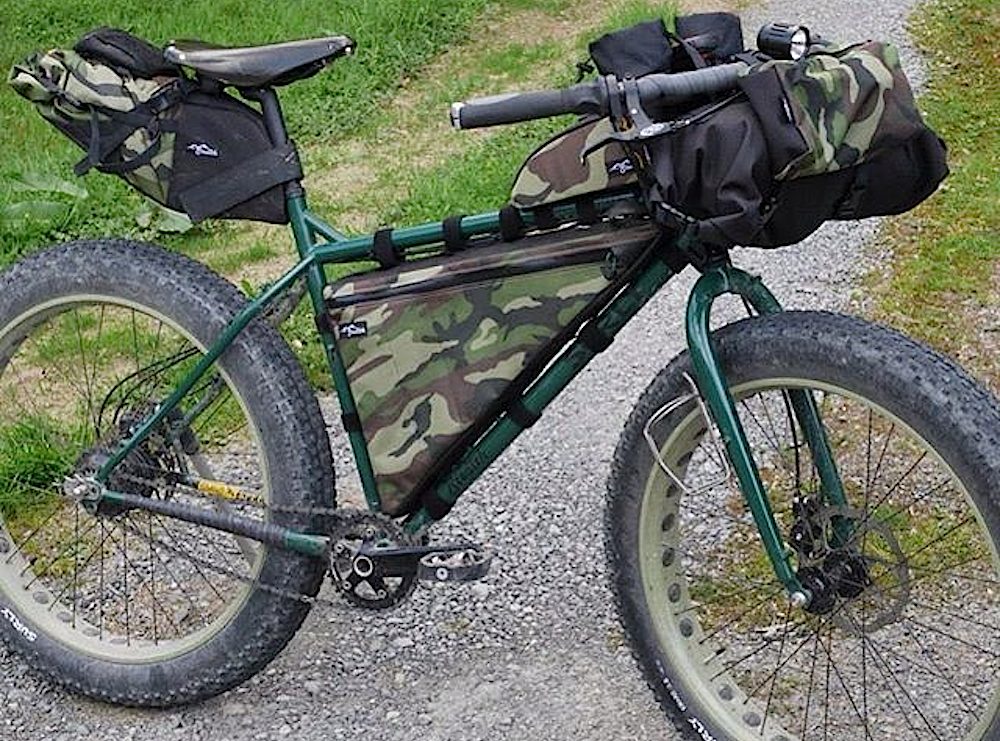
![Bike Bag Dude BikePacking Bags]()
Bike Bag Dude BikePacking Bags
Old Bag Cycling (AU)
Frame Bags // Custom – from AU $150
Seat Packs // Custom – from AU $180
![old bag cycling]()
An Old Bag Cycling custom frame bag.
Terra Rosa Gear (AU)
Frame Bag // Custom – from AU $210
Handlebar Roll and Pocket // Custom – from AU $150
Seat Packs // Custom – from AU $190
Top Tube Bag // Custom – from AU $75
![terra rosa gear]()
Terra Rosa bikepacking bags.
Canada
Arkel (CAN)
Arkel, famous for their great panniers, have just started making bikepacking gear for 2016! They will be releasing a ‘meatpacker rack’ which allows you to use the 25L handlebar bikepacking bag on the rear too, if you needed that extra gear space.
Seat Packs // 11L (requires rack), 15L
Handlebar Bags // 15L, 25L (can be mounted as a seat pack with a rear rack)
Porcelain Rocket (CAN)
Another of the more popular bikepacking bag manufacturers. PR are always putting together new products, colours and designs!
Top Tube Bags // Two Sizes – US $40-50
Stem Bags // One Size – US $140
Frame Bags // Custom – US $160-220
Seat Packs // 5L, 13L – US $125-185
Handlebar Harnesses // One Size (inc pocket) – US $125
![Porcelain Rocket BikePacking Bags]()
Porcelain Rocket BikePacking Bags
Phantom Pack Systems (CAN)
Phantom Pack Systems do any kind of bikepacking bag at a typically lower price than others on this list.
Top Tube Bags // Two Sizes – CAD $63-67
Frame Bags // Custom – CAD $115-189
Seat Packs // 6L, 8L – CAD $110-115
Handlebar Bag // One Size – CAD $100
![Phantom Pack Systems BikePacking Bags]()
Phantom Pack Systems BikePacking Bags
Chile
Akatanga Custom Bags (Chile)
These bags are handmade in Chile and are available directly through their Facebook page.
Frame Bags // Custom
Seat Packs // Custom
Handlebar Bags // Custom
Accessory Bags // Custom
Top Tube Bags // Custom
![bikepacking bag]()
Akatanga Bikepacking Bags
Choike (Chile)
Frame Bags // Custom – from 55000 CLP
Handlebar Harnesses // One Size – 23000 CLP
Seat Packs // 10L, 15L – 55000 to 65000 CLP
Stem Bags // One Size – 12000 CLP
Top Tube Bags // 1.2L – 23000 CLP
![Choike Bikepacking]()
Choike bikepacking bags.
China
AZUR (China)
Handlebar Bags // 9.5L – US $45
Seat Packs // 8.1L – US $60
![Azur Bikepacking Bags]()
Azur Bikepacking Bags.
Newboler (China)
Seat Packs // 10L, 12L – US $19-29
Handlebar Harness // 7L – US $19
Frame Bags // Half, Full – US $10-25
Top Tube Bag // S, M – US $11-13
![bikepacking bags]()
Newboler Bikepacking Bags.
Rhinowalk (China)
Seat Packs // 10L – US $90
![Rhinowalk Bikepacking Bags]()
Rhinowalk Bikepacking Bags
Roswheel (China)
Handlebar Bag // 9.4L – US $59
Seat Packs // 10L – US $79
Top Tube Bag // 1.5L – US $35
![Roswheel bikepacking bags]()
Roswheel bikepacking bags.
Czech Republic
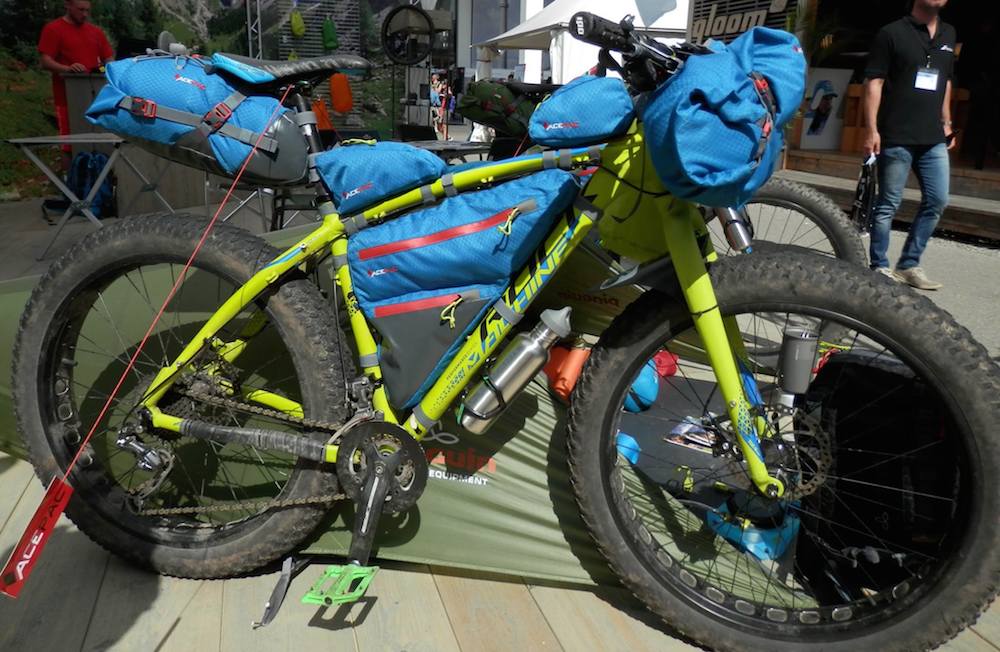
AcePac (CZE)
New manufacturer AcePac were showing off their gear at Eurobike this year, and they look great. Watch this space.
Top Tube Bags
Frame Bags
Seat Packs
Handlebar Harnesses
Handlebar Bags
![AcePac BikePacking Bags]()
AcePac BikePacking Bags
Author (CZE)
Frame Bags // Five Sizes
Seat Packs // 12L
Top Tube Bags // One Size
![Author Bikepacking Bags]()
Author Bikepacking Bags.
EverBike (CZE)
EverBike makes handlebar rolls and seat packs out of the Czech Republic.
Handlebar Bags // 12L, 15L – €76-84
Seat Packs // 8L, 12L – €76
![EverBike Bikepacking Bags]()
EverBike Bikepacking Bags
Germany
Burgfyr (Germany)
Made in Hamburg, these bikepacking bags look super fresh. I particularly like the custom “slotbag” framebags!
Frame Bags // Three Sizes + Custom – 58-99€
Seat Packs // One Size – €120
Handlebar Bags // One Size – €109
Stem Bags // 1.7L – €48
![bikepacking bag]()
Burgfyr Bikepacking Bags
Fellow Bags (GER)
Newly established brand FLLW put together a solid-looking seat pack only at this stage, available in six different colours.
Seat Packs // 6-14L – €169
![Fellow Bags Bikepacking Saddle Bag]()
Fellow Bikepacking seat pack.
Ghost (GER)
This large bike company has started to put together bikepacking bags for their new adventure bikes. They will be available in 2017.
Handlebar Bags // One Size
Accessory Bags // One Size
Seat Packs // One Size
Frame Bags // Three Sizes
![bikepacking bag]()
Ghost Bikepacking Bags
Ortlieb (GER)
Bicycle bag specialists Ortlieb have finally dabbled in bikepacking bags, piecing together a really impressive waterproof bag range. I’ve been using these bags over the last few months and have been really impressed. My Handlebar Pack review is HERE and my Seat Pack review is HERE.
Seat Packs // 11L, 16.5L – US $160
Handlebar Bags // 9L, 15L – US $130
Accessory Bags // 3.5L – US $75
Frame Bags // M, L
Top Tube Bags // 0.8L
![bikepacking bag]()
Ortlieb Bikepacking Bags
Parsley Bags (GER)
Seat Packs // Two Sizes – €177-197
![Parsley Saddle Bag]()
Parsley seat pack.
Italy
Kicking Donkey (ITA)
Stem Bags // 1L – 37 € (for two)
Framebags // Custom Half or Full – 70-120€
Handlebar Harness // 43 €
Handlebar Bags // Custom – 45-55€
Seat Packs // 6L, 12L, 17L – 48-89€
Top Tube Bag //1L – 39€
![bikepacking bags]()
Kicking Donkey Bikepacking Bags
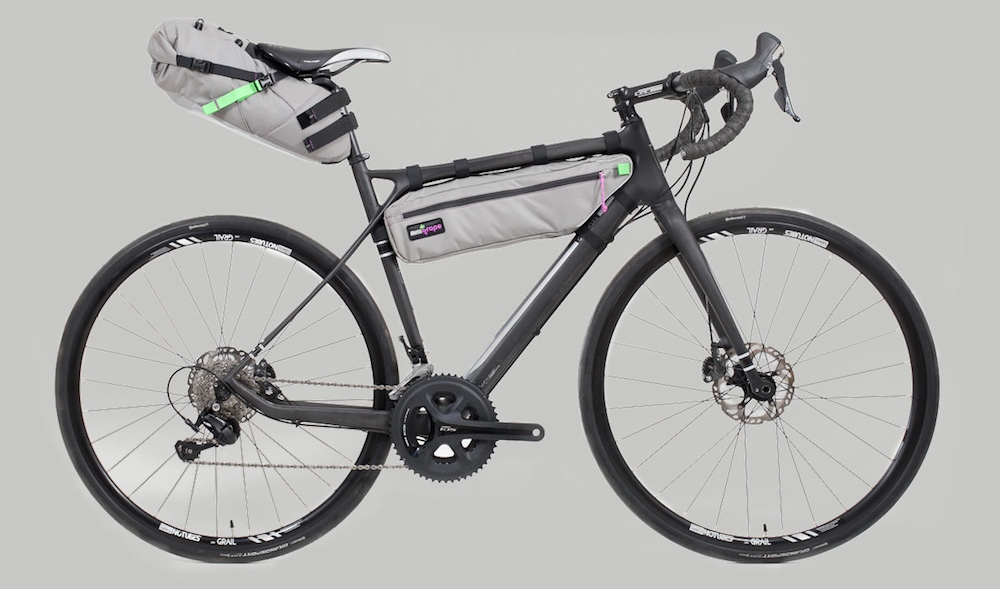
Miss Grape (ITA)
Frame Bags // Three Sizes – €97
Seat Packs // 13L, 20L – €139-149
Handlebar Harnesses // One Size – €109
![Miss Grape BikePacking Bags]()
Miss Grape BikePacking Bags
Rusjan (ITA)
Fork Bags // Two sizes – 55-60€
Framebags // Custom – 150-180€
Handlebar Bags // 15L, 17L, 20L – 185-195€
Seat Packs // 12L, 17L – 185-195€
Stem Bags // 1L – 40€
Top Tube Bags // 1.4L – 90€
![Rusjan Bikepacking Bags]()
Rusjan Bikepacking Bags.
Japan
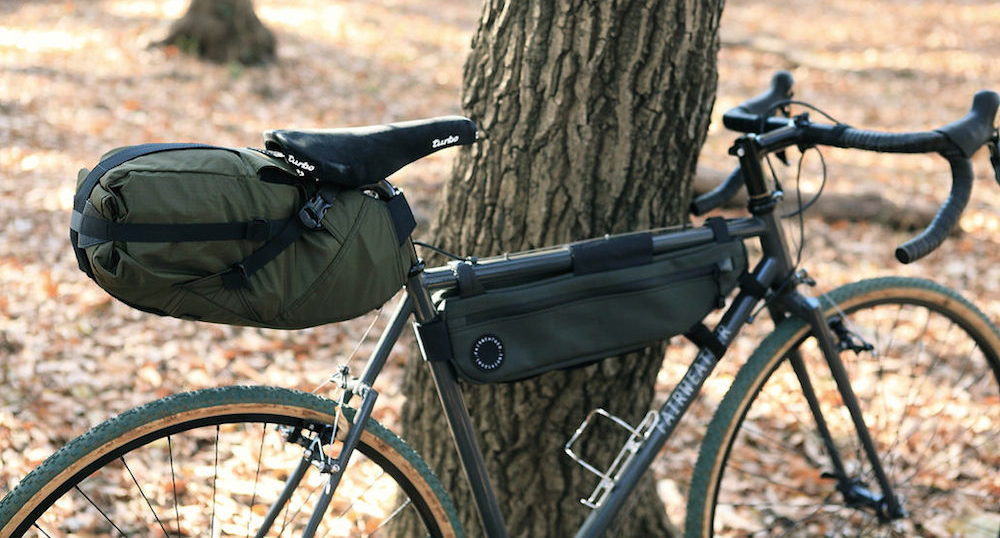
Fairweather (JAP)
I really like Fairweather’s panniers, and the bikepacking gear looks just as nice. Fairweather select their colours well too.
Frame Bags // Two Sizes – US $49-77
Seat Packs // 6L – US $138
Handlebar Bag // One Size – US $128
![Fairweather BikePacking Bags]()
Fairweather BikePacking Bags
Wanderlust Equipment (JAP)
W.E make quite a nice half-size frame bag, made in Japan.
Frame Bags // One Size – ¥8800
![Wanderlust Equipment Frame Bag]()
Wanderlust Equipment Frame Bag
New Zealand
Cactus Outdoor (NZ)
Handlebar Harness // 15L – NZ $129
Seat Packs // 10L – NZ $169
Top Tube Bags // 1L – NZ $69
![bikepacking bags]()
Cactus Outdoor bikepacking bags.
Dancing Moose (NZ)
Handlebar Harness // 20L – NZ $188
Seat Packs // 15L – NZ $222
Frame Bags // Custom – NZ $230
Top Tube Bags // 0.8L, 1.5L – NZ $89-96
Accessory Bags // 2L – NZ $76
![bikepacking bags]()
Dancing Moose bikepacking bags.
Robo Kiwi (NZ)
Handlebar Harness // 12-20L – NZ $169
Seat Packs // 14L – NZ $179
Frame Bags // Custom – NZ $149-169
Top Tube Bags // 0.8L, 1.9L – NZ $54-69
Stem Bags // 0.9L – NZ $54
Accessory Bags // 2L – NZ $59
![bikepacking bags]()
Robo Kiwi bikepacking bags.
Stealth Bike Bags (NZ)
Michael started Stealth in 2014, making bags out of Wellington, NZ. The majority of the materials are sourced locally and are waterproof, although Michael doesn’t go through the full process of waterproofing his bags (it’s too expensive and complicated).
Top Tube Bags // One Size – NZ $75
Stem Bags // One Size – NZ $60
Frame Bags // Custom – NZ $130-230
Seat Packs // 8L, 10L – NZ $160-170
Handlebar Bag // 7.5L, 9L – NZ $135
Handlebar Harnesses // One Size – NZ $120
![Stealth Bike Bags]()
Stealth Bike Bags
Poland
BikePack (POL)
This Polish bag manufacturer has a reputation for making excellent quality handcrafted bike bags.
Top Tube Bags // One Size, Custom – €21-24
Frame Bags // Custom – €78-91
Handlebar Bags // One Size – €71
Seat Packs // 5L, 9L, 12L – €45-77
![BikePack Poland Bags]()
BikePack Poland Bags
Triglav (Poland)
Triglav is another Polish bikepacking bag business, available directly through Facebook.
Seat Packs // One Size
Handlebar Bags // One Size
Frame Bags // Custom
Fork Bags // One Size
![bikepacking bag]()
Triglav Bikepacking Bags
Russia
Kailer (RUS)
Frame Bags // 3.5L, 5L, 6L, Custom – US $41-63
Handlebar Harnesses // 16L – US $52
Seat Packs // 8L, 15L, 20L – US $44-60
Stem Bags // 1.5L – US $13
![bikepacking bags]()
Kailer Bikepacking Bags
Kravets Bikepacking Gear (RUS)
Handlebar Harnesses // 12L – US $68
Seat Packs // 14L – US $77
![kravets bikepacking bags]()
Kravets bikepacking bags.
Notnee Bikepacking (RUS)
Seat Packs // 14L – US $30
Handlebar Harnesses // US $35
Frame Bags // Custom – from US $37
Top Tube Bags // S, M – US $15
![bikepacking bags]()
Notnee bikepacking bags.
Packrat Moscow (RUS)
Handlebar Harnesses
Seat Packs
Frame Bags
Top Tube Bags
Accessory Bags
![bikepacking bags]()
Packrat Moscow bikepacking bags.
SENNA (RUS)
Frame Bags // Custom – US $35-40
Handlebar Bags // 17L – US $36
Seat Packs // 5L, 12L, 17L – US $25-50
Stem Bags // 1L – US $13
![Senna Bikepacking Bags]()
Senna Bikepacking Bags.
UralTour (RUS)
Mike and Olga live in the Ural region of Russia and make super affordable bikepacking gear. They make the gear as you order it and almost anything can be custom to your needs.
Frame Bags // Custom – US $40-50
Seat Packs // 11L – US $45
Handlebar Bags // 14L – US $40
![UralTour BikePacking Bags]()
UralTour BikePacking Bags
Spain
Geosmina (ESP)
Top Tube Bags // 0.6-1.0L – €37-42
Cargo Cage Bags // 4L – €45
Frame Bags // 2.5L, 7.5L – €35-40
Handlebar Bags // 10L – €49
Seat Packs // 10L – €80
![bikepacking bags]()
Geosmina Bikepacking Bags
Inuvik Studio (ESP)
Inuvik makes some nice looking gear out of Spain.
Frame Bags // Three Sizes
Top Tube Bags // One Size
![Inuvik Studio BikePacking Bags]()
Inuvik Studio BikePacking Bags
Sweden
Endless Trails Outdoor Equipment (Sweden)
Edvin makes all kinds of waterproof outdoor gear out of Gothenburg, including bikepacking bags!
Handlebar Bags // One Size – US $121
Accessory Bags // One Size – US $62
Frame Bags // Custom – US $167
Seat Packs // One Size – US $122
Stem Bags // Two Sizes – US $50-72
Downtube Bags // One Size – US $44
![bikepacking bag]()
Endless Trails Bikepacking Bags
Switzerland
Spok Werks (SWI)
Spok bags are made out of Switzerland by Michael and his partner.
Top Tube Bags // Two Sizes
Stem Bags // Two Sizes
Frame Bags // Custom
Seat Packs // Two Sizes
Handlebar Bag // Four Sizes
![Spok Werks Bikepacking Bags]()
Spok Werks Bikepacking Bags
Taiwan
Giant (Taiwan)
The world’s biggest bike manufacturer is now dipping into the bikepacking market. Their Scout line of bags is waterproof and affordable.
Frame Bags // S, M, L – US $75-85
Handlebar Bags // One Size – US $80
Top Tube Bags // One Size – US $30
Seat Packs // One Size
![bikepacking bag]()
Giant Scout Bikepacking Bags
Merida (Taiwan)
Fork Bags
Frame Bags
Seat Packs
![Merida Bikepacking Bags]()
Merida Bikepacking Bags.
Woho (Taiwan)
Frame Bags // 2.75L, 4L, 4.7L – US $60-70
Handlebar Bags // 13L – US $100
Seat Packs // 12L – US $100
Stem Bags // 1.2L – US $35
Top Tube Bags // 1L – US $35
![woho bikepacking bags]()
Woho bikepacking seat pack.
Thailand
Conquer (Thailand)
Conquer have been around since 2014, their bags all made in Thailand.
Top Tube Bags
Stem Bags
Frame Bags
Seat Packs
Handlebar Bags
![Conquer BikePacking Bags]()
Conquer BikePacking Bags
Vincita (Thailand)
Frame Bags // 2.6L – US $35-75
Handlebar Harnesses // 5L, 9L – US $115-122
Seat Packs // 9L, 15L, 24L – US $79-139
Top Tube Bags // 0.8L – US $39
![bikepacking bags]()
Vincita Bikepacking Bags
Ukraine
Bag4Bike (Ukraine)
Dmitry from Bag4Bike loves bike touring with a minimal load. Needing more storage than his small daypack, he created a 7L seat pack to take a bit of weight off his back.
Seat Packs // 7L – US $59
![bikepacking bag]()
Bag4Bike bikepacking seat pack.
Fast-N-Light (Ukraine)
Seat Packs // 13L, 17L – US $45-50
Handlebar Harness // 8L, 15L – US $32-35
Frame Bags // Half, Full, Custom – US $28-40
Stem Bags // 0.75L – US $12
![bikepacking bags]()
Fast-N-Light bikepacking bags.
Seven Roads Workshop (Ukraine)
7R workshop has an impressive list of bags and harnesses for a reasonable price.
Frame Bags // Two sizes – US $50-95
Handlebar Bags // Four Sizes – US $80-105
Seat Packs // 5L, 8L, 13L, 18L – US $50-115
Stem Bag // 1L – US $25
![7R Bikepacking Bags]()
7R Workshop Bikepacking Bags.
United Kingdom
Alpamayo Designs (UK)
Paul and Sam met in Equador while bike touring. After getting along so well, they rode down the Andes together and then went on start a bikepacking bag brand! This gear is all made by a small workshop in the Peruvian Andes.
Seat Packs // One Size – £85
Frame Bags // Three Sizes + Custom – £55-115
Handlebar Harnesses // 10-20L – £60
Top Tube Bags // 1L – £29
Stem Bags // 1L – £25
![bikepacking bag]()
Alpamayo Bikepacking Bags
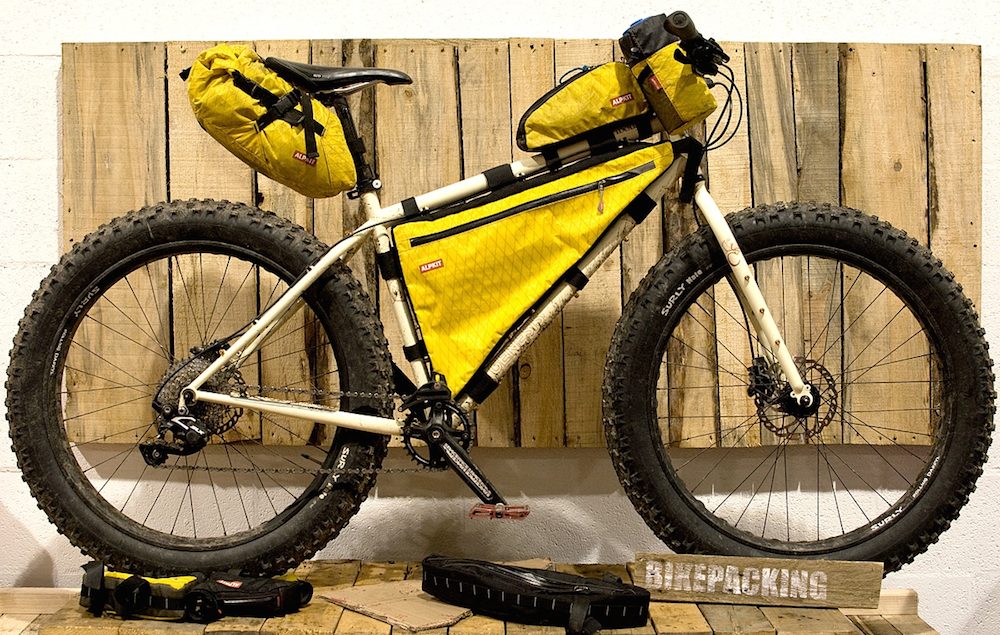
AlpKit (UK)
AlpKit is a UK-made, direct-to-the-public outdoor gear company. They have been putting together a huge line up of bags over the past few years.
Top Tube Bags // S, M, L – £18-29
Stem Bags // One Size – £18
Frame Bags // S, M, L, Custom – £40-100
Seat Packs // 3L, 13L – £15-65
Handlebar Harnesses // Two Sizes – £12-45
Handlebar Bags // 13L, 20L – £11-14
![AlpKit Bikepacking Bags]()
AlpKit Bikepacking Bags
Altura (UK)
Frame Bags // 5L – £49
Handlebar Bags // 12L – £49
Seat Packs // 6L, 12L – £49-59
Top Tube Bags // 1L – £29
![Altura Bikepacking Bags]()
Altura Bikepacking Bags.
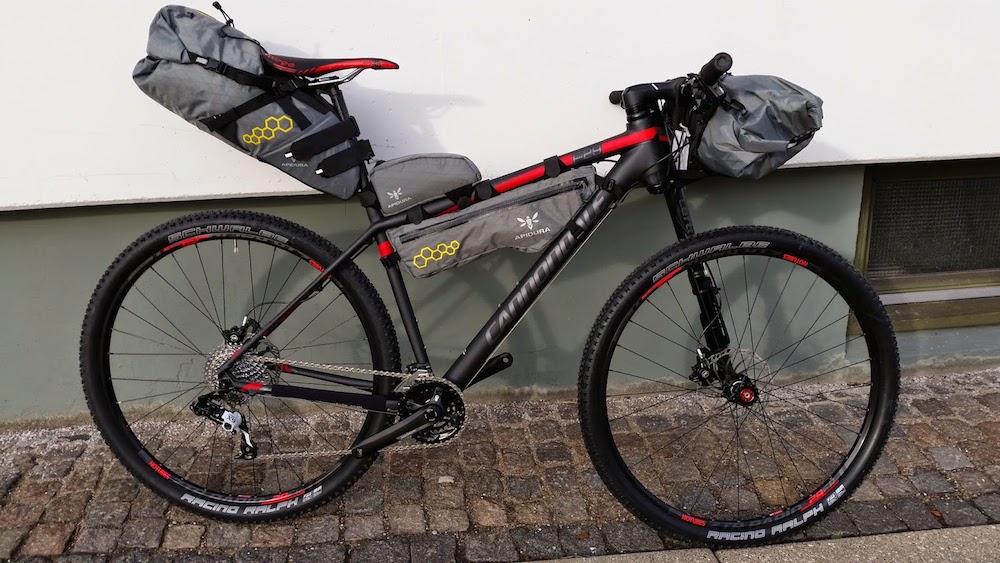
Apidura (UK)
Apidura are now one of the more common bikepacking bag manufacturers, sponsoring lots of ultra-endurance athletes and bike travellers.
Top Tube Bags //0.5L, 0.8L – £30-35
Frame Bags // 3L, 4.5L, 5.3L, 6L – £55-70
Seat Packs // 11, 14, 17.5L – £80-85
Handlebar Bags // 9L, 20L – £65-75
![Apidura BikePacking Bags]()
Apidura BikePacking Bags
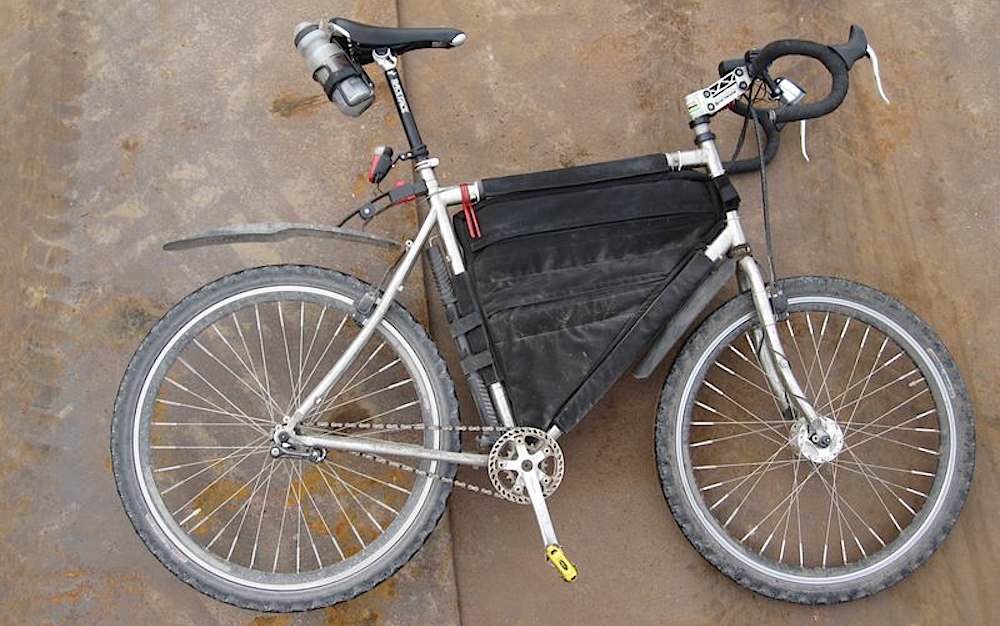
Bike Bag (UK)
Bike Bag put together quite affordable frame bags in the UK, all custom.
Frame Bags // Custom – £40-55
![Bike-Bag UK Frame Bag]()
Bike-Bag UK Frame Bag
Mack Workshop (UK)
Jon at the Mack Workshop makes high-quality bags at reasonable prices. As it’s all made to order, you can get any of the bags custom tailored to your needs.
Handlebar Bags // Two Sizes – £30-60
Seat Packs // One Size – £75
Frame Bags // Four Sizes + Custom – £40-62
![bikepacking bag]()
Mack Workshop Bikepacking Bags
Restrap (UK)
Restrap have a really nice line of bikepacking bags. I especially like their seat pack holster which allows you use different sized dry bags.
Frame Bags // S, M, L – £39-59
Seat Packs // 13L – £89
Handlebar Harnesses // One Size – £55
![Restrap BikePacking Bags]()
Restrap BikePacking Bags
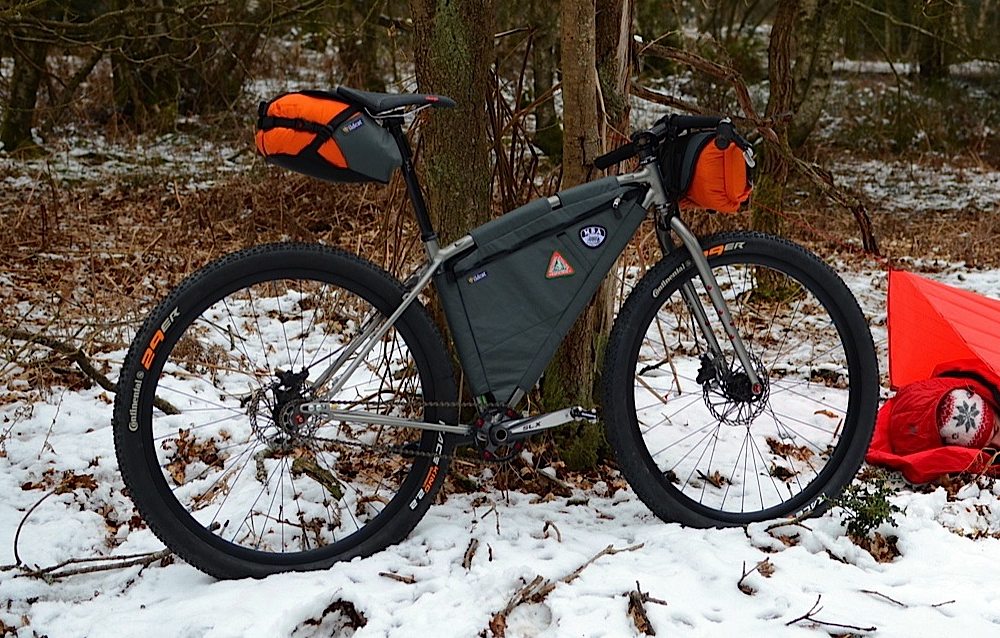
Wildcat Gear (UK)
Based in Wales, Wildcat make some top quality handmade stuff which you can buy in bundles for a reduced price.
Frame Bags // S, M, L, XL, Custom – £65-160
Seat Packs // 5L, 8L – £70-75
Handlebar Harnesses // Two Sizes – £65-75
![Wildcat Gear BikePacking Bags]()
Wildcat Gear BikePacking Bags
USA
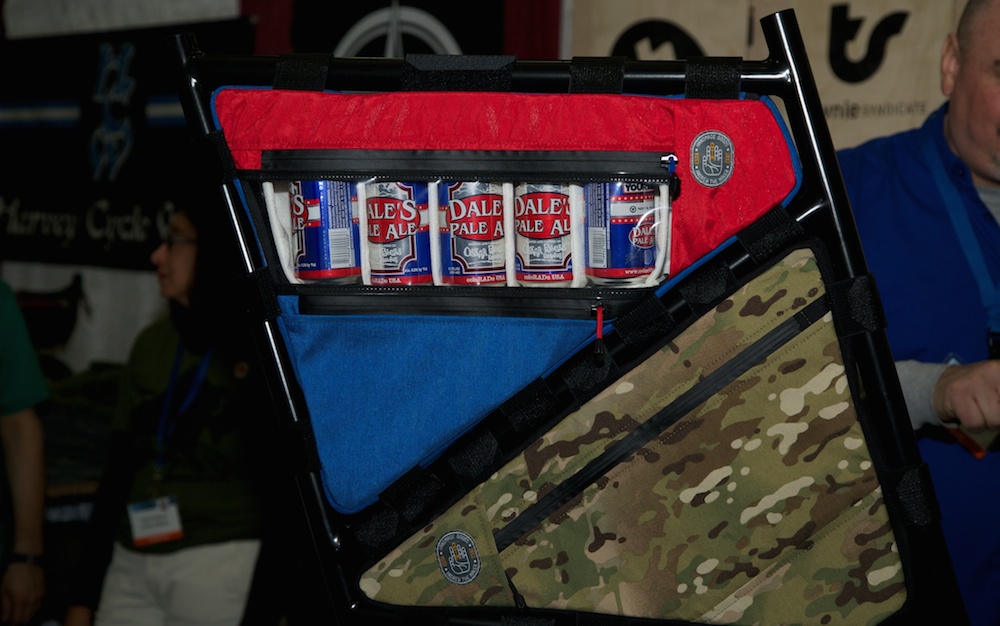
Andrew the Maker (USA)
Andrew makes his custom bikepacking gear in Missouri, USA. The ATM logo is rad to boot! I think the frame bikepacking bag with a beer window says it all really…
Top Tube Bags // Custom – US $65
Frame Bags // Custom – US $160-220
Seat Packs // One Size – US $35
Handlebar Bags // One Size – US $65
![Andrew the Maker Custom Frame Bag]()
Andrew the Maker Custom Frame Bikepacking Bag – Singletrack.com
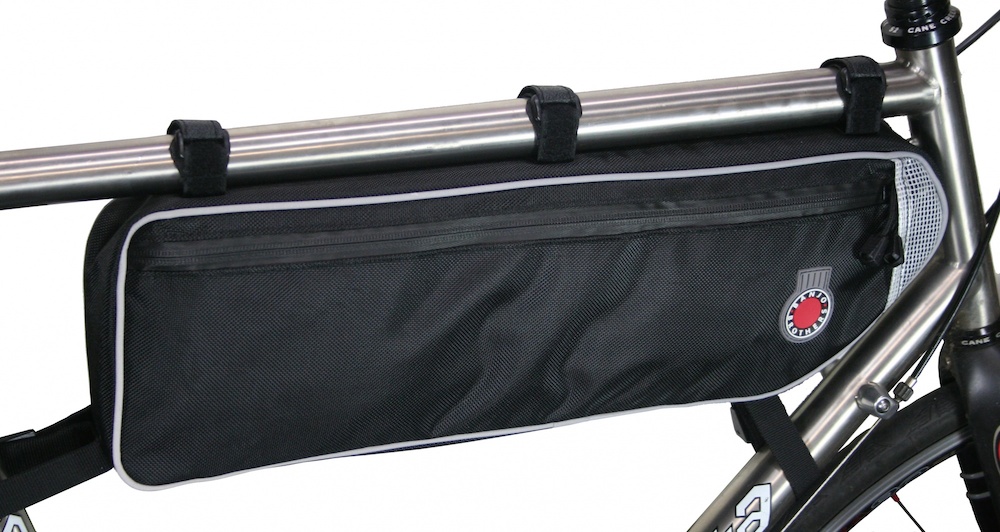
Banjo Brothers (USA)
The Banjo Brothers gear has got to be some of the most affordable out there. The bags aren’t huge, but combine it with other brands and you will have a cost-effective setup.
Top Tube Bags // One Size – US $15
Stem Bags // One Size – US $19
Frame Bags // S, M, L – US $32-40
Seat Packs // 6.5L – US $49
Handlebar Bags // 4.5L – US $29
![Banjo Brothers Frame Bag]()
Banjo Brothers Frame Bikepacking Bag
Becker Gear (USA)
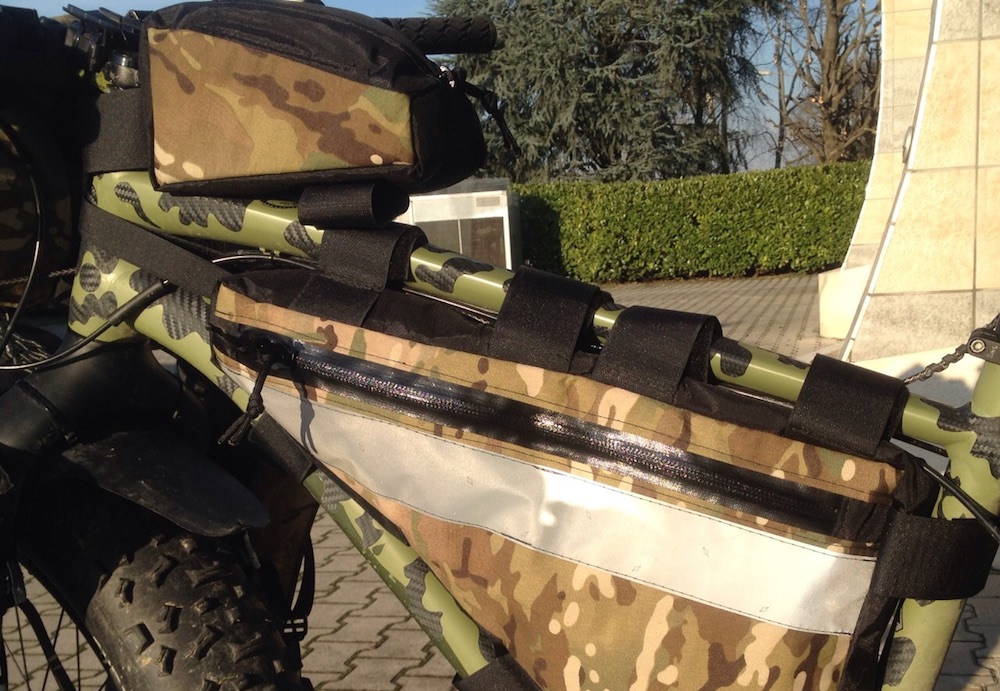
Becker is a custom manufacturer, testing all their gear in Fairbanks, Alaska. What I love most about this gear are the custom colours and designs.
Frame Bags // Custom
Seat Packs // Custom
![Becker Designs Frame Bag]()
Becker Gear Frame Bag
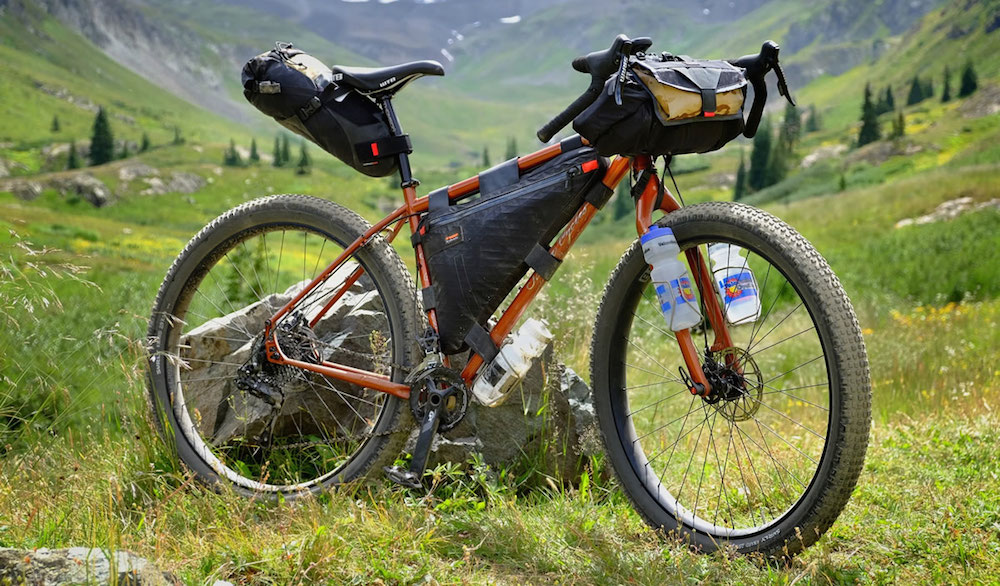
Bedrock Bags (USA)
Bedrock makes their gear out of Colorado, USA. The gear is clearly top-notch, and I really like the ‘railwing’ system which stabilises the seat pack.
Top Tube Bags // One Size – US $65
Stem Bags // One Size – US $49
Frame Bags // Custom – US $160-200
Seat Packs // 12L – US $175-190
Handlebar Bags // Two Sizes – US $150
Blackburn (USA)
Blackburn, who make all kinds of bike accessories, recently brought out a rad range of bags at great prices.
Top Tube Bags // S, L – US $20-45
Frame Bags // S, M – US $59-65
Handlebar Harnesses // One Size (inc. DryBag) – US $99
Seat Packs // 11L – US $119
![Blackburn BikePacking Bags - BikeRumor.com]()
Blackburn BikePacking Bags – BikeRumor.com
Boulder Bikepacking Gear (USA)
Boulder Bikepacking Gear have been making custom bags since 2010. They are also happy to modify bikepacking bags from other manufacturers.
Top Tube Bags // S, M, Custom – US $50-90
Frame Bags // Custom – Start US $75
Handlebar Harnesses // Custom – Start US $70
Seat Packs // 6L, 10L, 12L – US $110-130
![Boulder Bikepacking Bags]()
Boulder Bikepacking Bags
Broad Fork Bags (USA)
Josh entered the Tour Divide with just two weeks before the start. He didn’t have a bike or gear but cobbled it all together just in time. Although Josh didn’t finish his ride due to a sad achilles, he fell in love with bikepacking and now creates mostly custom bags.
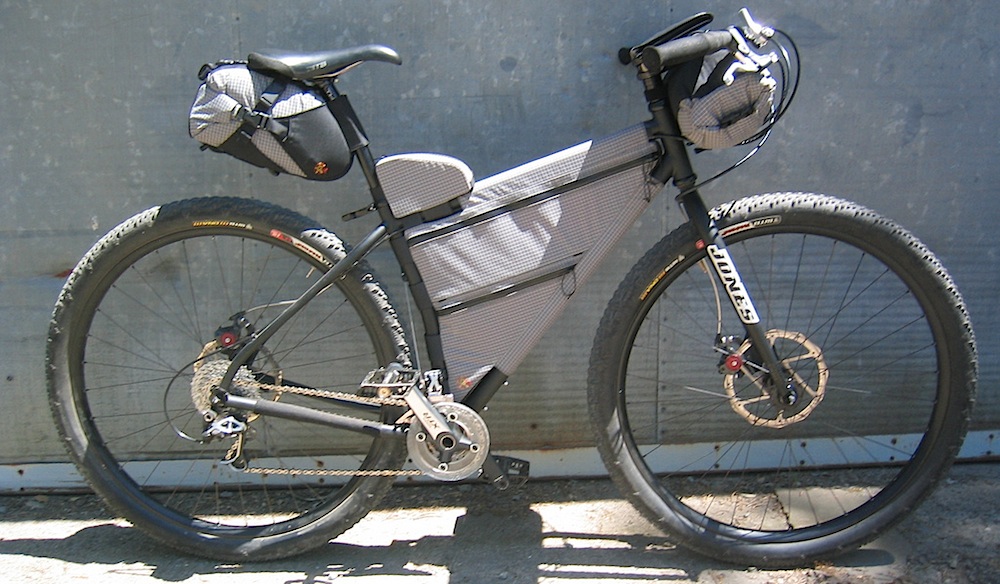
Jones Handlebar Bag // One Size – US $60-70
Top Tube Bags // One Size – US $45
Frame Bags // Custom Two Sizes – US $75-145
![Broad Fork Bags]()
Broad Fork Frame Bag
Carousel Design Works (USA)
Carousel has been making really nice custom bags for about a decade!
Top Tube Bags
Frame Bags
Seat Packs
Handlebar Bags
![Carousel BikePacking Bags]()
Carousel BikePacking Bags
Carsick Designs (USA)
Handlebar Bags // One Size – US $240
Seat Packs // 10L – US $125
Stem Bags // Two Sizes – US $35-40
Fork Bags // 4L – US $45
![bikepacking bag]()
Carsick Designs Bikepacking Bags
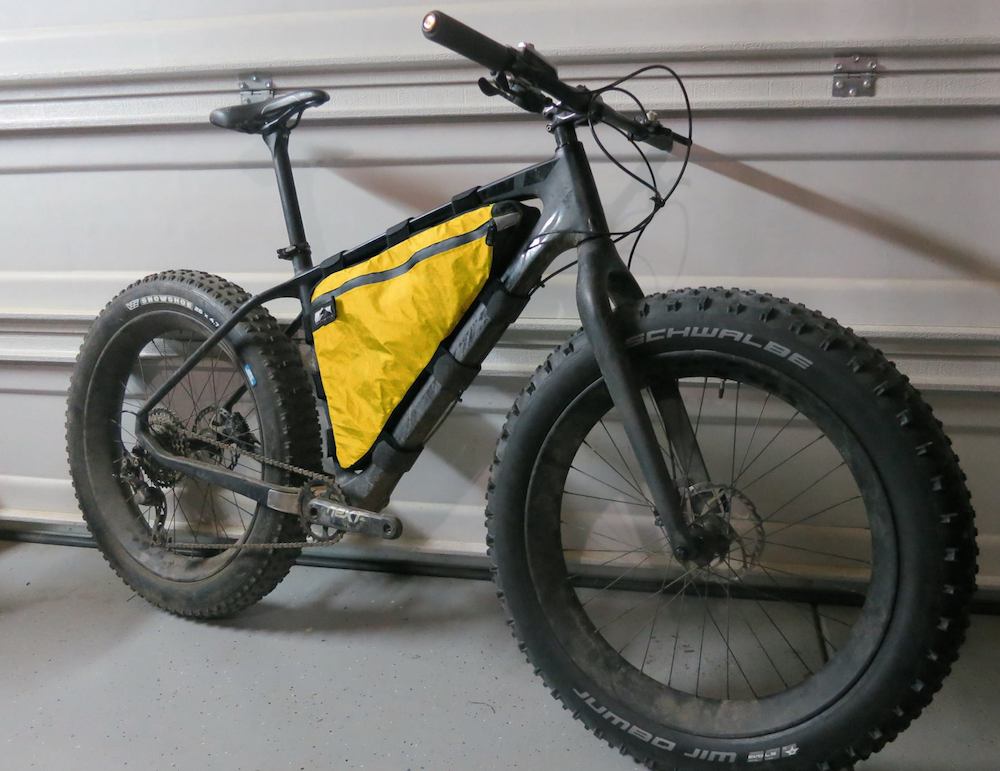
Cedaero (USA)
Frame Bags // Custom Half/Full – from US $149
Seat Packs // One size – from US $119
Top Tube Bags // from US $55
![Cedaero Bikepacking Bags]()
Cedaero Bikepacking Bags.
Cleaveland Mountaineering (USA)
Jeremy makes all kinds of bikepacking bags at pretty decent prices.
Top Tube Bags // One Size – US $40
Frame Bags // Custom – From US $110
Handlebar Harnesses // One Size (inc Pocket) – US $75
![Cleaveland Mountaineering Frame Bag]()
Cleaveland Mountaineering Frame Bag
Crater Packs (USA)
Rich makes his bags out of vinyl or cuben fibre if you care about the grams. They are made in Colorado, USA.
Frame Bags // Custom – US $125-140
Seat Packs // Two Sizes – US $80-120
Handlebar Bags // One Size – US $120
![Crater Packs Frame Bag]()
Crater Packs Frame Bag
Defiant Pack (USA)
Defiant Pack are based in Colorado above a brewery. They’ve been making bikepacking gear since 2014.
Top Tube Bags // One Size – US $43
Stem Bags // One Size – US $34
Frame Bags // Custom – From US $160
Seat Packs // XS, S, M – From US $115
Handlebar Harnesses // One Size (inc. pocket) – US $113
![Defiant Packs Frame Bag]()
Defiant Pack BikePacking Bags
DirtBags (USA)
Frame Bags // Custom Half/Full – US $90-175
Seat Packs // 12 Litres – US $95
Stem Bags // 1.2L – US $40
Top Tube Bags // 1.6L – US $50
![Dirtbags Bikepacking Bags]()
DirtBags Bikepacking Bags
Endless Trails Outdoor Equipment (SWE)
Edvin makes all kinds of waterproof outdoor gear out of Gothenburg, including bikepacking bags!
Handlebar Bags // One Size – US $121
Accessory Bags // One Size – US $62
Frame Bags // Custom – US $167
Seat Packs // One Size – US $122
Stem Bags // Two Sizes – US $50-72
Downtube Bags // One Size – US $44
![bikepacking bag]()
Endless Trails Bikepacking Bags
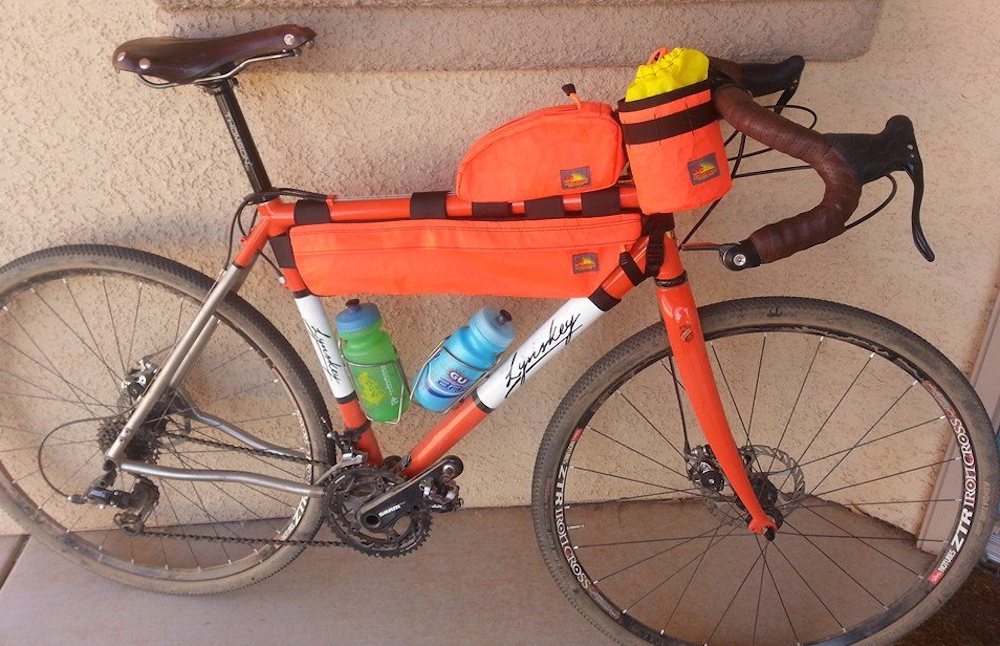
eoGEAR (USA)
Seat Packs // 6.8L, 8.2L, 12L – US $63-119
Top Tube Bags // 1.1L – US $26-39
![EOGear Bikepacking Bags]()
EOGear Bikepacking Bags.
Fun Bags (USA)
Since 2011, Fun Bags have been putting together custom bikepacking kits for riders. They believe that their knowledge for bag making should be shared, so they have information on their site for how to DIY too.
Seat Packs // One Size – US $100
Handlebar Bags // Two Sizes – US $80-90
Frame Bags // Custom – US $110-165
Top Tube Bags // One Size – US $45
![bikepacking bag]()
Fun Bags Bikepacking Bags
Green Guru (USA)
Holy colours! Green Guru use factory scraps to construct their bikepacking bag range.
Seat Packs // 7L – US $100
Frame Bags // 7L – US $40
![bikepacking bag]()
Green Guru Bikepacking Bags
Gryphon Workshop (USA)
Gryphon Workshop mostly specialises in making kilts, but they’re now doing some really nice frame bags and panniers.
Frame Bags // Custom
![Gryphon Workshop Frame Bag]()
Gryphon Workshop Frame Bag
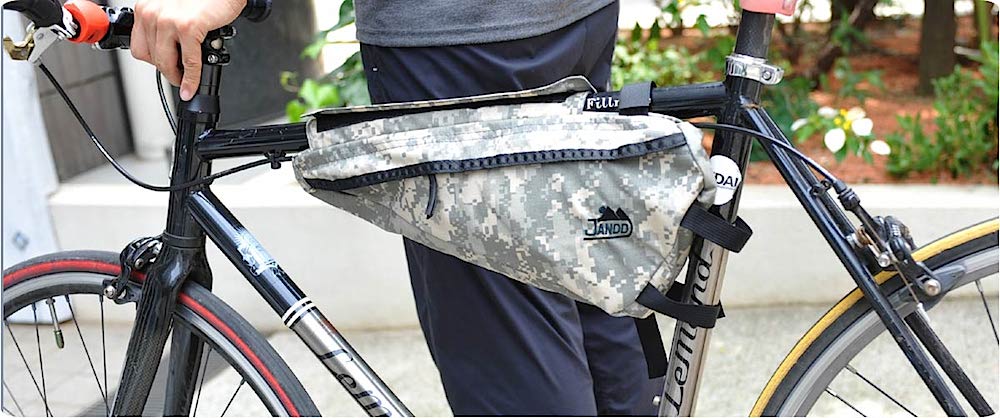
Jandd (USA)
Jandd makes super affordable accessory bags which can be used in conjunction with other larger bags on this list.
Top Tube Bags // Five Sizes – US $19-29
Frame Bags // Four Sizes – US $42-49
![Jandd Frame Bag]()
Jandd Frame Bag
J.Paks (USA)
The JPaks stuff looks really nice. They clearly use really high-quality materials for all their bikepacking gear.
Top Tube Bags // Two Sizes – From US $60
Stem Bags // One Size – From US $50
Frame Bags // Custom – From US $150
Seat Packs // 5L, 14L – From US $110
Handlebar Bags // One Size – US $180
![J Paks BikePacking Bags]()
J Paks BikePacking Bags
Lezyne (USA)
Handlebar Bags // 7L – US $49
Seat Packs // 7.5L – US $69
Stem Bags // 1.3L – US $26
Top Tube Bags // 0.8-1.2L – US $25-29
![Lezyne Bikepacking Bags]()
Lezyne Bikepacking Bags.
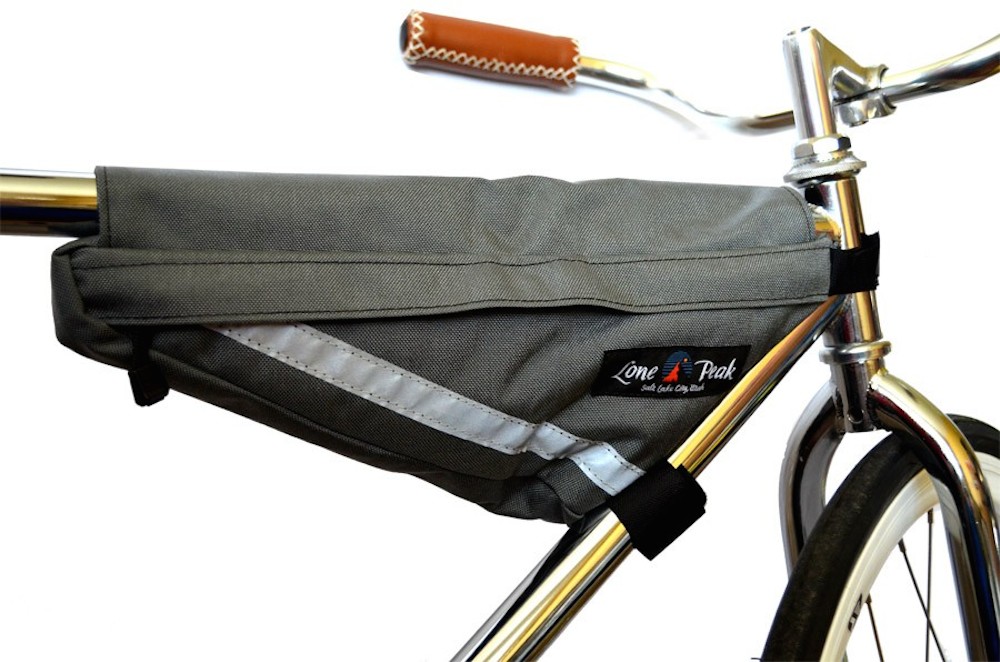
Lone Peak Packs (USA)
The Lone Peak gear is mostly cost-effective accessory bags to use in combination with other bikepacking options.
Top Tube Bags // Two Sizes – US $25-35
Frame Bags // Three Sizes – US $37-79
![Lone Peak Packs Frame Bag]()
Lone Peak Packs Frame Bag
No Logo Bikepacking (USA)
No Logo is a small-scale custom manufacturer making quality bikepacking products.
Top Tube Bags // One Size
Stem Bags // One Size
Frame Bags // S, M, L, Custom
Handlebar Harnesses // One Size
![No Logo BikePacking Bags]()
No Logo BikePacking Bags
Nuclear Sunrise Stitchworks (USA)
Nuclear Sunrise make lots of great looking bikepacking bags. A full matching set looks the business.
Top Tube Bags // Two Sizes – US $40-50
Stem Bags // One Size – US $35
Frame Bags // Custom
Seat Packs // Two Sizes – US $145-155
Handlebar Harnesses // One Size – US $95
![Nuclear Sunrise Stitchworks BikePacking Bags]()
Nuclear Sunrise Stitchworks BikePacking Bags
Oveja Negra (USA)
One of the more popular brands, Oveja Negra is high quality and has a good reputation for a reason.
Top Tube Bags // Two Sizes – US $45-50
Frame Bags // S, L, Custom – US $75-200
Seat Packs // 10L, 20L – US $120-125
Handlebar Harnesses // One Size – US $50
![Oveja Negra BikePacking Bags]()
Oveja Negra BikePacking Bags
Outer Shell Adventure (USA)
Top Tube Bags // Two Sizes – US $38-55
Stem Bags // 1L – US $55
Frame Bags // Three Sizes – US $80-90
Seat Packs // 10.5L, 16L – US $160-165
Handlebar Harnesses // 5L, 10L – US $40 + $25-35 (drybag)
![bikepacking bags]()
Outer Shell Adventure Bikepacking Bags
Portland Design Works (USA)
Seat Pack Rack // 14L – US $88
Handlebar Harness // 12L – US $99
![bikepacking bags]()
PDW bikepacking bags.
Revelate (USA)
Revelate is one of the most widely recognised bikepacking brands; you’ll find their gear in shops all around the world. The updated Terrapin dry seat packs look really nice!
Top Tube Bags // Two Sizes – US $38-55
Stem Bags // One Size – US $39
Frame Bags // Three Sizes – US $90-165
Seat Packs // 12L, 14L – US $90-125
Handlebar Harnesses // One Size – US $75
![Revelate BikePacking Bags]()
Revelate BikePacking Bags
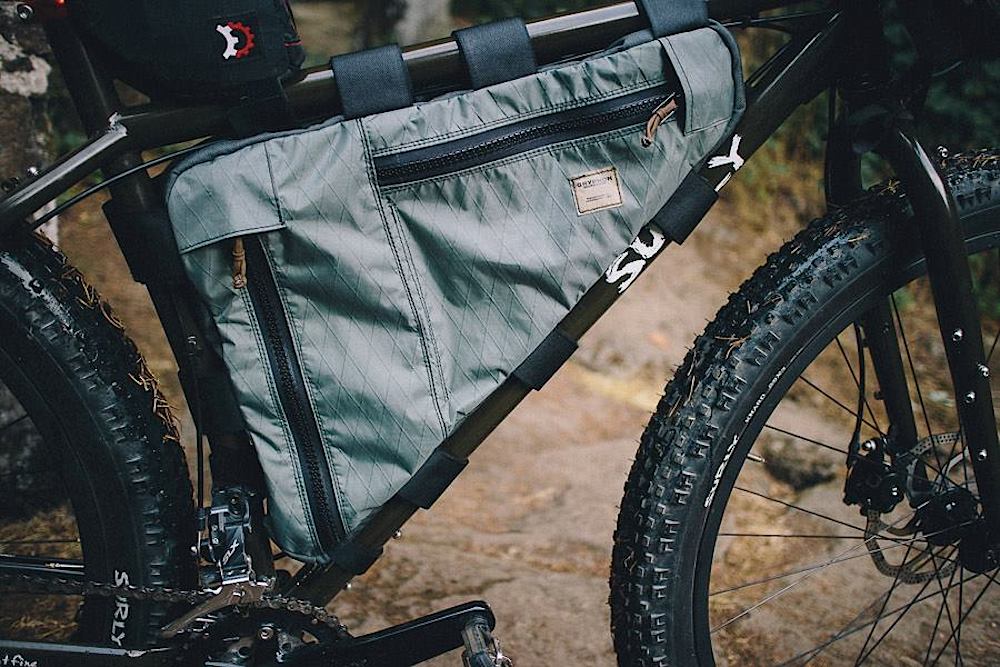
Rockgeist (USA)
Custom bags out of the USA. Their gear looks pretty top notch.
Top Tube Bags // One Size – US $48
Stem Bags // One Size – US $48
Frame Bags // Custom – From US $100
Dropper Post Seat Packs // 10L – US $85
Handlebar Harnesses // One Size – US $66
![rockgeist bikepacking bags]()
Rockgeist Bikepacking Bags.
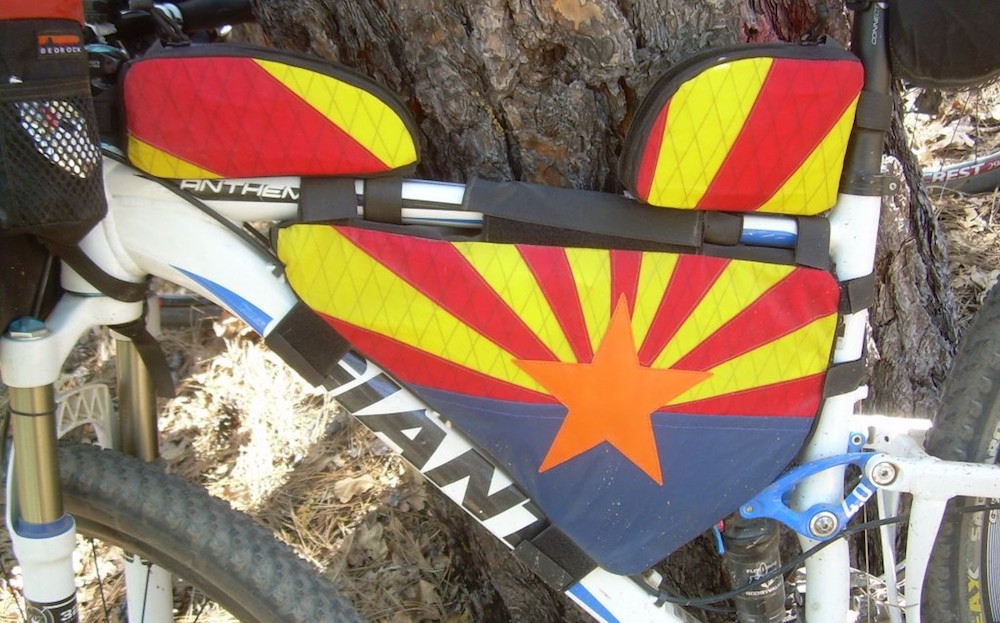
Rogue Panda Designs (USA)
Started in 2014, Rogue Panda makes bikepacking bags out of Arizona, USA. Their bags are almost always custom made to fit your bike and Nick can even do amazing patterns like the Arizona flag below!
Top Tube Bags // One Size – US $40
Down Tube Bags // One Size – US $40
Stem Bags // One Size – US $40
Frame Bags // Custom – US $75-140
Seat Packs // 13L – US $105
Handlebar Bag // 10L, 14L, 18L – US $80
![Rogue Panda Designs Frame Bag]()
Rogue Panda Designs Frame Bikepacking Bag
Salsa (USA)
Adventure bike brand Salsa has just dropped an awesome looking EXP bikepacking bag range. I especially like the handlebar cradle which creates a handy gap from your bars.
Handlebar Bags // One Size – US $99
Accessory Bags // One Size – US $50
Frame Bags // Multiple Sizes – US $119
Seat Packs // One Size – US $119
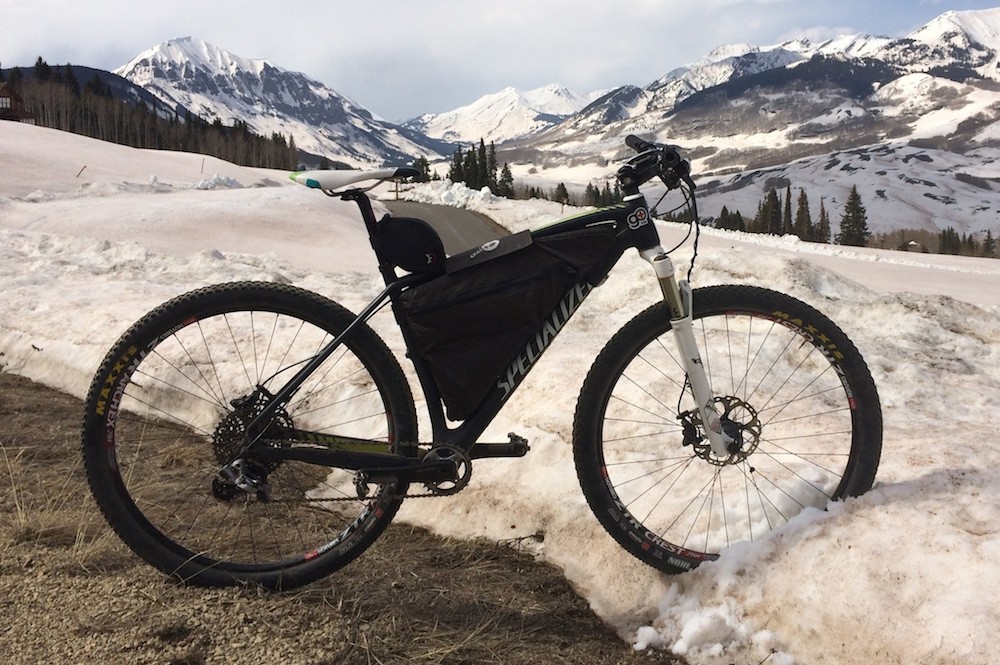
Specialized (USA)
Another big bike brand making bikepacking bags for their adventure bikes. The Burra Burra range is all waterproof and has some innovative features like a seatpost mount to stop the seat pack swaying.
Seat Packs // 8, 10.5L – US $130-140
Frame Bags // 3, 5, 8L – US $90-110
Handlebar Bags // 13, 23L – US $130-135
Top Tube Bags // 0.75L – US $50
Fork Bags // 1L – US $40
![bikepacking bag]()
Specialized Burra Burra Bikepacking Bags
Switchback Bike Bags (USA)
Switchback make their custom gear out of Colorado, USA. It looks to be great quality.
Top Tube Bags // Custom – From US $40
Frame Bags // Custom – From US $99
Seat Packs // 12L – From US $109
Handlebar Harnesses // One Size – US $99
![Switchback Frame Bag]()
Switchback Frame Bag
Timbuk2 (USA)
Frame Bags // US $69
Seat Packs // US $79
Top Tube Bags // US $35
![Timbuk2 Bikepacking Bags]()
Timbuk2 Bikepacking Bags.
Topeak (USA)
Component manufacturer Topeak has just released a bikepacking bag range which is not all that surprising given their long history with bike bags.
Seat Packs // 6, 10L
Frame Bags // 3, 4.5L
Handlebar Bags // 8L
Accessory Bags // 3L
Top Tube Bags // 0.75L
![bikepacking bag]()
Topeak Bikepacking Bags
Vagabond Bicycle Bags (USA)
Vagabond make all their gear in the USA and use the motto, “make any bike, an adventure bike”. They offer a lifetime warranty on their gear.
Frame Bags // One Size
Seat Packs // One Size
Handlebar Bags // One Size
![Vagabond BikePacking Bags]()
Vagabond BikePacking Bags
Wanderlust (USA)
Made in Virginia, USA, Wanderlust have a neat range of bikepacking gear.
Stem Bags // One Size – US $40
Frame Bags // Custom – From US $125
Seat Packs // 12L – US $140
Handlebar Bag // One Size – US $135
![Wanderlust BikePacking Bags]()
Wanderlust BikePacking Bags
Bikepacking Bag Manufacturers with Limited Details
Barking Bear Bag Works (USA)
Lone Mountain Innovations (USA)
The post A Complete List of Bikepacking Bag and Frame Bag Manufacturers with Prices appeared first on CyclingAbout.